**Quick Update: I’ve recently been contacted by someone who has installed the same recycled ‘moonlight’ mosaic tile as us (the tile that’s in our shower nook) and is just TWO sheets short of finishing her backsplash! The tile is now discontinued, so if you happen to know of someone with extra – it’s a long shot – but it would be awesome to help her out ;). Email me at: morgan at pepperdesignblog dot com.**
We’re on to flooring over here in the new bathroom. Most of the floors throughout the house are the original wood floors, one room is carpeted (read why here) and the kitchen is tiled because it was previously a bedroom and closet (before it was a den) making for some unusual wood flour patterns. Man I love the look of original wood floors! But since that’s generally a no-no for a bathroom, we checked out plenty of different tiling options.
But that $70 bathroom update that is the BEST EVER? It’s this little guy:
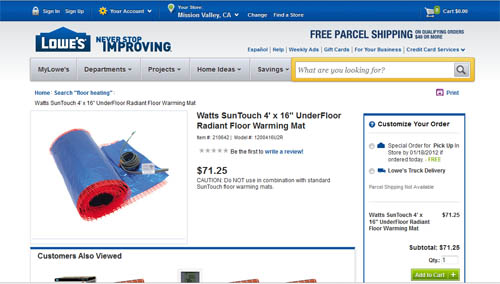
Such a great price for a tootsie toaster that is under the tile in the entire bathroom. This radiant floor mat is installed under the tile and our layer of subfloor and when turned on heats up your toes after getting out of the shower or in the cold early mornings. I’ve seen this in newer construction and have always oooed and ahhhed at the feature while secretly thinking it must have cost a fortune, but really it’s totally attainable for anyone who’s remodeling their bathroom. I cannot wait to test it out. Who knows, during the winter I might move my office and make myself comfortable on the floor of the bathroom.
But back to the tile.
It’s important to us that this 1930s home isn’t crazily remade into a modern should-have-been-built-in-the-year-2012 home. We love the original architecture found throughout the space and we’ve always had the goal in mind of paying homage to the year it was built while updating it to meet modern needs. We tried to do the same for the kitchen by using warm woods, oil rubbed bronze details and subway tiles (albeit modern glass ones). So when it came to tiling the bath my first choice was a beautiful older hexagon floor tile like this. How stunning! and that look and feel has and will survive the decades. Option two for me was to bring some continuity to our flooring situation (by not adding a fourth style of flooring into the house) by using the same dark slate tile as the kitchen.
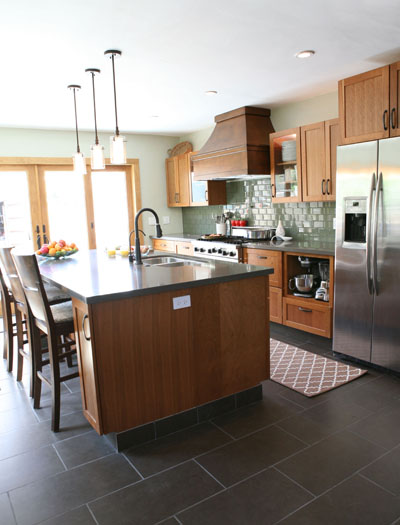
Kevin loved the kitchen floor tiles and the dark grey grout (talk about easy to clean – white grout on the floor is a wee bit trickier) so we went with it. To break it up a bit though, and to create a newly defined space, we ordered tiles in 12×12″ squares rather than the 12×24″ panels that are in the kitchen.
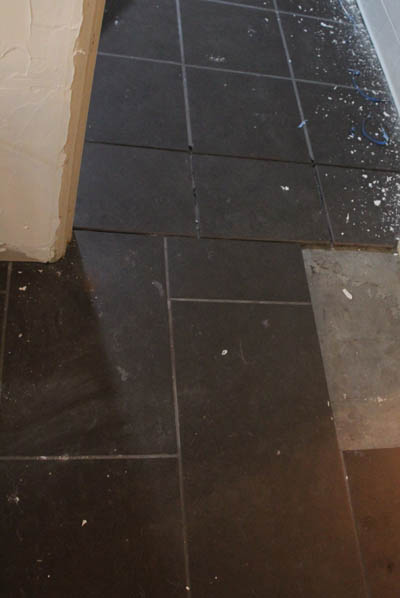
You can see the break here (despite some of the missing grout and a tile that’s waiting for its cut):
The grey tiles below represent that dark slate that we were debating on with our initial color plan for the whole bath:
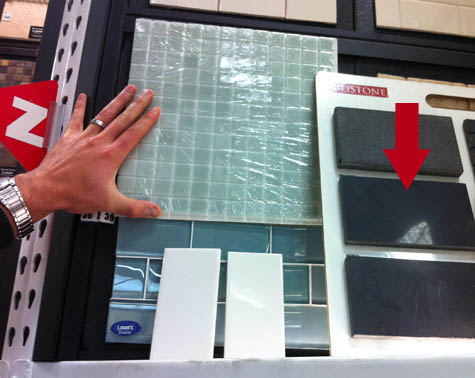
We were still debating option 1 & 2 at that point, but liked that the kitchen tiles worked well with the color palette. Now that the flooring is more modern, I’ll really have to work hard at finding other ways to incorporate those older, original-to-the-home accents.
The first step in tiling the new floor was establishing a pattern.
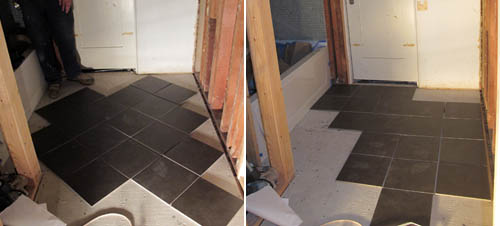
You can tell from one of the previous pictures above that we chose the second option or the square pattern (the real name is Jack on Jack pattern – who remembers that?). That diamond or ‘point’ pattern would have been great, you couldn’t have gone wrong, but I was leaning towards the latter. (Side note: we also tried the square version in the brick pattern (Running Bond pattern) we used in the kitchen but that was the first option to go). I wanted to keep it simple, simple, simple.
And so the tiling began (here are a few tips from the pros over at Lowe’s to reference too).
On top of the original wood floors a layer of hardibacker subflooring was drilled in (if you’re remodeling a bathroom it’s essential that you remove all original tile and really take care to focus on the subfloor – a tiled bathroom is only as good as your original floor and could create for later issues or an unlevel surface). Next our amazing electrical toe warmer was unrolled and installed. (Very sad I don’t have pictures of this but that’s how quickly it took Kev and his two buddies to install. Minutes.) The one picture I do have is of the electrical to the new radiant heating mats, our electrician tied it into the circuit when he installed all wiring.
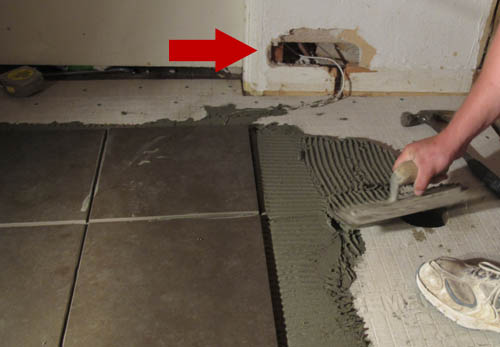
On top of that went the tile.
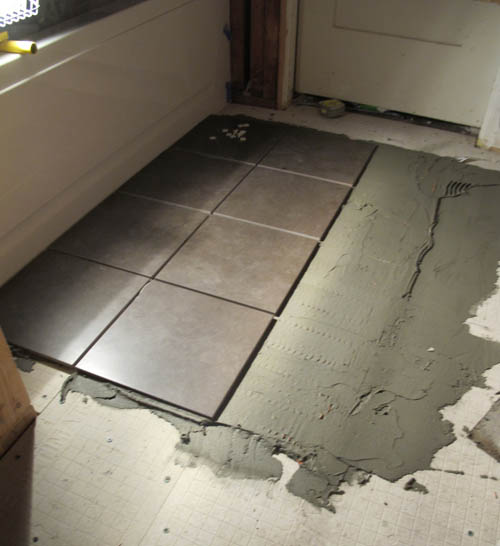
The tiles were installed from the center out in this fashion: adhesive, notch end of trowel to create divets, add tile. Using the first tile as a guide, the rest of the tiles were lined up directly off of it.
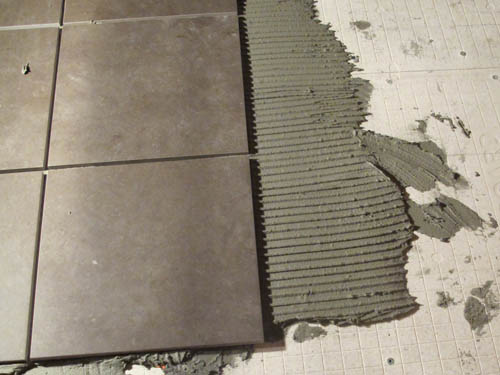
Spacers can really help to create perfectly even grout lines.
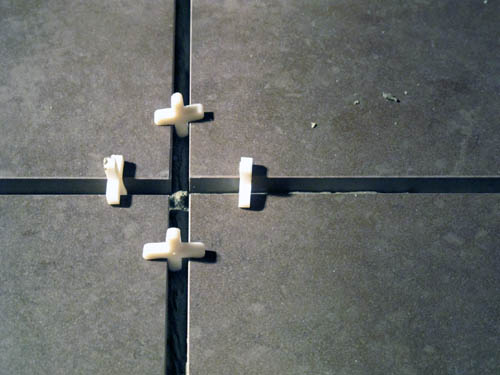
If you’re working on a tile project at home and use spacers, be sure to remove those puppies before the adhesive you’re using (check tile directions) sets, usually between 20-30 minutes. That’s your time period for cleaning up adhesive that has smooshed it’s way out between or on top of the tiles too. Remember that this is just the adhesive step and not the grout.
It’s a bit repetitive but soon you’re well on your way to having installed all full tile pieces.
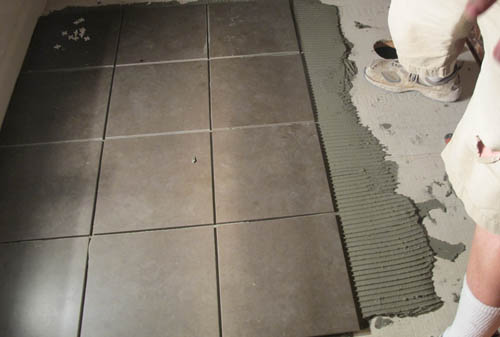
For those trickier edge pieces, we used a wet saw (a tile saw that helps to smoothly cut tiles by keeping a steady stream of water pouring over the tile while it’s under the blade). Kev and a friend went in on the cost of a tile saw years back and this puppy has seen plenty of use.
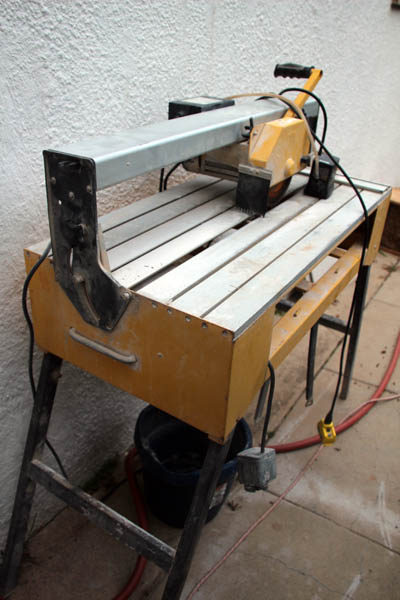
Definitely a smart investment for us.
I’m seriously breaking the blogging cardinal rule on this one for not having a proper ‘after’ photo but my after pictures of the newly tiled bathroom are too dark (I blame it on the midnight tiling and me forgetting to take photos in the morning :() but you’ll be able to see that finished floor soon after our tiled subway walls are complete!
More building a bathroom posts: a quick catch-up on our work on the bathroom in 2011, tiling with recycled glass, choosing and installing a bathtub, demo time!, a peak at the layout, initial inspiration, partnering with Lowe’s
We partnered with Lowe’s on our bathroom remodel and received some product at no cost and some product at a discount. The ideas and stories shared in this post are entirely our own.


What kind of wood are your kitchen cabinets? They look really sharp with the 12×24 grey tile. I’m trying to get a similar look.
Thank you, Katie! The cabinets are made out of maple.
I wanted to know where you got the bathroom tile and the name of it. I love the way it looks and I am looking to redo my bathroom.
Hi Jessica, the white subway or the moonstone in the shower? Both are from Lowe’s but I believe the moonstone is discontinued :(. The white subway tile is something that they keep in stock all of the time!
what color grout did you use in the kitchen
Oooh I have to double triple check but it’s a dark putty – almost grey. I will see if I can find an original bag…
the start of it looks great- beautiful tile!
Great job on your post.Pictures are excellent and
very informative.I am a retired tile setter.I am happy to see you have a wet saw.A must for a good tile job.Keep up the good work
Shoot- wish I had known how easy the heated floor mat was before we retiled our bath! Looks great, can’t wait to see the “after.” :)
so jealous of the heated floor! that will be so nice!
Mmm, heated floor in the bathroom is the ultimate luxury! That is awesome.
A tile saw is one thing I definately wished I had had during the major tiling project downstairs at my place. Maybe it will be a good investment for when we get to the bathroom. Can’t wait to see the after!