So the sun has been shining with full force and the weather has been warm! and then just like that the switch was flipped and this morning we have grey skies here in San Diego. Oh funny weather…
A way while back I had mentioned finishing up a couple of sewing projects that involved zippers, one being new throw pillows for the living room. And these aren’t just any zippers, they’re the infamous invisible zippers! I accidentally purchased a ton of these for a few new projects around the house, and then realizing my mistake (and being a bit stubborn) I set out to tackle the invisible zipper rather than return for the regular version.
You’ll find invisible zippers on most store bought cushions and pieces of clothing, they’re great because when applied correctly, the zipper literally disappears within your fabric.
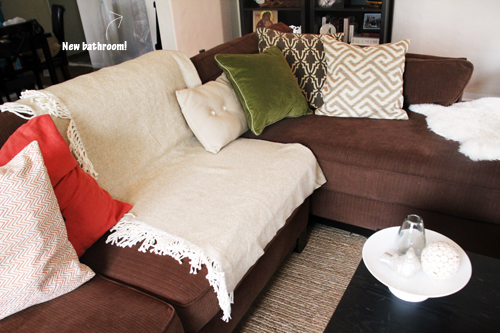
The new bathroom project is hiding there in the background. We’ve had to pause that guy temporarily while we wait on permits and Kevin works on summer school.
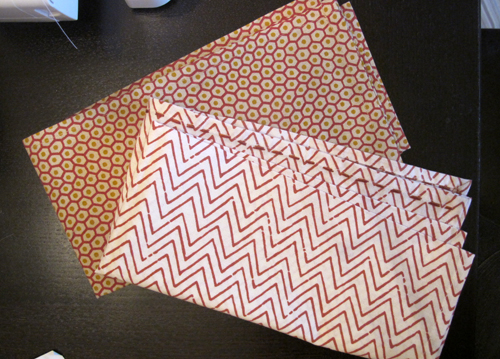
I found a few clearance napkins at West Elm that fit with my color scheme and I knew they’d be perfect for the project at just $4 a pop. That plus left over fabric from my favorite nursery glider makeover (that awesome tan ikat) left me with three new pillows that were quick and easy to sew up.
I researched a few slipcover pillow ideas but settled on adding a zipper because I knew that I wanted these pillows to really stand the test of time. Plus, I was dying to experiment with zippers, something I haven’t tried in ages. The first pillow was a challenge (think twisted, inside out fabric and thread), but as soon as I had the ‘invisible zipper’ down, the other two were easy peasy. It looks difficult, but I promise that if you go that extra step to hide your zippers, you’ll love the results.
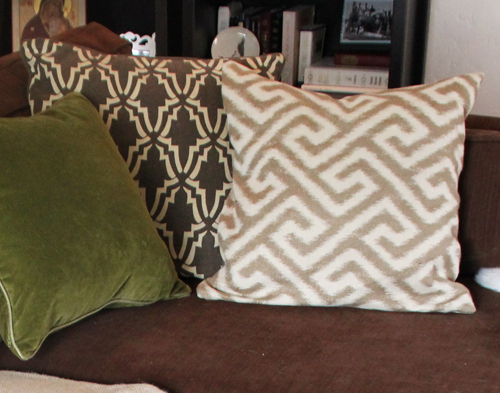
For stuffing, I usually cover up an existing throw pillow. You can also purchase bags of filler at your local fabric shop for a few dollars. If you go that route, I recommend making an insert for your pillow as well so that you’re not constantly fighting clumps and wisps of filler material as you zip and unzip your covers.
***************************************************************************************************
Sewing Throw Pillows with an Invisible Zipper
a
Materials: 2 19×19″ squares of fabric for one 18″ pillow OR a set of cloth napkins, an invisible zipper (two inches shorter than one side of your pillow, though you can always shorten a longer zipper by sewing across the zipper, too), zipper footer for your sewing machine, complimenting thread, threaded bobbin, pins, scissors, pillow stuffing/inserts
1. To sew an 18″ pillow, cut your fabric into two 19×19″ pieces. This should allow a 1/2 hem on all edges. Remove one set tags if you’re using a napkin – I like to keep one set hidden inside with washing instructions for the future. Baby + dog + dinner parties = definite spots :). Cloth napkins are great because they’re already hemmed and provide a clean finish on the underside of your new pillows. Plus, they’re the perfect size!
2. Pin the fabric/napkins together at the corners with the top sides facing each other (we’re going to do this first step with the pillows inside out).
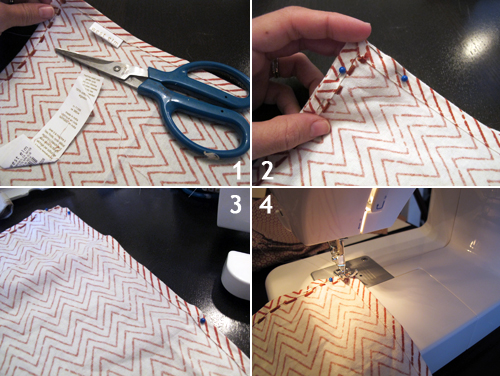
3. Add a pin roughly half way between each corner.
4. Sew three sides of your pillow together, leaving just the edge for your invisible zipper open.
5. Now comes the tricky part. The easiest way to add your invisible zipper is to pin it in place as you imagine it functioning. Go ahead and pin your zipper in a couple of inches from the edge so that you leave yourself a little working space. We’ll close that up at the end.
6. Then flip your pillow right side out and try it. If the zipper opens and closes correctly without twisting any fabric, great job – you nailed it on the first try. It took me a couple of times of pinning, flipping, repinning to get this just right. Note: if you’d like, you can iron your invisible zipper flat before pinning to help you get as close of a stitch to the zipper part as possible.
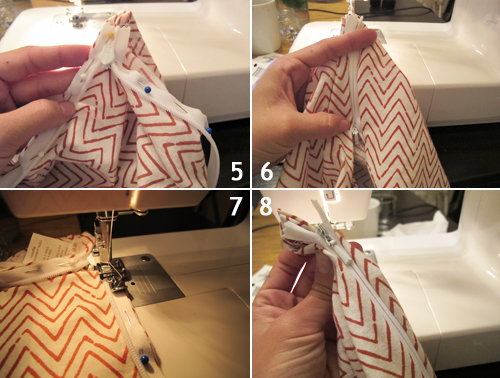
7. Add your zipper foot to the sewing machine. It usually comes with your machine in that little parts bag below the main compartment, but you can also pick a plastic one up from the store for a few dollars. Sew your zipper edges to the fabric running that little zipper foot right up against your zipper.
8. If you flip your pillow inside out now, you’ll notice that your zipper closes (yay!) and that your fabric edges are hidden.
9. This picture illustrates the end of the zipper which has been left open – that’s the extra ‘working space’ we left from step 5.
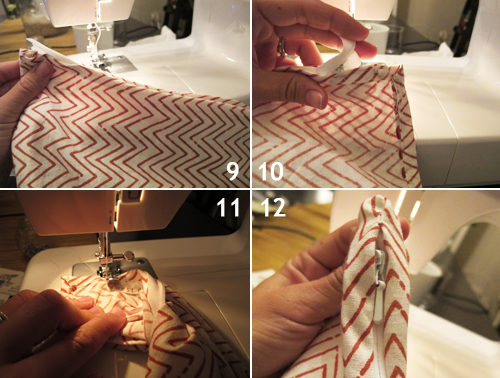
10. Lifting the zipper out of the way, pin together the two loose ends of the pillow.
11. Now sew the two pinned pieces together, don’t forget to repeat on the other side (don’t worry about the loose zipper portion, it’s hidden inside your pillow).
12. Flip the entire pillow inside out and you should have a clean, finished end and an invisible zipper!
Stuff your insert in your cover and your throw pillow is done!
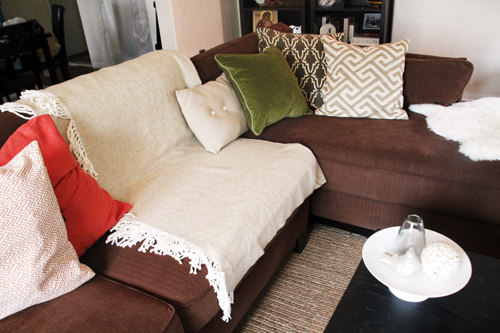
Love how the new pillows look, the added patterns were just what the space needed.


I just got a new sewing machine, but I can’t imagine I’ll be making pillows…..yet! Someday I may certainly give it a try as yours look fantastic!
You are so talented!
I’ve seen a few people make cushions out of napkins but I have to say I’ve never seen any pretty ones like you find in the States! Love that apple green cushion too.
Love the idea of using cloth napkins for this!