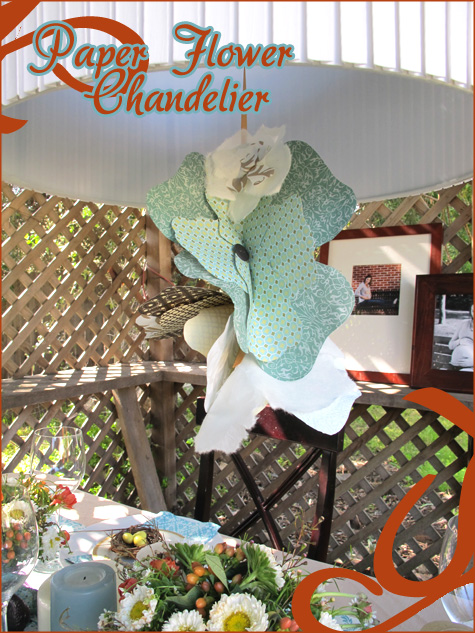
One of my favorite diy projects for this shower (Part 1 & Part 2) included handmade flowers and a big white chandelier to hang over the main table. Each flower was easy to assemble and when scattered about the table, dessert buffet or attached to long, gold ribbon they gave a vintage, rustic vibe.
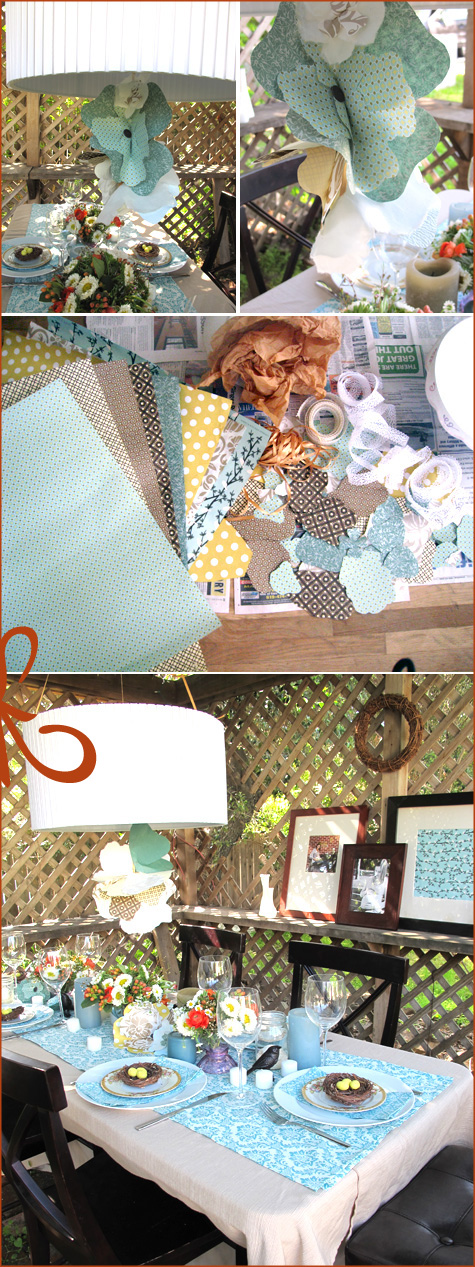
The chandelier was a collage of handmade flowers hanging just below and inside the large white lampshade (a thrift store find at just $1) in place of a light bulb. I used the same gold ribbon to balance the shade above the table and also to hang the flower cluster from the inside of the chandelier.
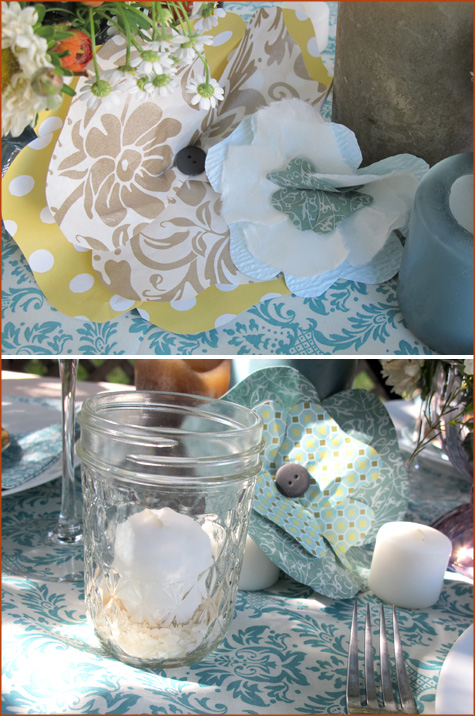
In addition to hanging the flowers from up above, small clusters were grouped on the tables and elsewhere around the party.
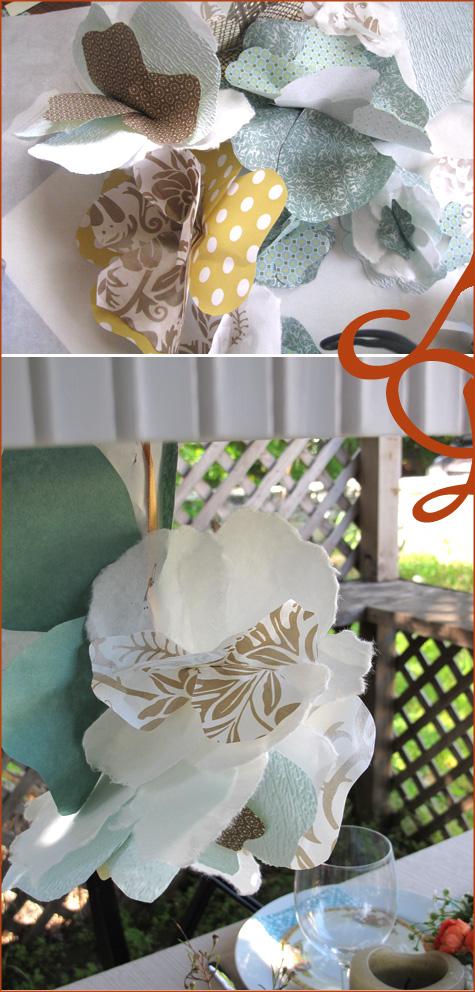
Making the flowers was simple. I collected specialty paper from stores such as Paper Source, Michaels and even my local Artists & Craftsman. I especially love the large rolls of handmade paper for their texture and variety.
For complete diy instructions and more step-by-step pictures, follow the jump.
{DIY Project: Handmade Paper Flowers}
b
Materials: large sheets of specialty paper, scissors, stapler, buttons in assorted sizes, glue.
Steps correspond with numbered pictures.
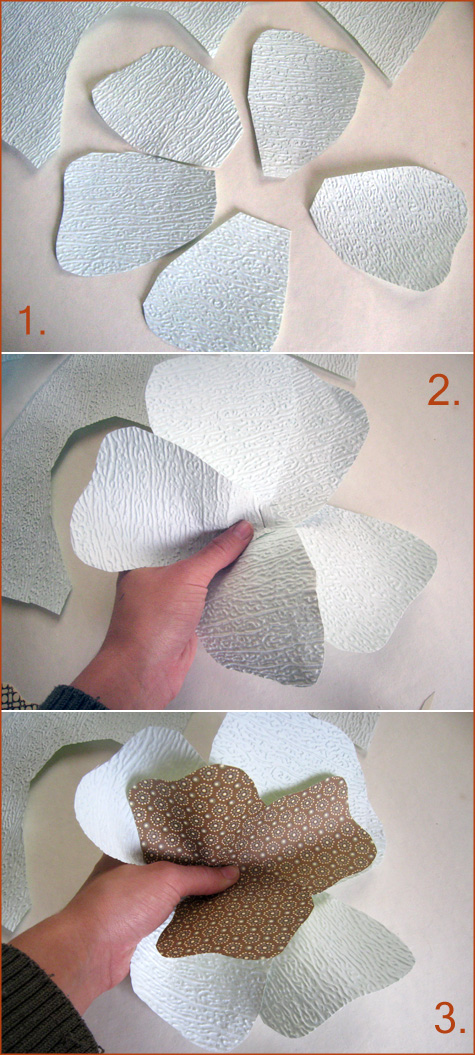
{1.} Cut wavy petals out of the paper, each flower should get two to three sets of four or five petals in the same pattern for a layered effect. Petals can be cut individually, in pairs or with the entire flower still connected – it’s a rustic, vintage look so feel free to play with the shapes and sizes. I especially love the look of the very fibrous, handmade papers that could easily be torn and pulled apart.
{2.} Center the first layer of petals with a single staple.
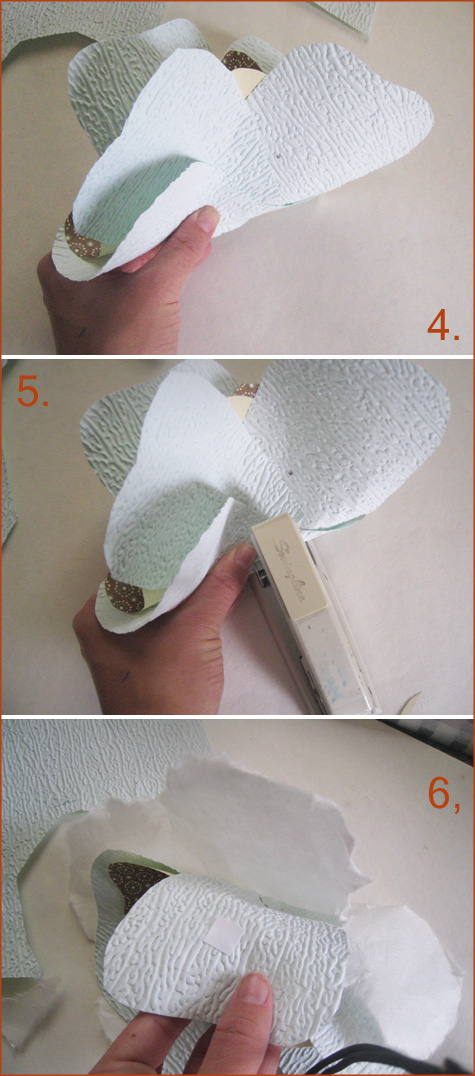
{3-4.} Add a second and third layer of petals, fold flower in half and flip over.
{5.} Staple center together, flip back over and form petals by folding and bending the flower back open.
{6.} If necessary add double-sided tape or scrapbooking tape to inside of flower petals to help form and hold them in place.
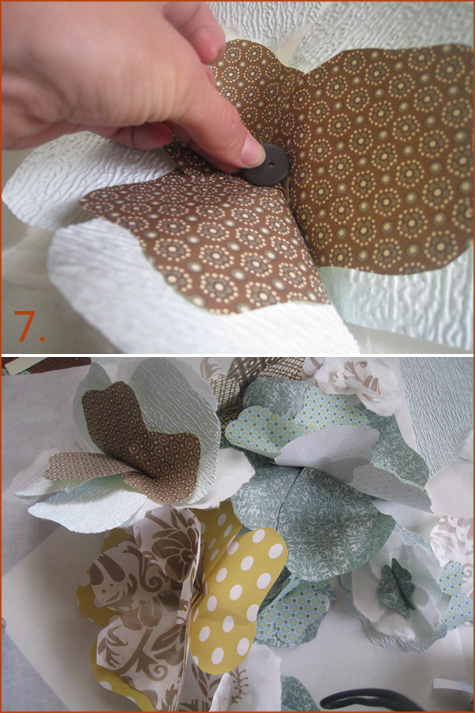
{7.} Glue button to center of flower.
Cluster together and hang from ribbon from ceilings, door frames, windows, lamps, fireplace mantles and curtain rods. Scatter flowers in smaller clumps around tables, buffets and serving dishes. Attach to picture frames, cork boards and everywhere in between for a beautiful, simple decoration.


It’s looking gorgeous………
Thanks for sharing this nice tutorial on how to make paper flowers.
Oops. Meant to leave you the link too!
http://singingthreelittlebirds.blogspot.com/2010/05/flower-week-begins-may-24th.html
This is beautiful! I am hosting Flower Week on my blog and would love for you to stop by!
Gorgeous shower! Love the paper flowers too!
I love the texture of all the papers nestled together. Looks really cool and different. Nicely done!
Thank you everyone, and thank you for the pingbacks & links! I’m thrilled you guys like the project :).
~Morgan
That is so pretty! How perfect for parties and weddings. Thanks so much, I’ll be linking.
these are so awesome… Gonna use them for my DD summer b’day party!!!!
Cute!! Ya I used the pom poms for my daughters bday and now i’m kind of sick of them. I see them everywhere!
I have my twins bday soon and these would be adorable for it, thanks!!
I agree on the pom poms – it’s fun to mix it up a bit every once in a while :).
I love this! I’m getting a little tired of tissue paper pom poms :) This is a GREAT alternative
Cute! I love how you can use so many papers with it too!
Kim @ http://frostmeblog.blogspot.com
party inspiration