A Little of This & That… Renovating, Decorating, DIY Projects & Family

Liv’s Play Kitchen: Finished!

Remember back here when I decided to build Liv a little kitchen for Christmas (and shared all of the inspiration for my favorites)? Well five months later and…. it’s finished!!

It’s been one of those projects where I’ve sllloooowwwlly added and added to it over the months. It probably should have been considered finished in January when my Dad and I designed and assembled all of the little pieces (and when we revealed it for her birthday rather than at Christmas time). But then I added a faucet in February, baking racks and an oven light in March, redid the stove range and added a backsplash in April… and it slowly evolved into an obsession. I have to stop. So as of today, I’m marking it done and done!

Liv's Little Kitchen | PepperDesignBlog.com

Liv's Little Kitchen | PepperDesignBlog.com

Liv's Little Kitchen | PepperDesignBlog.com

Liv's Little Kitchen | PepperDesignBlog.com

I’ll be sure to share some of the how-tos and progress pics this week.

Liv's Little Kitchen | PepperDesignBlog.com

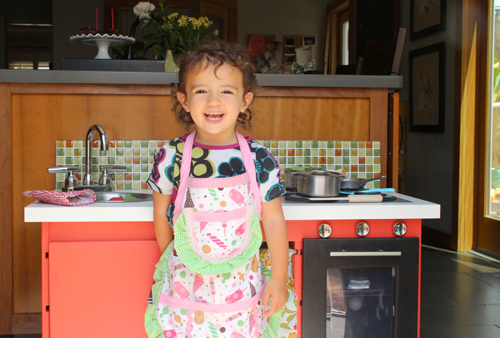
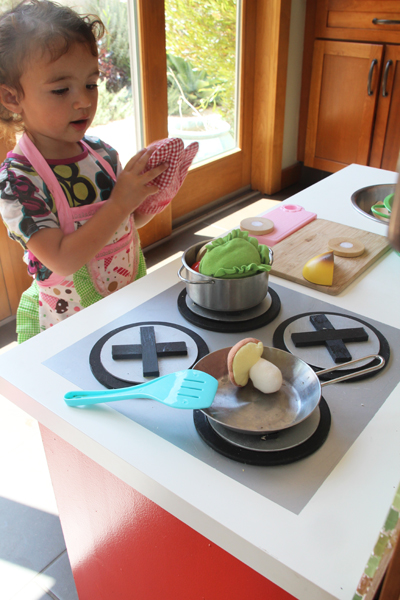
One of my main goals was to build a little kitchen that would work well with our big kitchen. That way Liv would have something fun and interactive to do while we were working in the kitchen (the hub in our house) and could participate in the ‘cooking’ – and we could have a toddler toy that wasn’t plastic or an eye sore in plain view.

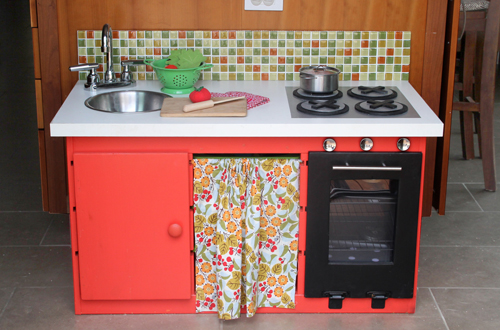
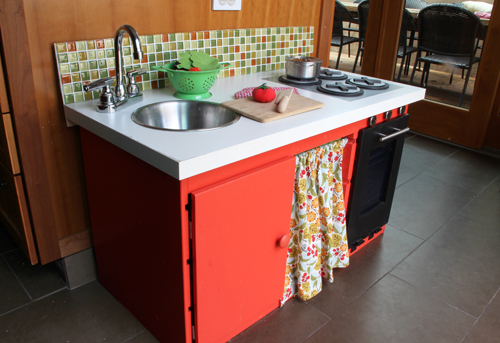
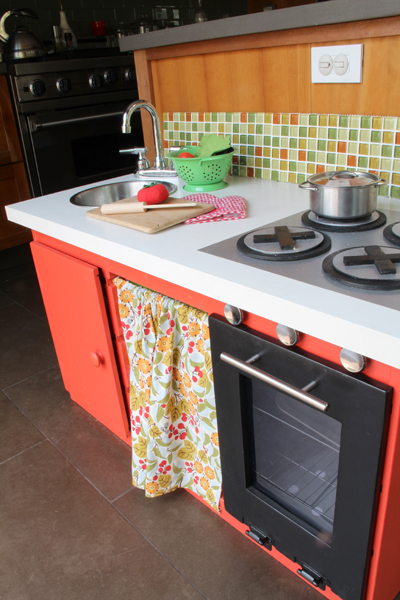
The finished mini kitchen fits perfectly at the end of our island, and I chose all of the colors to be more upbeat, kid-friendly versions of the colors that we have throughout our own kitchen space.

Liv's Little Kitchen | PepperDesignBlog.com

After quite a bit of research (and hunting through Craigslist, thrift stores and what not for the right sized cabinet), I used the TROFAST toy storage unit and plastic bins from Ikea for the little wooden base, and a basic white Ikea desk top that fit the unit near perfectly for the countertop (can’t seem to find the link online at the moment, but it was 39″ long and we sheared off just a bit of the width at the back so that there was just a tiny lip over the storage unit). The orange door on the left and black oven door were both shelves built for the TROFAST unit as well that we converted with hinges.

Liv's Little Kitchen | PepperDesignBlog.com

Liv's Little Kitchen | PepperDesignBlog.com

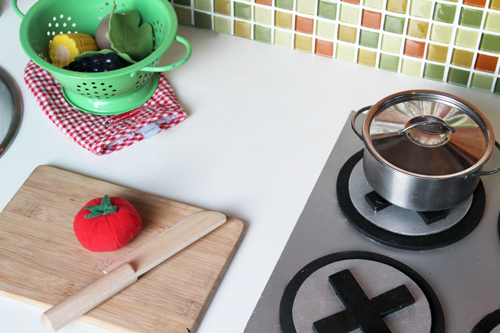
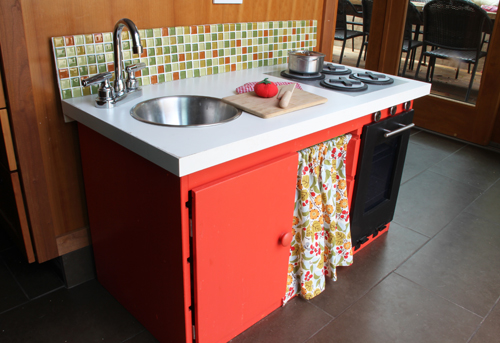
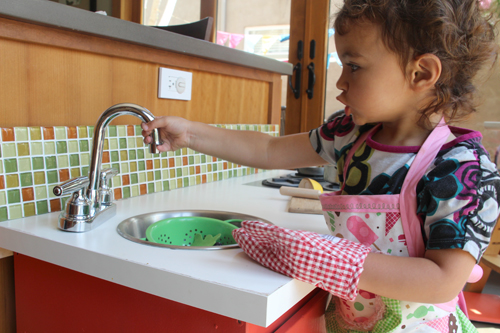
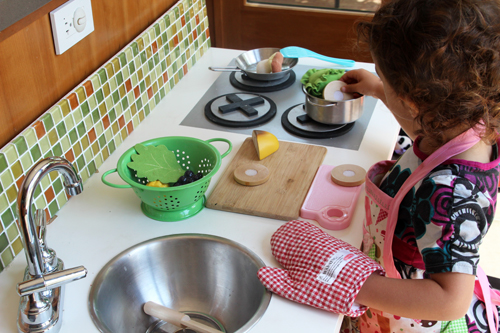
Little extra features include a bar sink that works well as a faucet (which Liv has already requested ‘please make it work’, ha!):
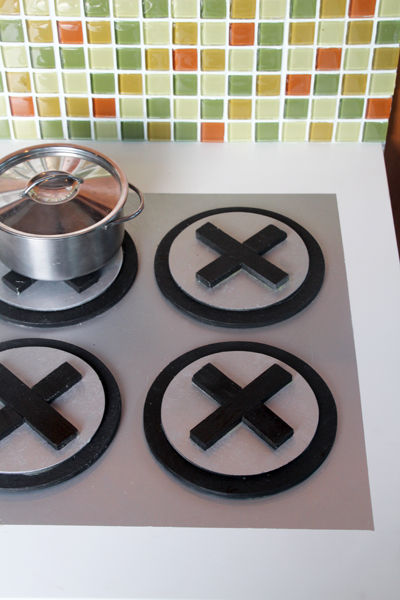
Liv's Little Kitchen | PepperDesignBlog.com

A stove top:

Liv's Little Kitchen | PepperDesignBlog.com

Liv's Little Kitchen | PepperDesignBlog.com

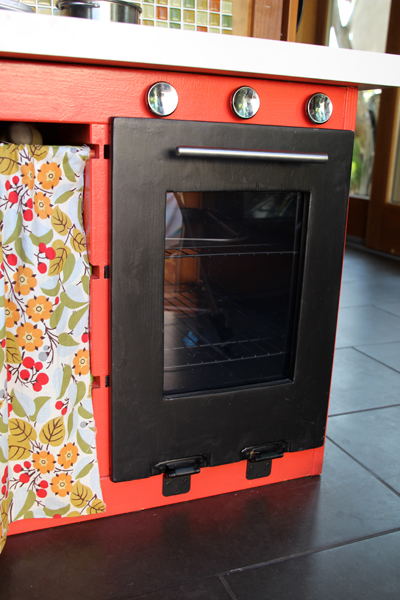
An oven with two little racks and an oven light for baking:

Liv's Little Kitchen | PepperDesignBlog.com

Liv's Little Kitchen | PepperDesignBlog.com

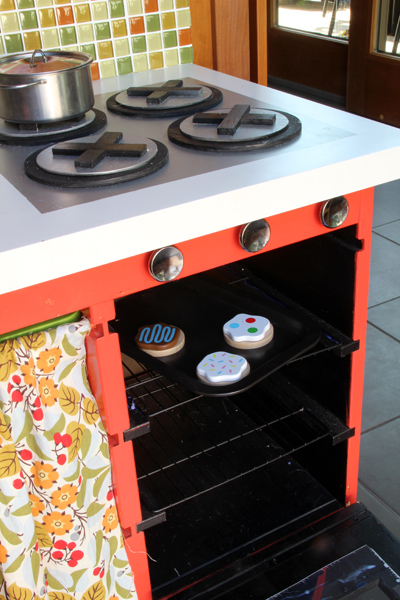
Little knobs that spin for the stove and a handle, hinges + plexiglass for the oven door:

Liv's Little Kitchen | PepperDesignBlog.com

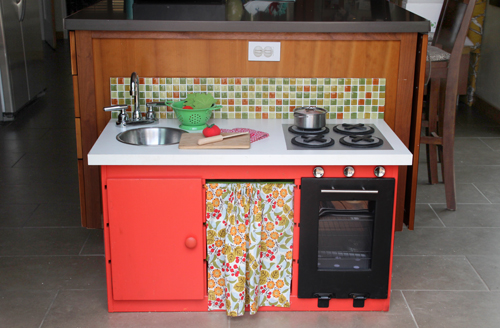
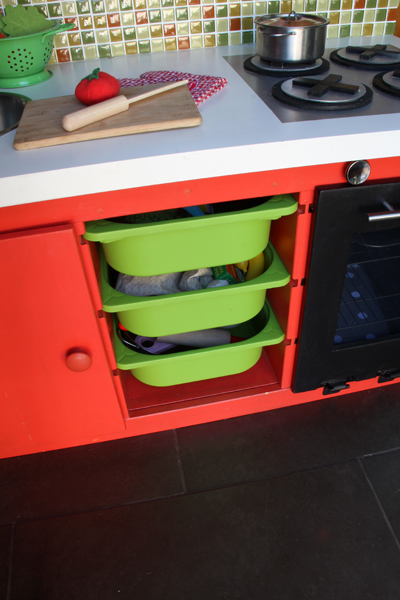
And for toy food storage, a large door to hide bigger bowls and tools, and a fabric curtain to cover up three plastic Ikea bins:

Liv's Little Kitchen | PepperDesignBlog.com

The dowel at the top of the curtain fits right into the notches that were already built into the Ikea toy unit (the fabric remnant is from Joann’s):

Liv's Little Kitchen | PepperDesignBlog.com

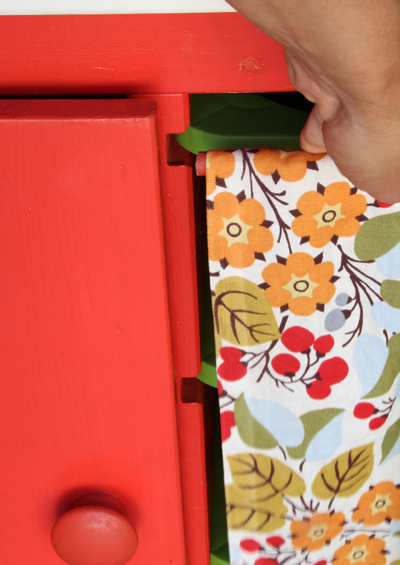
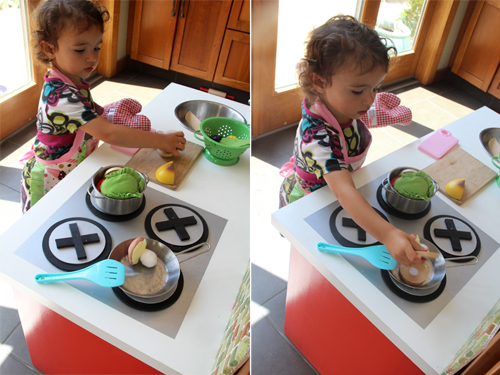
And the entire curtain can be removed during playtime to reveal the bins of felt and plastic foods, wooden cutting boards, aprons and the rest of that fun stuff:

Liv's Little Kitchen | PepperDesignBlog.com

Thanks, Dad for all of your help assembling this guy! He was my powertool man over Christmas and he troubleshooted problems like the oven doors, unbreakable plexiglass and installing the bowl for the sink. I added most of the little design details later when all mellowed down.

Liv's Little Kitchen | PepperDesignBlog.com

Liv's Little Kitchen | PepperDesignBlog.com

So much work! But Liv loves it and that’s what matters most. And I have loved being super creative with the design and build, troubleshooting how I could add a mini backsplash or what way to attach the oven racks into the inside of the oven :-). It’s what I live for! In retrospect it would have been cheaper and easier to purchase a pre-built kitchen, but sometimes you just can’t beat the DIY.

Liv's Little Kitchen | PepperDesignBlog.com

Liv's Little Kitchen | PepperDesignBlog.com

Be back shortly with the source list and the steps to build!

Shhhhh, a Secret: Magic Belly Stretch Mark Cream

Hope you had a restful, memorable and happy Memorial Day! We had such a busy weekend, but the best sort of birthday + holiday combo busy weekend. I love three day weekends. I won’t recap it all here (I’ve thrown a lot of family/personal posts at you lately) but feel free to follow along over on Instagram for more regular updates (birthday cakes and parades and cute pictures of Liv).

Instagram_MemorialWeekend2013b

I do have a quick post that I wanted to tag on to last Friday’s little maternity snapshot for baby #2. I know that all of us mommas (or future mommas) will deal with this little dilemma in some way or another and I wanted to pass on a secret recipe that my mom has passed on to me for each of my pregnancies: my mom’s very own Magic Belly Stretch Mark Cream.

Magic Belly Stretch Mark Cream : PepperDesignBlog.com

Not a fun topic. But who likes all of those terrible spider veins and bleached lines? Our skin stretches so darn fast when we are growing a little life that it’s inevitable (even with the magic cream), but if you care for the elasticity of that stretching skin you lesson the chance of any drastic or permanent marks.

I’m happy to say that after Liv my belly went right back to where it started at (even if it was 1 year later…) and no stretch marks remained. But I know we are not all as lucky and I know that this next time might be different (my skin might have a ‘been here done this before’ moment where it decides to ‘stay there’ after all). Fingers crossed that doesn’t happen.

During the actually pregnancy, I’m terribly prone to all things ugly belly. Namely stretch marks. That’s where these ingredients fit in:

Magic Stretch Mark Cream Recipe : PepperDesignBlog.com

Okay, ready for the secret recipe? It’s not an exact science (it’s more of ‘a little of this, a lot of that’ sort of recipe), but I hovered over my amazing mom until she gave up the goods that are in that sweet little bottle she sends me so that I could share them here with you, and here’s her blend:

Magic Belly Stretch Mark Cream

m
Start with an empty pump container and roughly 16 oz of your favorite non-scented, moisture-rich lotion.

Add the good stuff:
*6 oz aloe vera
*1 oz 100% cocoa butter
*2 oz lanolin
*8 oz 100% glycerin
*1 oz vitamin E oil

Mix well.

When my skin is feeling particularly stretchy – which leads to particularly itchy – I mix with 1% hydrocortisone cream. This concoction help aids sun relief, too (minus the cortisone)! I try to apply twice a day (like when changing into or out of PJs) and start at about 4-5 months into pregnancy. I also use my magic cream well into those post-partum months as everything begins to ‘shrink’ back to size.

Much pregnancy love from me to you.

A Few Belly Shots for Baby #2

So sorry if you’re having trouble commenting on any of the posts, I’m trying to figure out that 403 error ASAP. If you’re not getting a 403 error but something else, please email me at: morgan @ pepperdesignblog.com.

Around this time last month my girlfriends and I took our annual ‘weekend away’ trip to Julian, California – a small mining and mountain town about an hour east of San Diego, a town known for its quaintness, beauty and apple pies. We began this annual trip back when we were all big scrapbookers, and we’d lug our massive totes full of scissors, paper, glue sticks and the like to Julian to disappear into our scrapbooking world. And to watch favorite chic flicks. And to eat delicious food and drink lots of wine.

These days there are just a few ‘real’ scrapbookers left, but the group of us still treasure our Girl’s Weekend away. We have also found the most perfect home to rent and it’s the house we come back to spring after spring. The home is just outside of town on a beautiful piece of horse country property, complete with a picturesque barn:

The weekend was beautiful (we’ve visited through snow, rain, you name it) and without much planning or forethought, my friend Anna and I decided to take a few impromptu belly shots.

See, I’ve been feeling just a tad guilty that I captured so much of my first pregnancy on camera, and have let this second one almost slip on by.

Now baby girl number two can have her very own momma photos for that baby album. So my apologies in advance: lots of belly shots today.

Because the pictures were pretty much unplanned, I had only comfy clothes (I mean, curl up on the couch with a good book comfy clothes) with me and should have packed another sundress or something a little more ideal for photos. But the basic black dress, leggings and striped shirt worked out okay.

I loved, loved! the barn and so we took one round of photos over the weekend, and then the field photos (in the striped shirt) randomly on our drive home. It was one of those ‘if we see a neat spot to snap some photos let’s do it’ moments.

To create the vintage-y effects, I applied Pioneer Woman’s Photoshop Actions at anywhere from 10-50% to most of the final images. If you use Photoshop or Photoshop Elements, I highly recommend checking out some of the free Action sets out there (like PW’s) because they’re so fun to play with. To capture a similar look without Actions, try adjusting the Photo Filter, Exposure and Brightness of images in Photoshop.

If you don’t have Photoshop, I know that most of the free programs out there (like Picasa) offer unique filters (kind of like Instagram but for your computer), read more about three of the free options I’ve played with here.

Maternity Photos : Baby Girl #2! :  Julian, CA : PepperDesignBlog.com

Maternity Photos : Baby Girl #2! :  Julian, CA : PepperDesignBlog.com

Maternity Photos : Baby Girl #2! :  Julian, CA : PepperDesignBlog.com

Maternity Photos : Baby Girl #2! :  Julian, CA : PepperDesignBlog.com

Anna, thank you so much for your talented photography skills! Okay, no more belly touching photos to share. But sweet baby girl, these are for you :).

Related Posts Plugin for WordPress, Blogger...