A Little of This & That… Renovating, Decorating, DIY Projects & Family

Girls’ Room: Acrylic Bookshelves & a Library Wall

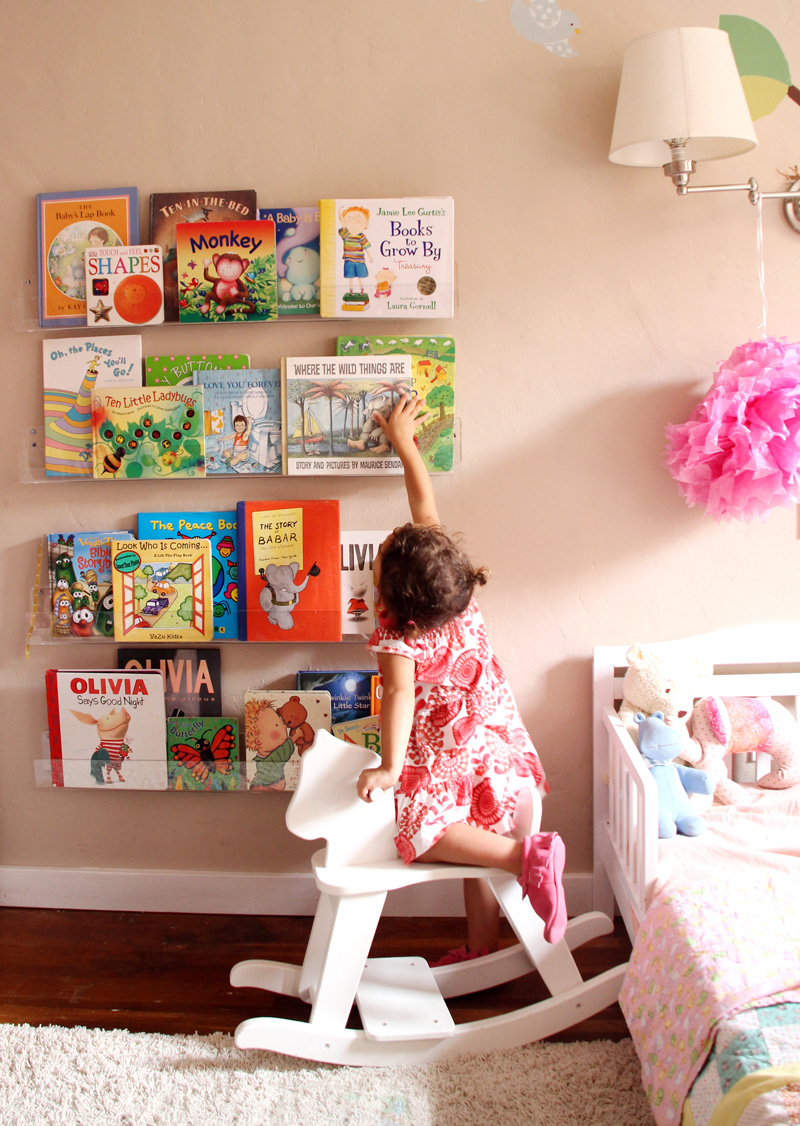
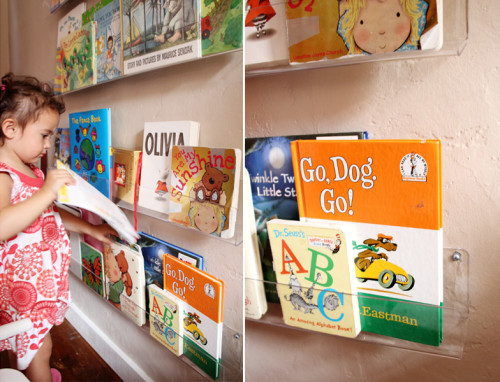
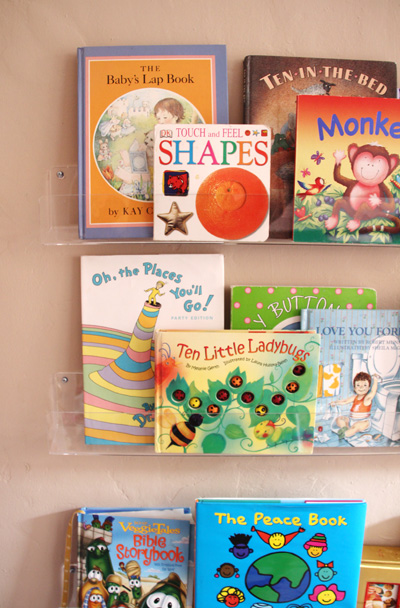
We are all about books in this house. I grew up being read lots and lots of books, Liv LOVES to hear stories and to pull books down from her shelves to flip through and I hope that Taylor will be as keen on them one day as well. This weekend we installed an awesome library wall for the girls to display, organize and encourage book play and I’m super happy with how it turned out.

Acrylic Bookshelves Library Wall | PepperDesignBlog.com

And how about that acrylic? Oh it makes the design part of my brain happy.

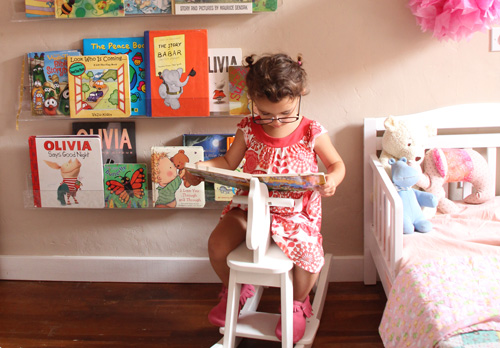
It’s really fun to see Liv take so much pride in arranging her books and choosing which to read before naps, bedtime and in between. Previously books were stacked on a bookshelf or in a basket next to our rocker, now titles (and front covers) are easily found and stored. Acrylic is a trend I’m willing to keep around for a long, long while.

Acrylic Bookshelves Library Wall | PepperDesignBlog.com

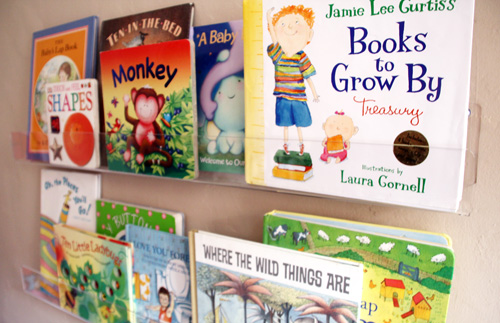
Those acrylic bookshelves are actually card ledges built for card stores (like Hallmark). I believe I first learned of this awesome to-the-card-store-trade resource from Emily Henderson, but I can’t seem to find the original post where she recommended them. Regardless, if you love the look of acrylic you will love this online store, which is much cheaper than the acrylic bookshelves made for this very purpose… (I think I’m going to get some neat clear boxes to hold blocks, art supplies, etc off of Amazon next). I purchased the 30″ versions though they range from 16-48″.

Acrylic Bookshelves Library Wall | PepperDesignBlog.com

Liv sporting her nana’s spectacles during an impromptu dress-up moment while reading her books. After about 2 seconds she told us that she was going to put them down on her nose so that she could ‘see’ the pictures.

I’d love to eventually cover this floor area with soft cushions and maybe a pouf to create a little reading lounge.

Acrylic Bookshelves Library Wall | PepperDesignBlog.com

These guys were not hard to install and I was planning on tackling the project this week while the girls were napping, but my family came to visit for the weekend and my awesome dad stepped in to help.

At first it was a family affair…

Acrylic Bookshelves Library Wall | PepperDesignBlog.com

Once we decided how far off of the ground, how far apart each shelf should be, where on the wall to hang… dad knocked the project out.

Acrylic Bookshelves Library Wall | PepperDesignBlog.com

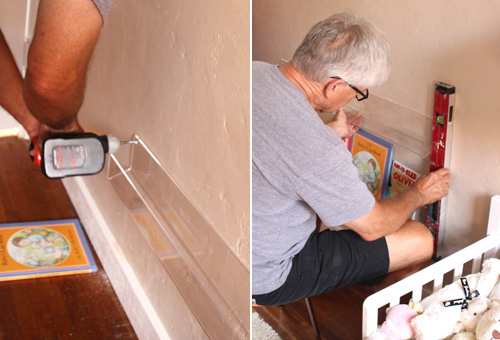
A little tip I’ve learned over the years: if you have plaster walls like ours (and even better, lath and plaster walls built in the 1930s) and you’re installing your own clear bookshelves (or picture frames, etc), you’re going to want to make sure you anchor each and every screw that you drill in.

Anchors come in many forms but often they look a bit like this:

Acrylic Bookshelves Library Wall | PepperDesignBlog.com

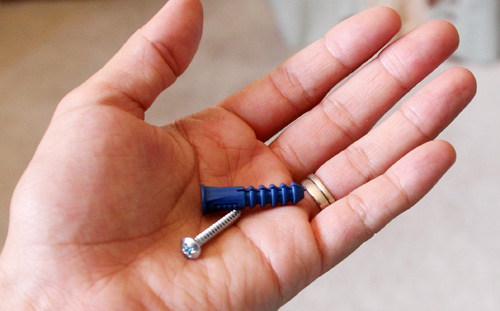
After marking your drill points on the wall with a pencil, drill a hole that is just a hair smaller than the anchor. Insert anchor as if you were plugging up the hole (tap gently with a hammer if necessary) and screw the metal screw directly into the anchor. Measure out next shelf and repeat!

Acrylic Bookshelves Library Wall | PepperDesignBlog.com

Bah, I love it. It’s so fun and I’m so happy it encourages more reading.

Acrylic Bookshelves Library Wall | PepperDesignBlog.com

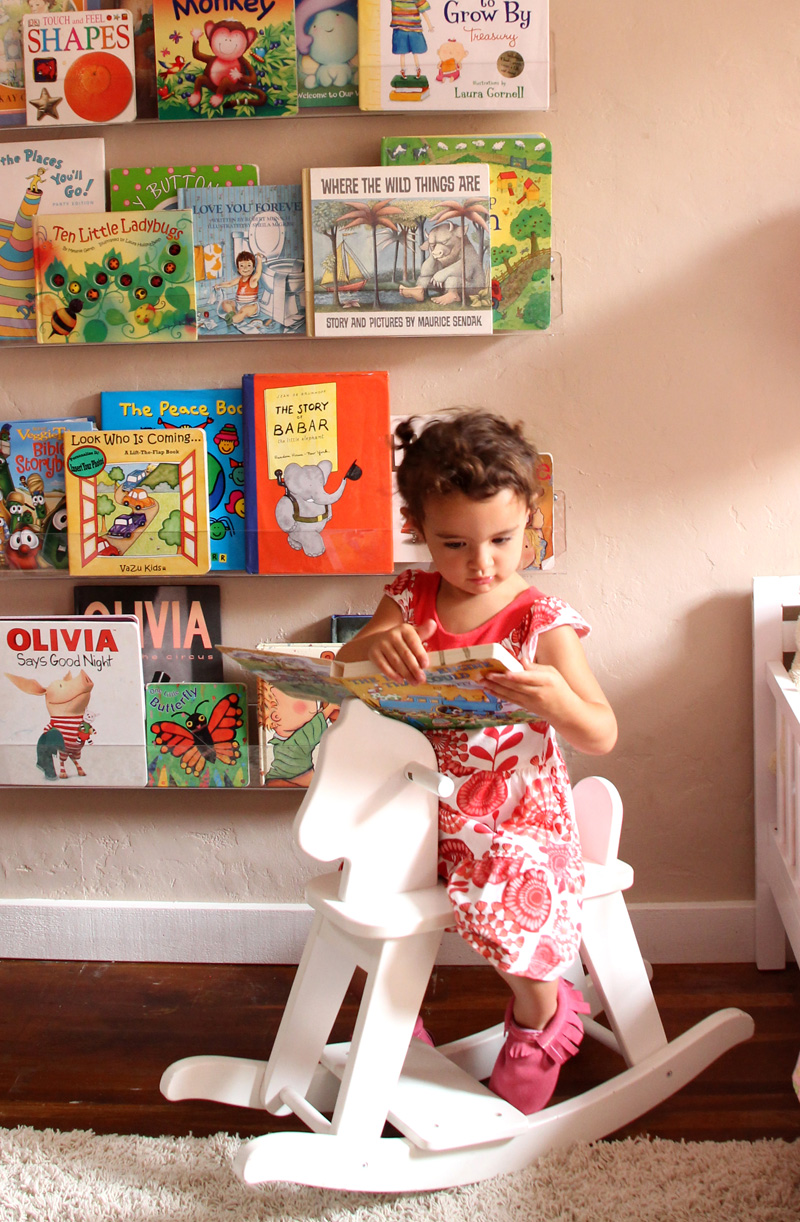
Even reading on a rocking horse if that’s your thing.

PS More nursery transformation posts here.

Happy Weekend!

Bathing Beauty | PepperDesignBlog.com

Happy weekend! Hope that you’re having an excellent one. The girls and I are spending time with Nana, Papa and Mimi – it is a full on grandparent weekend and Liv is in heaven. We also indulged in a little swing dancing a la a local jazz group concert at the park and went out for pizza at a new neighborhood eatery.

I found these two pictures of Liv & Taylor as newborns and was so surprised:

Baby Comparison | PepperDesignBlog.com

Shared the comparison on Instagram recently – the above is without a filter! My two comparison bath pics are a little less drastic but the range of baby genetic possibilities that our family might have makes me smile. Liv really was pretty darn tan at birth and Taylor’s eyes are stunning.

PS one of the best pieces of baby advice we’ve received (this was back with Liv) was to purchase a simple foam bath insert for baby baths and to forgo the big plastic tub. For the first year or so of Liv’s life we didn’t have a bathtub (while we built this guy) so Liv just showered with me while I held her (I also attribute this as to why she doesn’t make a huge fuss about getting water in her eyes). But when we did do sink baths we just filled up the sink with warm soapy water and propped Liv (and now Taylor) up with the foam. You can pretty much submerge everything but the head this way, and that totally beats a cold belly and bum from a sponge bath. It’s quite economical, too. Similar version found here.

Bathing Beauty | PepperDesignBlog.com

Taylor at top, Liv at bottom :). More favorite surviving-the-first-three-months baby product ideas found here.

PPS Fun link finds: awesome wardrobe styling tips from a former J Crew stylist (love the one about rolling sleeves) and cute pregnancy outfits by trimester worthy of pinning. 

Guest Bathroom: A Quick Fix

A little update on our guest bathroom to share today…

If you’ve been reading this blog for a bit you know that we transformed three hallway closets into a full bath in the middle of our house.

guestbath_after_livsroomdooropen_400

If I back track just a bit, the last time we had to deal with a grout issue in this space was when we were installing the tile itself. That was a decent amount of time ago.

subwaytile_groutingcollage

So when this little bitty hole in the grout popped up a couple of months ago, I noticed it immediately (terrible spot for a blemish in the tile!) but kept pushing off the repair by convincing myself it was a time consuming project.

Well I finally got around to fixing it when I was grouting the backsplash for Liv’s mini kitchen and it was such a basic job! I suppose the purpose of this post is to share how easy it is to fix up little tile problems in the bath and kitchen. No need to call the handyman or even add it to the honey-do list. This is a quick DIY fix.

Guest Bathroom Grout Fix | PepperDesignBlog.com

Rather than mess with a giant bag of grout, I scooped out a mini cup’s worth for all of my grout projects that day (I was also grouting Liv’s mini kitchen backsplash but if I was just making this bathroom repair I’d need maybe a teaspoon) and mixed it with a small amount of water to form my grouting paste.

Building the New Play Kitchen | PepperDesignBlog.com

Guest Bathroom Grout Fix | PepperDesignBlog.com

Apply and let dry. Bam!

Guest Bathroom Grout Fix | PepperDesignBlog.com

Love it when projects that I dread turn out to be no big deal at all :).

This post was sponsored by Modern Bathroom which specializes in chic, contemporary bathroom vanities, tubs and other décor.

Related Posts Plugin for WordPress, Blogger...