A Little of This & That… Renovating, Decorating, DIY Projects & Family

Thanksgiving & Grandma’s Buns ;)

What are your Thanksgiving plans this year? We have started a tradition of cooking and celebrating Thanksgiving dinner with my dad and my brothers and sisters on my dad’s side. That will take us to Oxnard, California (just north of us by about four hours) this year, though we have plans to rent out our house through airbnb (like we did here).

Another family tradition? What has come to be affectionately referred to as Grandma’s famous buns. I mean the edible ones (though I’m sure she had a killer backside in her day, too).

These are the tastiest, most delicious, perfect-for-cranberry-and-turkey-sandwiches-the-next-day buns.

Grandma's Buns! | PepperDesignBlog.com

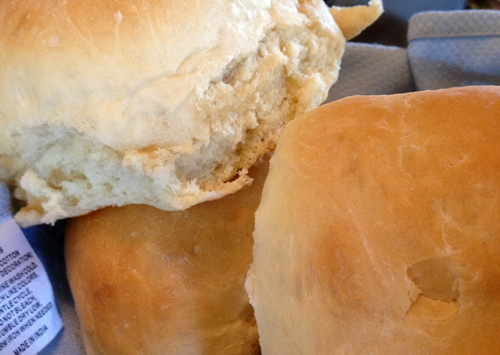
This is actually my Great Grandma’s recipe, and likely from women in our family before that. And I (humble bow) pass this family secret on to you. Because this roll recipe is so phenomenal that it deserves to grace the table of many a family this Thanksgiving.

(I wish I had better photos – just a few iPhone photos and instagram images that I shot while baking the bread with Liv last year).

Great Grandma’s Buns

aka 2 Hour Rolls

Ingredients:
2 packages yeast
½ cup sugar
2 eggs
2 ½ cups warm water
3 tablespoons melted shortening
¾ teaspoon salt
7+ cups of flour
~2 tablespoons for brushing baked rolls

Makes 24 or so rolls, takes about 2 hours from start to finish (that includes time to rise twice plus baking).

Beat the yeast, sugar, eggs and water in a large bowl until foamy. Add 3 tablespoons melted shortening and ¾ tsp salt. Gradually mix in 7 or more cups flour. Knead just enough to mix well. Place in large bowl, cover with towel and let rise in warm place until double in size. Make into golf ball sized rolls (and no bigger – though it will be tempting), place in buttered glass Pyrex dishes with space between. Let rise, covered in warm place until doubled. Bake 20 or so minutes at 350 degrees. As soon as they come out of the oven lightly brush with butter.

I start the rolls the morning of and intermittently work on them and the rest of the meal (while they’re rising or baking) so that the rolls are about ready when we’re ready to eat. They’re really not a lot of work at all. Make extra so that you can enjoy them as turkey sandwiches the next day! Delicious with gravy, stuffing and cranberry sauce. That might be what I look forward to most!

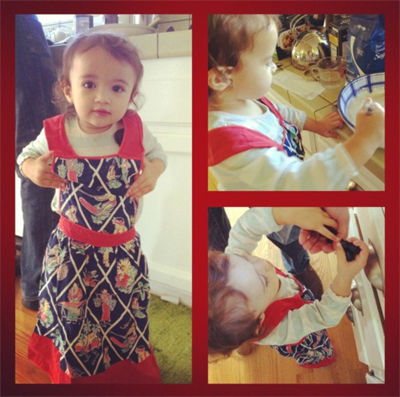
I will snap better photos this year! Until then, my sous chef (sans Thanksgiving 2012):

Grandma's Buns! | PepperDesignBlog.com

I love putting together a pretty Thanksgiving table! I remember one Thanksgiving when I was maybe 18 or 19 and had ‘free reign’ to decorate my dad’s Thanksgiving table in his new town (and completely empty home) in New Mexico. He lent me his credit card (ha!) and I think that he almost fell over when I arrived home with bags of gold chargers, wine glasses, sparkling centerpieces, florals and cloth napkins… and little presents for everyone’s place settings ;). I take offers to ‘create a beautiful table’ seriously. Needless to say he didn’t openly extend the invitation again.

I’m partnering up with Target to share a few of my favorite table finds (as well as my above favorite tradition) and I must say that I was pretty impressed with their selection. Kilim placemats and dark black pottery? Yes please. And wine is great with dinner but a special Thanksgiving cocktail is delicious! (love these hiball glasses.)

Target Thanksgiving Tablescape Inspiration | PepperDesignBlog.com

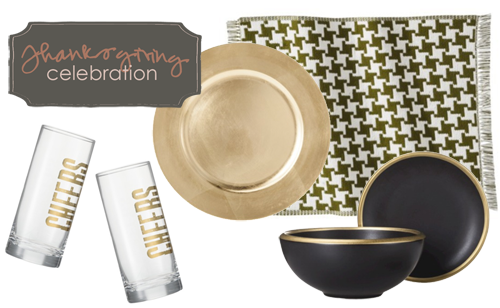
kilim placemats | gold chargers | black & gold ceramic bowls & plates | cheers hiball glasses

However (and wherever) you celebrate your Thanksgiving (that is – if you’re here in the States!), I hope that you have a beautiful one! Can’t wait to get started on Grandma’s buns this year.

More recipes to share here.

Sponsored Post by Target
This is a post sponsored in part by Target. Check out sites with this hashtag: #MyKindOfHoliday for more great Target finds this holiday season.

Master Bedroom Gallery Wall: Progress

The gallery wall that I had mentioned yesterday is slowly expanding from a few framed photos to a few framed photos + art. I’m still pretty indecisive about what will go where and what all will be included, but it feels good to be making progress. Sometimes it takes just one nail hole to get the ball rolling.

Here’s what I started with.

Gallery Wall Project | PepperDesignBlog.com

Actually, my mirror-tuned-map project was here first, but I’m still searching for a new home for that guy.

To the left are two black and white photos from Liv’s newborn days two and a half years ago. I like the unusual mat sizes and square photos, but the pair may be split up or I might update one or both of the images with more recent photos.

Gallery Wall Project | PepperDesignBlog.com

Before cutting out butcher block paper and making a scotch tape spectacle of the wall, I thought I’d play with a few configurations in photoshop.

Gallery Wall Project | PepperDesignBlog.com

We’re making room for the living room TV in the bedroom (the living room is getting a TV upgrade). I never thought I’d be a fan of a TV anywhere we slept, but it turns out we rarely ever turn these guys on and when we do it’s to catch up on one favorite show and then crash. And there’s nothing like crashing right where you are. Kevin’s not sold (even though he’s the one that crashes on the couch mid show) but we’ll see how it goes with time. It is the extra TV for now.

Gallery Wall Project | PepperDesignBlog.com

Writing the type of frame (I’ve been collecting a few here and there with this wall in mind) and adding a screenshot of possible art has helped to organize the random groupings.

Gallery Wall Project | PepperDesignBlog.com

I’m leaning towards plenty of neutral colors, black and white photos/art and just a few bright pops of color. Like my painting that I did with Liv.

Gallery Wall Project | PepperDesignBlog.com

Via computer, I thought that I was pretty confident with my layout until I actually did cut up pieces of butcher paper and taped them to the wall (much better than random nail holes – I’ve learned that mistake…). Then art began to shift its way around the space, and I learned that I might actually be in for a splattering of nail holes before I get this right.

Gallery Wall Project | PepperDesignBlog.com

A few more pieces to find, a few more photos to print and frame, a lot more progress to come shortly. So far? One etsy ink painting, one thrift store find, one giant Costco print of the girls (from Taylor’s newborn announcement) and two b&ws from way back when. Those crepe flowers are working out well in here, I think they’ll balance the more colorful paintings out nicely.

But it’s making progress from here, right?

Gallery Wall Project | PepperDesignBlog.com

I’m ready to find that replacement for my beloved granny chair, too. I don’t think I’ll ever get around to fixing it up quite like I’ve wanted to and this corner is asking for something a little more modern and a little less boxy.

Master Bedroom: Gallery Wall Inspiration

Building our first family home over the last five years has been quite a journey. There is much that I can tick off the ole thought-I’d-never-have-to-make-that-decision checklist during this remodel, but if I reflect back on it all there is one consistent, happy theme that continues to reverberate throughout the direction of this house. If I could sum it up in one word it would be: Cozy.

Funny all-encompassing word, I suppose.

It’s hard to explain, but I think that we all have expectations out of a personal space. For me, that means that my favorite spaces are ones that feel like a warm, embracing hug. Soft, comfortable, relaxing, familiar, special.

I sometimes wonder why I spend so much time deliberating and gawing over simple design decisions when I feel like I already have so much on my plate, and (besides being a hobby that’s just buried in my bones, a hobby that I really enjoy) I think that it ultimately comes down to an innate desire to build a space that gives my family that warm and fuzzy feeling – that ‘coziness’. I don’t know if a space can do that all on its own, but I hope that a space that people enjoy spending time in will at least encourage that feeling.

Cozy means that a home is comfortable. Besides feeling like a warm embrace, it should also reflect who you are inside and out. For some reason when I think of that I think gallery wall. I suppose the connection there is that these recognizable signs of our favorite art, familial faces, faraway places – this is part of what makes us happy.

Wall Gallery Inspiration | PepperDesignBlog.com

I’m a fan of the gallery wall. We have one in our living room, our dining room and I’m building one for the girls’ room.

Art, knick knacks, even favorite ‘trendy’ pieces that speak to you – you can’t have too many smiles! – this is what gallery walls are all about. I don’t think they’ll ever go out of style.

So when I was deliberating on how to make our master bedroom a more comfortable, cozier space that I would enjoy spending more time in (mostly because it’s last on our list for any major remodeling and therefore the place I often feel most depressed about these days), I decided to add a gallery wall. I mentioned its progress here, but like anything that takes a lot of love, progress is slow.

Wall Gallery Inspiration | PepperDesignBlog.com

And so today, the inspiration! Because it never hurts to have a guide on how to hang that collection of favorite stuff :).

Wall Gallery Inspiration | PepperDesignBlog.com

If you love any of these photos as much as I do, please check out my gallery wall Pinterest board so that you can pin straight from the source.

Besides photos and art, cozy to me means soft textures, fluffy rugs, warm woods, natural hues… but it could mean something completely different to someone else. And cozy might not even be on the top ten of a friend’s house word list (is there such a thing?). But to me – that’s what home is all about.

Related Posts Plugin for WordPress, Blogger...