A Little of This & That… Renovating, Decorating, DIY Projects & Family

Random Thoughts: Baby Names

What's in a Name | PepperDesignBlog.com

What are your thoughts on names? Baby names are the sorts of things eight-year-olds (and twenty-eight-year-olds) agonize about. ‘Liv’ was a name I have loved forever, ‘Olivia’ the only name that Kevin truly adored when I was pregnant with number one. He said he would call her ‘Love’.

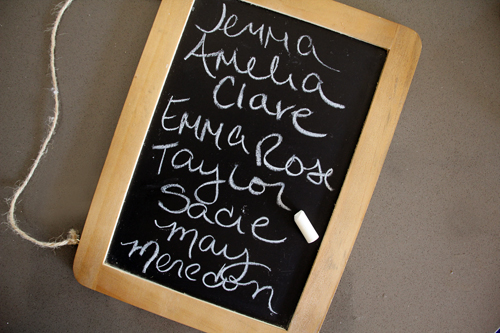
Amazingly, the name ‘Taylor’ has been on my list for a solid decade. That feels like a long time in baby naming years. Taylor was perhaps second or third on my list with baby number two (the above is not necessarily the chosen order), but even growing in my belly I always felt that that would be her name. Kevin, too.

Liv | PepperDesignBlog.com

Taylor Rose is Here | PepperDesignBlog.com

I remember calling my very favorite baby doll ‘Sydney’ as a little girl. I was sure that that’s what I would name my own children when I grew up and out of my five-year-old boots. Not surprisingly ‘Sadie or Saidey’ (rather close?) is a very favorite of mine today and was at the top of the Taylor-naming-game list.

The one other name (besides Taylor & Liv) that we both really enjoyed was Meredon. It was sort of a play on sailing and the sea… (mer meaning sea and meridian a line of longitude or a common directional reference for sailors). We have a sailboat from Kevin’s bachelor days and it was a favorite pre-child San Diego Bay hobby. I also liked that it was one-of-a-kind. But then that movie Brave came out.

What's in a Name | PepperDesignBlog.com

A funny story behind Liv’s name is that we were really unsure of what to name her even as I was in labor and at the hospital. I had a natural birth and after agonizing pain and she finally arriving, I remember Kev leaning over and saying ‘so I’m going to text everyone that Olivia is here’. I was so exhausted that I just nodded and then fell asleep.

An odd thing happens after you finally give your child their name though. They become that name. They are that name. You can’t imagine them being named anything else.

Easter Eggs | Liv | PepperDesignBlog.com

During our name-agonizing pregnancy days (actually, just mine. Kev had always had just one or two names that he stuck by), I had a close friend make that statement to me and it brought me much peace. I think that I was always nervously worried that I would regret the name I eventually chose. It’s such a huge responsibility! This child will apply for their first job with that name, introduce themselves to new friends with that name, sign love letters with that name, hear that name called out at their college graduation and on their wedding day

And nick names? Where do I begin.

Maybe I was overthinking it.

Olivia_Jan20-2011_007_475

You know what’s kind of odd? My lists of names changed drastically between the two girls. I’m not sure more than two or three baby number one names crossed over to the baby number two list.

Random Thoughts: Baby Names | Taylor Belly Shot | PepperDesignBlog.com

Just for fun, a few of the other names I loved for Liv included ‘Madelene’ (that how a friend spells it and I love it), ‘Emma’, and I think ‘Clare’. There were many others but they must have not made a strong enough impression for me to remember as I type this.

Liv & Taylor | PepperDesignBlog.com

Middle names are a whole other beast. Anne is my middle name and my mom’s middle name (it’s a common middle name but it’s peppered throughout our families). I felt strongly about giving my daughter, and I didn’t know how many I’d have, that middle name.

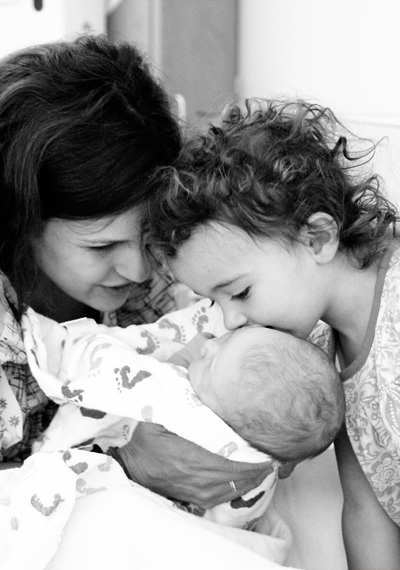
Because we went with tradition for the first, Kev and I just came up with the prettiest name we could think of for the second. I was incredibly close to giving Taylor my very special (and recently passed) Grandma’s name (Vivian) or my own first name (Morgan), too. I also love when mom’s pass on their maiden name as a middle name. In the end we went with our gut and brought a ‘Taylor Rose’ home from the hospital.

Random Thoughts: Baby Names | Taylor Belly Shot | PepperDesignBlog.com

If we have a third (and we’d like to) I have no idea what we would name him/her. Somehow we ended up on the top 100 for baby names with the first two, maybe next time something really unique? Or something really traditional? We actually didn’t know if we were having a girl or boy with Liv, so we have a decent list of untapped boys names :), too. Here’s how we found out Taylor was a baby girl.

Do you still admire any of the baby names your six-year-old self chose? How did you (or how will you) choose your children’s names? Are yours traditional, unique, sentimental?

Kitchen Update: Salvaging French Doors

So back to these doors

Black French Doors | PepperDesignBlog.com

The crazy thing about these french doors is that they have been on my mind for almost three years. Perhaps since the day we installed them back during the officebig kitchen build.

officedemo2_doors

It doesn’t hurt that I walk through them umpteen times a day as I wander from kitchen to office and back to the rest of the house again during my usual routine. This is my zone right here, my commute, my little world in a single transit path.

Black French Doors | PepperDesignBlog.com

I have spent a lot of time staring at those doors.

When we found these doors waiting to be recycled on the side of the road (and then asked permission from the homeowners before taking), we were thrilled to have found something so big (and pricey) and full of history – they were just what we were looking for for this exact space in our kitchen/office transition.

Unfortunately refinishing these doors was such a very long journey. It took about 2 years and nine months longer than I expected to find a way to close them (doors should, by all means, naturally know how to do this) and about 2 weeks longer than I expected to fill holes, prime, paint and install hardware, once I built up the courage to paint them (in order to close them). I think that sometimes that’s just the nature of the DIY beast. And a happy end result makes it all so worth it.

I shared more about why, even after sanding and rehanging, these doors went black here, but in the quick and dirty it was two part: first, we weren’t really able to restore them to an unfinished wood glory despite a lot of time and resources:

Kitchen French Doors Before | PepperDesignBlog.com

Kitchen French Doors Before | PepperDesignBlog.com

And second, the very old and unique double jointed shape of the doors and latch system meant that finding a proper handle set would be near impossible. (In fact, the near throw-in-the-towel moment came when I had a historically accurate window and door reproduction carpenter tell me that I would probably never really be able to find the existing locking mechanism for this door to match the holes that were in place. My heart fell about three inches when he said those words because we had just assumed it would be so easy).

Kitchen French Doors Before | PepperDesignBlog.com

Two months ago I was close to spending some of our savings on new custom french doors for this space since doors that closed and functioned were a growing must to keep my work-from-home professionalism alive.

Kitchen French Doors Before | PepperDesignBlog.com

But my ah-ha moment came about two weeks later and none-too-soon. Friends of ours were hosting a super bowl party at their new home and about half way through the party, I watched as one of their young sons went from his bedroom into the living room through a narrow set of french doors. When he turned around to shut the doors behind him, there was a little ‘click’ of door shutting satisfaction – but no latch. I hopped off of the sofa and investigated immediately. At the top of the door was a small cup that ‘caught’ a small rod (topped with a ball) as the door closed. Why hadn’t any of these professionals shared this idea with me? It was such a happy moment!

It worked just like this:

ball_catch

source

That week I raced to a specialty hardware store and picked up their last little baggie of 6 ball and cup latches for $5. Problem solved and I could ignore the existing latch holes on the door to make this all work. No major drilling necessary.

But before any door latch could be installed, I had a seriously naked door to contend with.

kitchen_blackfrenchdoors_painting_primer_500

Using a bare wood primer was a recommendation to me that I almost passed up. I’m not a huge fan of priming anything, it feels very much like a useless extra step in most circumstances and I hate to do double the work (love me a solid paint+primer in one). BUT I heeded warning and am so glad that I did. This initial coat of primer was a breeze to apply and it made painting on my glossy black latex paint afterwards feel like buttah.

kitchen_blackfrenchdoors_painting_primer2_400

Raw wood absorbs a lot of the moisture out of your paint leaving you with a slightly courser, grittier surface. By using the primer as this initial surface, my final coat of black on the doors was smooth and pretty.

kitchen_blackfrenchdoors_painting_primerdone_400

It did take a few hours to get this sucker finished. I taped off the hinges and molding but I didn’t worry about the glass panes because I had heard how easy it is to scrap these free of paint with a razor. In hind sight it was possible but not so easy, I wish I had taken the 20 minutes needed to tape off the paint to save myself an hour or more of scraping towards the end.

Then it was on to black. I wanted the glossiest black I could get my hands on.

Kitchen French Doors Before | PepperDesignBlog.com

I initially imagined using an oil based paint for the type of finish I was leaning towards. The paint experts told me that either latex or oil would do and would provide similar results, so in the end I went with latex since I think that it’s so much easier to apply and clean up.

I suppose I should mention here that the correct order would have been to fill those massive latch holes prior to my primer, but I was a little anxious (and short on time) the weekend I tackled these doors and needed to accomplish as much as possible during my free time. So while I waited on collecting more supplies to correctly patch the latch holes, I threw on the primer and first coat of black.

When it did come time to patching the holes, I took a three-phased approach that took me about a week to finish up (using the spare time I had here and there).

kitchen_blackfrenchdoors_painting_cuttingdowel_400

I didn’t rush the process because my goal was ultimately to do this right.

The first step was to fill the unnecessary extra latch holes with small cuts of wood and dowels pieces cut to size.

kitchen_blackfrenchdoors_painting_dowel_400

I applied wood filler over the wedged and tapped-into-place wood cuts in the doors and let dry, sanding when finished.

Kitchen French Doors Before | PepperDesignBlog.com

If you take a look at the top right though, you’ll see my disappointment with my first filling technique. The wood filler became porous when dry and took on an odd shape – not smooth at all, even after much sanding. You can even see the porous nature through a coat of primer, which I was hoping might hide more texture.

kitchen_blackfrenchdoors_painting_filler2_400

Determined to do this job better, I followed the suggestion of a neighbor and used an epoxy putty next. My choice? All-Purpose Bondo Putty (originally made for cars, now apparently for use on anything).

kitchen_blackfrenchdoors_painting_bondocan_500

It’s a two part system with quite a few chemicals. I recommend a mask and keeping your windows wide open.

Black French Doors | PepperDesignBlog.com

Once the two parts are mixed together well, the mixture can be applied to the holes with a spatula, just as the wood filler was added.

kitchen_blackfrenchdoors_painting_bondo2_500

kitchen_blackfrenchdoors_painting_filler1_400

Soft and smooth and perfect for priming! I can’t speak highly enough regarding Bondo for these sorts of fixes. A quick note here that Bondo dries in less than five minutes while wood filler takes closer to twenty. Wood filler is easier to mold and manipulate (even with your fingers to get the shape just right) while with Bondo you probably would want to avoid contact. They each have their own perfect purposes.

Kitchen French Doors Before | PepperDesignBlog.com

Kitchen French Doors Before | PepperDesignBlog.com

Building up the rough spots and patching the door purposefully (with plenty of sanding in between) felt like I was doing the doors justice. I probably sanded and reapplied wood filler or bondo or paint (or whatever step I was on) many times over about five days until I was happy with the patch.

The next step was to install the ball and catch at the very top of the doors. These were pre second coat of white paint (again, a little out of order but sometimes you tackle what you can get done or what you might have help with in that moment).

Kitchen French Doors Before | PepperDesignBlog.com

Kitchen French Doors Before | PepperDesignBlog.com

Now when the doors were shut – they stayed shut with that satisfying ‘click’! Woohoo! A sweet, sweet sound for the ears.

Black French Doors | PepperDesignBlog.com

To open and shut those doors we installed dummy handles. Dummy handles drill right into the door and don’t actually open or close a locking mechanism. They’re perfect for a spot such as this one.

Black French Doors | PepperDesignBlog.com

Black French Doors | PepperDesignBlog.com

There they are! Done and done. It feels great to have this project crossed off of our list.

Kitchen French Doors Before | PepperDesignBlog.com

I’m pretty proud that I finished these up, and now my commute from the office and home again is so much prettier. :)

PS more pictures of the above and process of building the office & new-from-scratch kitchen. All of the black french door ‘after’ photos posted here, and great black door inspiration right here.

Girls’ Room: Rug, Blanket, Pillows & a Crib (Oh My)

Oh man, yesterday I was sick, sick. Some sort of bug struck me so hard that I’m pretty sure I slept for a good 36 hours straight with small bouts of awake time to email in a sick day at work, pick up the girls from their morning childcare spot (with a friend) and bring them home for a nap, cancel the afternoon sitter so I didn’t pass on the bug, only to ask my mom to come over and hold court for me until Kev made it home so that I could… sleep. I haven’t felt that miserable in ages.

But today I’m back. I was happy to wake up and feel like my old self again. I remember driving home yesterday while passing neighbors walking dogs and pushing strollers with a killer migraine and stomach ache thinking – why does everyone look so happy? I’m happy to be back on the happy side of things again.

It occurred to me that I haven’t shared an update on the girls’ room (a room I’d been SO passionate about!) in ages. I thought I’d take a moment to update you on the goings on in that space before jumping into new art projects for the walls and a set of ‘art boards’ for Liv’s latest projects (I want to build a ‘maker’s space’ where she can really enjoy).

Girls' Room Update: March 2014 | PepperDesignBlog.com

The first big change you might notice right off of the bat is the addition of a crib! We’ve officially moved T into the room and now it really is ‘the girls’ room’.

I was so nervous about the adjustment – Taylor is not an excellent sleeper (quite the opposite of her sister, and all attempts to fix that have been so difficult) and my worries included Liv waking up at night whenever Taylor woke up. I started off by moving our co-sleeper out of the bedroom and into the office for Taylor to sleep in. Then when that sort of seemed to work (it was an odd middle ground and I think confused T even more), we just sort of took the plunge and began putting Taylor down in the crib for naps and bedtime.

Girls' Room Update: March 2014 | PepperDesignBlog.com

Now that Taylor naps only twice a day, I’ve been able to line up hers and Liv’s afternoon nap and they snooze for roughly the same time (hallelujah). In the evenings, sometimes Liv goes to bed first followed by T, but most nights Taylor goes to bed and then Liv quietly crawls in after reading books on the couch. Even though we haven’t been able to break the 4am Taylor wake up call (she falls back asleep in our bed), Liv is such a sound sleeper that she doesn’t even stir. Now I’m nervous to break that 4am wake up call because I know Liv will not enjoy that process.

Girls' Room Update: March 2014 | PepperDesignBlog.com

You might recognize that this isn’t the crib we had in Liv’s nursery. My parents recently moved to San Diego and had asked for some help building a kids room at their new house. They would need a crib for T to take naps there and occasionally spend the night. My intention was to nab an Ikea crib for them. Then as our own nursery progressed, I ended up having to part with a few big pieces of furniture (due to those awesome built-in bookshelves and not much else fitting space-wise).

We kept: the changing table, art table and chairs, and Liv’s toddler bed. That was it. Over to my parents went the large espresso brown bookcase and dresser that no longer fit, and I thought I’d keep the set together so we also packed up and sent over the espresso brown crib.

But, Ikea came through and not long after had a big as-is sale for the Gulliver crib. A crib I had been eyeing anyhow for some time for my parents or our space:

Girls' Room Update: March 2014 | PepperDesignBlog.com

Girls' Room Update: March 2014 | PepperDesignBlog.com

Not a bad price for a crib! On a separate trip I found the mattress on sale as well. So far we are very happy with its performance.

Another addition was a large chunky mustard blanket for Liv’s bed. Liv does an excellent job of cleaning up her room when requested, the only space that she has a little trouble with is making her bed. This super soft knit blanket helps out a great deal because she can just pull it over the rest of her bedding and be finished. She’s such a great little helper.

Girls' Room Update: March 2014 | PepperDesignBlog.com

Pink pillow on Liv’s bed found here.

Girls' Room Update: March 2014 | PepperDesignBlog.com

The color of the knit blanket works so well in the room! Just the right color to balance out all of the rusty reds and pinks. It also goes really well with the Moroccan pouf that I brought home from Africa during our trip there a year and a half ago.

The last update is that I finally upgraded the rug. The existing white rug might have lasted longer if it weren’t for an accident by a friend of ours’ pet (oops) but it was the motivation for me to jump online and nab another highly discounted one off of Joss & Main. We always opt for white because of our white shedding lab.

Girls' Room Update: March 2014 | PepperDesignBlog.com

I can’t complain about that crisp white in the room now!! I’m glad we scooped up another rug.

Other new additions brought in from around the house: 2 white Ikea pillows, a trellis print pink Caitlin Wilson pillow found on eBay (originally lived in the living room), a gold and white star pillow made from a fabric remnant.

I think we’re all caught up. Now on with the art boards and art for the walls… can’t wait for those to be finished :).

PS you can watch the evolution of this room right here. And if you want to go waaay back and check it out in action prior to it being ‘the girls’ room’, start with one of the first posts here.

Related Posts Plugin for WordPress, Blogger...