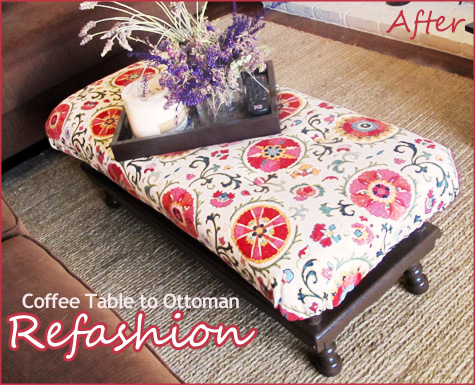
The living room redecorating project is slowly coming along… and this week I had the chance to finish one of my big diy refashions. Using one of my favorite fabrics I turned a vintage coffee table into a tufted ottoman.
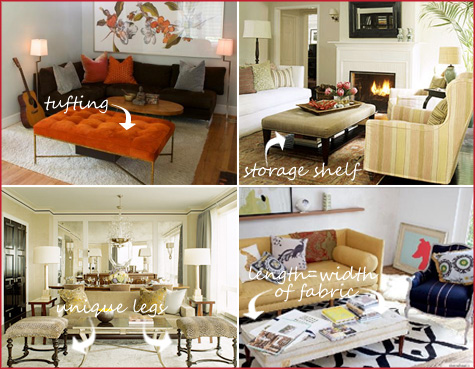
Here’s a quick recap of the inspiration board for the room (to see the before photos and painting project, check out this post):
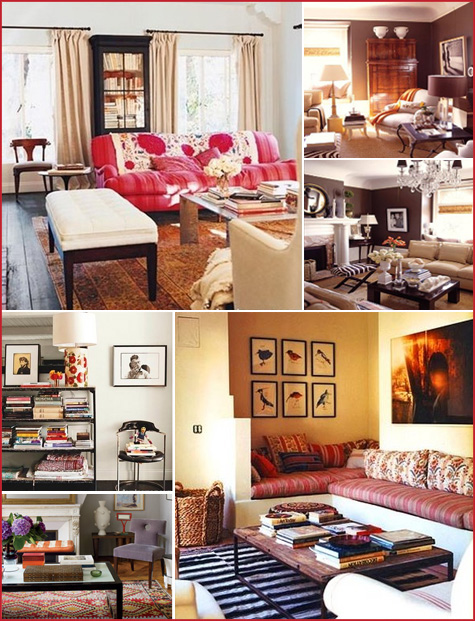
I love the soft colors and the cozy-yet-modern feel each of these rooms exude (for image credits, check out this link). To bring that same warmth and coziness to our new living room, I wanted to introduce strong textiles to play up favorite colors and add pattern to the space. A big, soft ottoman fit the bill.
And so the search began… my mission was to find a coffee table that would allow for the finished ottoman to meet the following requirements (images from DecorPad):
*Storage space for coffee table books, photo albums and the like
*Tufting along the top of the cushion
*Unique/vintage-y legs
*And most importantly, the length had to be shorter than the max width of my fabric (most fabric bolts are somewhere around 54″ and it sure was tough to meet this criteria)
I searched and searched and searched… and found the perfect coffee table in the most unlikely of places! While at a friend’s house, I happened to notice an in-the-process-of-refinishing table sitting out on the patio. Would they mind if I took a stab at making it over? When they said yes I was beyond thrilled.
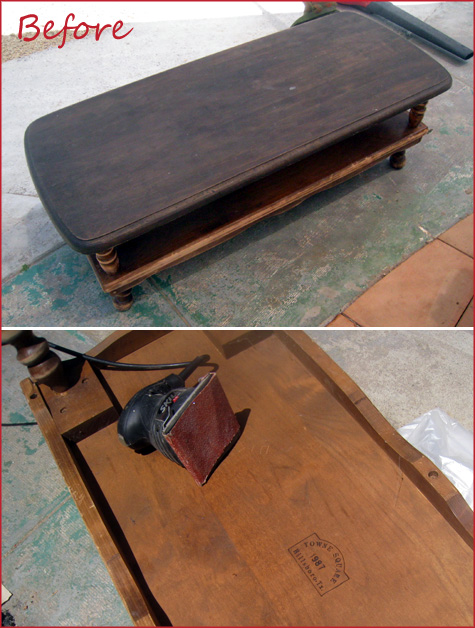
It’s a beautiful vintage table that’s made of solid wood and is incredibly sturdy – the craftsmanship definitely dates it back a few decades.
Here are my step-by-step directions just in case you decide to tackle something similar in the future. I used this very helpful guide from Little Green Notebook as my start but modified and built on to it as I went.
*********************************************************************************************
{Coffee Table to Ottoman Refashion}
a
Materials:
*Older coffee table
*Sanding paper and power sander
*Drill
*Staple gun
*Brown paint (I like a foam brush for the crevices)
*Sealant (bristle, everyday painting brush for a clean finish)
*2″ foam/cushion material
*Quilt batting
*Strong thread and needle
*Upholstery fabric (my table required a 36×54″ cutting – or just one yard of fabric)
*Lining (optional): additional fabric, spray glue
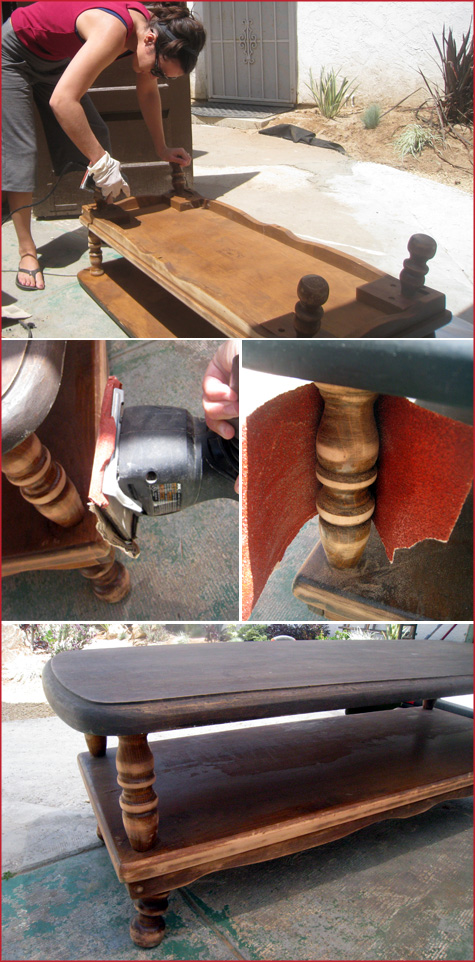
{Step 1} My ‘before’ piece had plenty of varnish and sealant on it and needed a thorough sanding to rough up the surface enough to hold paint. I used a power sander for the majority of this step but broke out the individual sanding sheets to really get around the details. I don’t have a picture of how sanded the table was before moving on, but really spend time here and you won’t regret it.
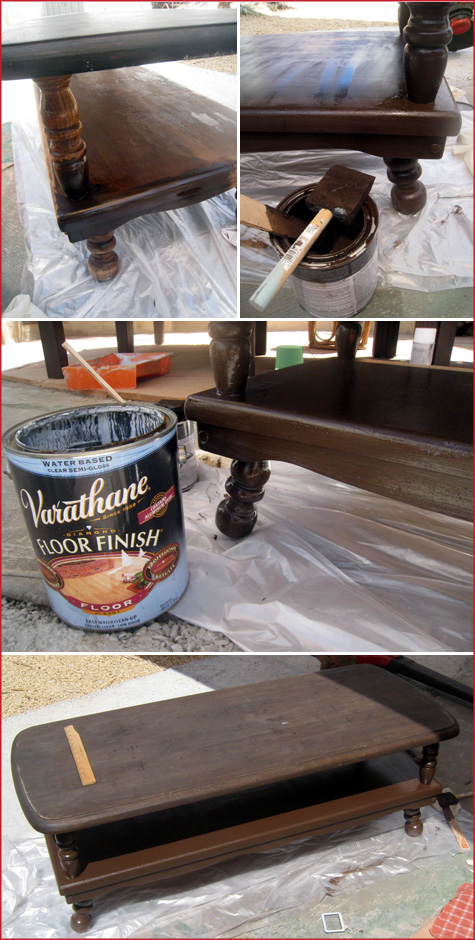
{Step 2} I chose to use a dark brown paint on the base of the table (remember that the top will get fabric and so no need to paint here) instead of staining the piece again – but that’s always an option. I applied two coats of paint and one layer of sealant, letting each layer dry completely between applications. I tested each of these products (they were leftovers from the garage, actually) before beginning to be sure that the look was what I was aiming for.
I hate to chop up this post… but it’s so darn big! In an effort to keep the home page loading quickly and from really dragging on… follow the jump to find detailed directions for adding cushion, batting, tufted buttons, fabric and upholstering it all together with nothing more than a staple gun.
I do hope you come check it out! Continue reading


