The living room is coming along great and I was so excited to find tan, neutral curtains from West Elm on clearance. The wool fabric adds a bit of texture to the walls, allows enough light to filter though and blends in well with our choice of paint – this will help with any future decor changes since beige works with almost every color and fits right into our living room inspiration board.
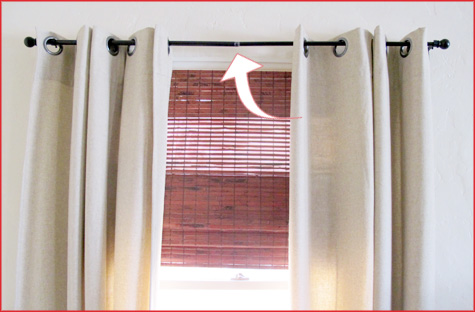
The only thing that kept me from happily covered windows were a few basic curtain rods and a bit of drilling. I found faux rod iron curtain rods from Target and thought they might just do the trick while also keeping costs low. But a bend in the center of each collapsible rod (and the little plastic gizmo that keeps the two poles connected) has been driving me crazy… I promise that it’s much more annoying than what this picture shows! So I sought out a quick curtain rod fix via Lowes.
I needed a solution that was longer than 36″, would fit well with my current end caps and had a smaller diameter than the brackets that were already drilled into the walls. After a bit of perusing, 1/2″ wooden dowels seemed like the perfect fit.

The next step was to cover each dowel with two layers of basic black spray paint. This left me with two dull looking dowels that didn’t match the sheen of my curtain rod end caps. So over the black paint went a thick layer of clear high gloss spray paint left over from another project that made those poles shine.
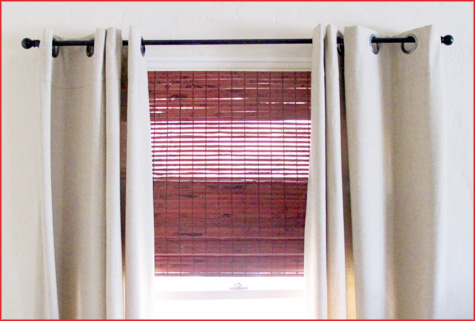
I wasn’t so sure of my plan after coat number one… but as soon as the glossy paint was applied, the end caps popped on and the panels re-hung, we were pretty happy with the finished result.

And no more bend! (Does the right side of the curtain look a wee bit higher to anyone else?) An easy fix for $1.75 per window.
I’m currently working on diy curtains for the bedroom as well – a little pvc piping, a few drawer pulls for end caps, a bit of paint… we’ll see if the finished project stands up to the industry standard!
Side note if you try this out yourself: After having purchased the dowels I found that each end of the Target rod was a different diameter, and thus so were the caps – they do this so that the rod can easily collapse in on itself. Plan on using a little bit of sand paper to shimmy on one of the end caps to each rod.


