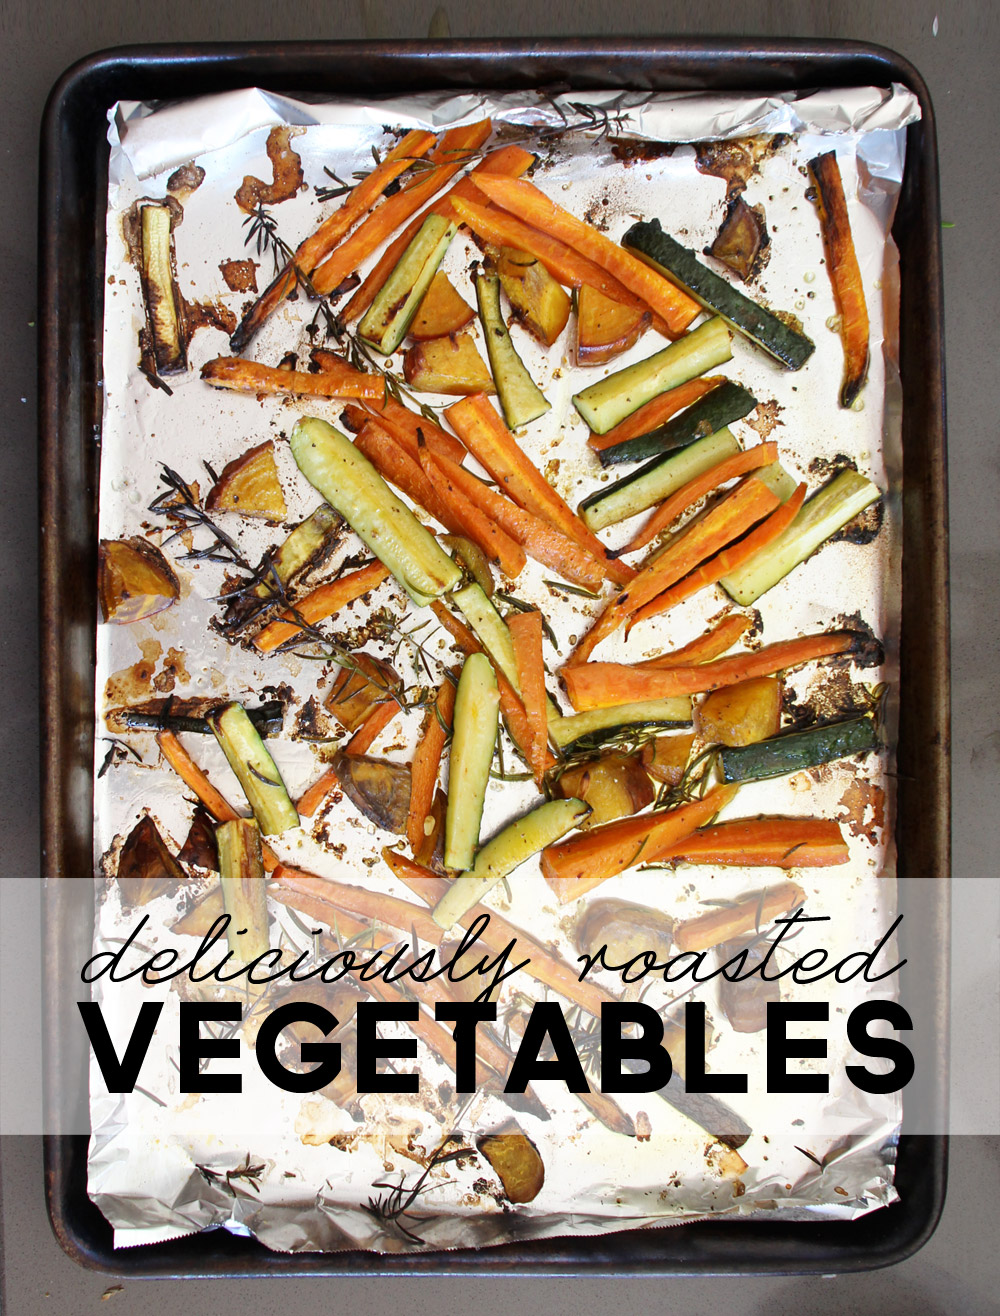
A Little of This & That… Renovating, Decorating, DIY Projects & Family

Good Eats: One of My Favorites… Roasted Veggies

YUM.

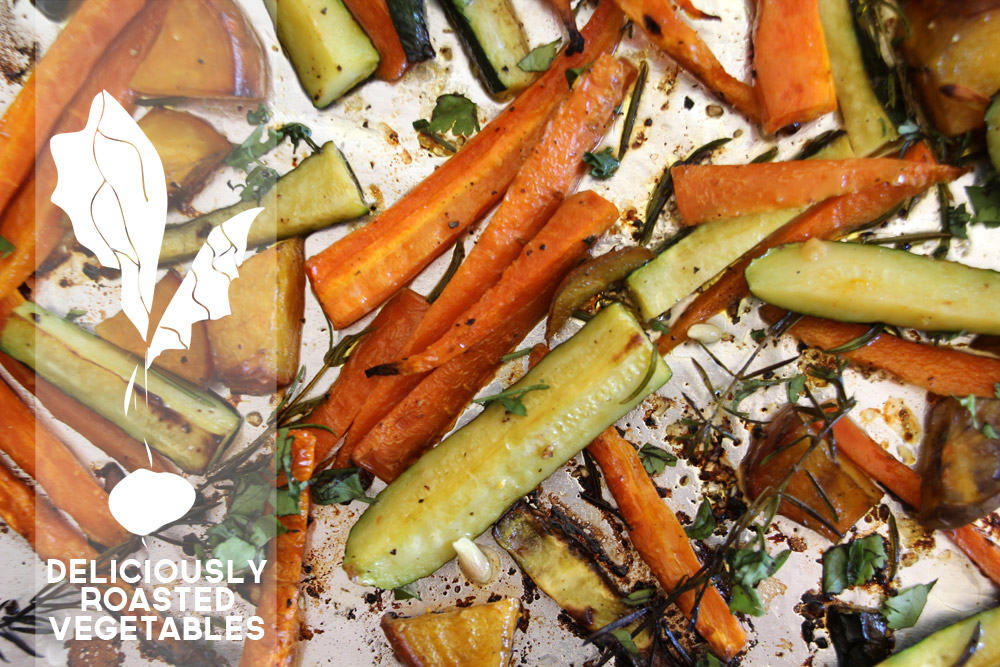
That about sums up this favorite that I wanted to share with you today. I am a huge fan of roasting veggies and I pop a full cookie sheet into the (hot, hot!) oven at least once if not twice a week. Roasting allows the natural juices of carrots, sweet potatoes, beets and even green beans to caramelize into sweet, gooey-yet-crunchy deliciousness (think tender and full flavored on the inside with a honey-coated crispy skin on the outside).

Tips for Deliciously Roasted Veggies, a How-To | PepperDesignBlog.com

I have a couple of tricks up my sleeve to make these extra delicious.

Back in college there was a small cooking school a few miles away from campus. On the occasional Saturday morning I headed on down to an awesome class on cooking fundamentals such as roasting, all things chicken or even an entire class on every sauce you can think of. I love to experiment and I love to learn how to expand my little toolbox of technique (which is meager, I must admit). Kev and my’s recent date night included a class called ‘Snout to Tail’ and it was on – yep, an entire pig.

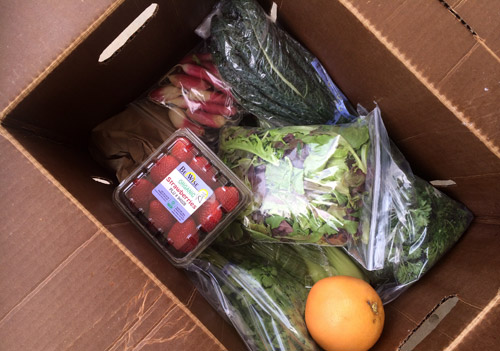
These veggies are a staple in our house because they allow us to really take advantage of our CSA veggie box contents, to make every meal nutritious, and to enjoy what is seasonal and of the earth that week (oh wow, that’s really always the tastiest).

Tips for Deliciously Roasted Veggies, a How-To | PepperDesignBlog.com

I also dig that the girls love every vegetable out there. Roasting takes it to the next level because roasted veggies taste almost as though they’ve been candied.

I attribute the girls’ great love of all things veggie to BLW, but if there’s ever any push back at the dining room table a quick mention of how that evening’s veggies were prepared (as in, ‘don’t you love the candied beets’) puts any obstinance to rest.

Tips for Deliciously Roasted Veggies, a How-To | PepperDesignBlog.com

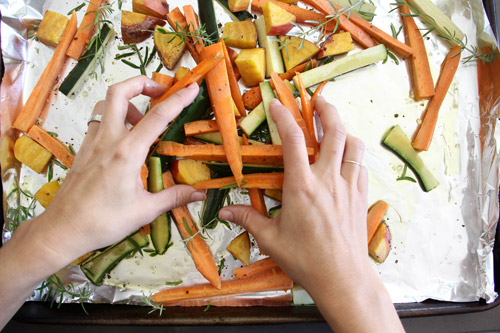
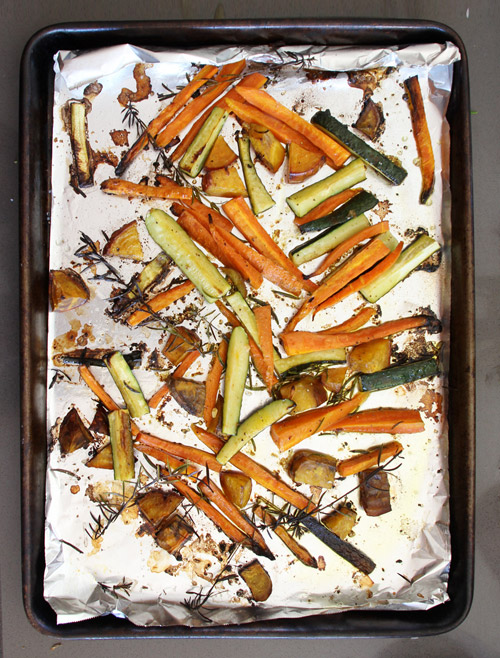
My tricks: all veggie chunks are of similar size for similar roasting results. I like to cut zucchini, carrots, parsnips and squash into strips, beets, Brussel sprouts and chard stalks, etc into chunks (which if you compared my strips by folding them up, they would be the size of the chunks and are about the same volume).

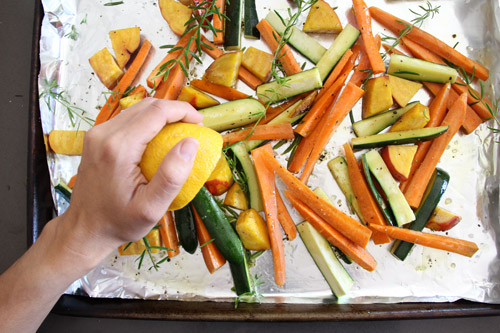
Another tip: plenty of freshly squeezed lemon juice before and right after they come out of the oven.

Tips for Deliciously Roasted Veggies, a How-To | PepperDesignBlog.com

I always line my cookie sheets with foil. These veggies will become so juicy and the last thing you want to be scraping off of your pan is sticky residue.

Tips for Deliciously Roasted Veggies, a How-To | PepperDesignBlog.com

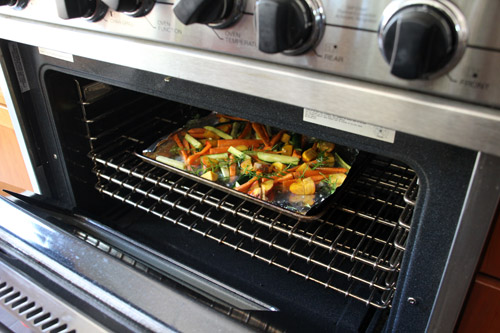
I preheat the oven to 450 degrees and then toss with the veggies: a coating of olive oil (not to the point that they’re drowning but a good layer), pepper and coarse sea salt (so key!), herbs that I have on hand (love fresh rosemary), a thorough dousing of lemon juice.

Tips for Deliciously Roasted Veggies, a How-To | PepperDesignBlog.com

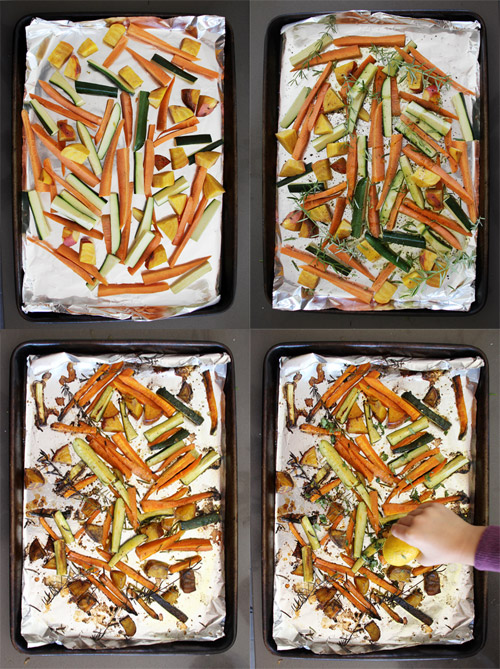
Into the oven they go for between 20 & 30 minutes (keep an eye on those guys, you want them to be cooked and even shriveled, but not burnt). Actually, the edge veggies might experience a little charring and that’s a good thing.

Tips for Deliciously Roasted Veggies, a How-To | PepperDesignBlog.com

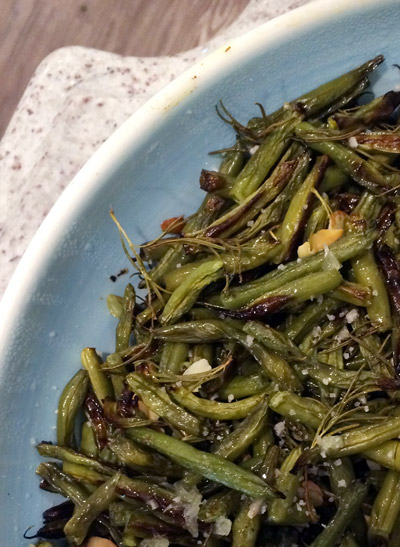
Soooo good for green beans, Italian broccoli and asparagus too.

Tips for Deliciously Roasted Veggies, a How-To | PepperDesignBlog.com

Happy roasting. Hard to convey how much I rely on this easy technique. It’s not as hot as broiling but I’m beginning to prefer cooking at these high temperatures. :)

Tips for Deliciously Roasted Veggies, a How-To | PepperDesignBlog.com

PS I’ll post a Taylor update on Baby Led Weaning soon, it’s been very easy this time around!

Hey ya’ll, if you’re free and would like to join in on a ‘Wallet Friendly DIY Decor’ twitter chat with me I’ll be over at Wise Bread to join Home Depot and Apartments.com at noon (PST) Thursday. Lots of fun ideas sure to be shared! 

One Favorite Four Ways: Black Leather Sandals

A while back I shared a pair of sandals that I had been eying. I’ve been on the hunt to replace my everyday summer sandals – there’s nothing like a great pair of comfortable, pretty sandals! – after four years (or more?) of wearing them into the ground.

Side note: don’t you sometimes wish that there was an awesome directory of every shoe ever made and you could just have your favorites ‘reproduced’ every few years?

Favorite Summer Sandals - 4 Ways | PepperDesignBlog.com

After hemming and hawing I finally bit the bullet and ordered these Matisse Paula sandals from Piperlime earlier this month. The verdict is now in – I think I may have found the perfect replacements to my previous, stretched-out favorites. The leather is so soft and comfortable, they have already molded to my feet and I can tell that I’ll be relying on them plenty in the coming months. They remind me a lot of my favorite shoes for Liv (speaking of, I ought to try the adult version one of these days).

Four ways to wear:

1 | summer scarf shirt & dark denim

2 | solo with a colorful maxi dress

3 | striped terry shorts and a blazer-style cardigan

4 | work-meets-happy-hour printed dress

Matisse buttery leather Paula sandals, so happy I tried you out.

PS I haven’t tried this particular pair out yet, but I just noticed that Dolce Vita has the exact same style (albeit a different ankle clasp) called the ‘Dekka’ sandal and it’s currently on sale for $34 over here.

PSS I affectionally call sandals like these my ‘dress up sandals’, as in a bit more fancy than my usual highly coveted rainbows :). Not sure any sandal will ever replace those beach bums.

DIY $8 Gold-Rimmed Cheese Board

DIY $8 Gold Rimmed Slate Tile Cheese Board | PepperDesignBlog.com

Hope that you had a beautiful Easter weekend! We spent ours out in Tempe, Arizona with Kevin’s family. Sunshine, wonderful people, good food, toooo much sugar. The recipe for a great holiday.

I wanted to share a quick DIY project that I put together for upcoming outdoor entertaining (now that spring has brought with it perfect outside evening weather in our neck of the woods).

DIY $8 Gold Rimmed Slate Tile Cheese Board | PepperDesignBlog.com

This DIY slate (it’s actually porcelain made to look like slate) cheese board was close to $8 to make – less if you already own spray paint – and makes a very easy and fun display piece for appetizers. Love broiled fruit with cheese now :). A row of them would be pretty, or perhaps spaced about a party for cohesiveness? You could also try for a larger or smaller square tile for a different look.

DIY $8 Gold Rimmed Slate Tile Cheese Board | PepperDesignBlog.com

DIY Slate Tile Cheese Board

Materials: 1 tile (I chose a 12×24 in a faux slate – it’s actually porcelain), wooden 1″ flat head plugs (found in the finish carpentry aisle), gold spray paint, wood glue, scrap wood

Any tile will do here. I chose a porcelain piece because it was pretty inexpensive ($3.50 for a 12×24″) and because slate is not so easy to find. If you were looking for the real deal you might try a tile shop that sells scraps. Quick note that stores like Lowe’s and Home Depot will often let you buy just one tile from their boxes of 10 or 25 if you just ask.

First up is painting the edges of the tile to give it that extra little bling. I found that rather than taping the tile, I simply placed the tile upside down on a scrap piece of wood and spray painted. It did the trick.

DIY $8 Gold Rimmed Slate Tile Cheese Board | PepperDesignBlog.com

DIY $8 Gold Rimmed Slate Tile Cheese Board | PepperDesignBlog.com

DIY $8 Gold Rimmed Slate Tile Cheese Board | PepperDesignBlog.com

DIY $8 Gold Rimmed Slate Tile Cheese Board | PepperDesignBlog.com

DIY $8 Gold Rimmed Slate Tile Cheese Board | PepperDesignBlog.com

Next is applying ‘legs’. The wooden plugs work perfectly as legs, you could also cut down a dowel to size (especially if you were interested in a taller stand).

DIY $8 Gold Rimmed Slate Tile Cheese Board | PepperDesignBlog.com

DIY $8 Gold Rimmed Slate Tile Cheese Board | PepperDesignBlog.com

Attached with wood glue and allow to dry.

DIY $8 Gold Rimmed Slate Tile Cheese Board | PepperDesignBlog.com

So easy and pretty! I think I might make several of these for outdoor parties this summer.

DIY $8 Gold Rimmed Slate Tile Cheese Board | PepperDesignBlog.com

Enjoy the start to your week!

On a side note… what do I do with all of this Easter candy??

Easter Egg Hunt, Taylor | PepperDesignBlog.com

I think that we may have participated in something like a half dozen egg hunts over the past two weeks. I can’t keep this stuff around.

PS more handmade gift ideas here, and crafty ideas (because I love me a good start-of-the-week project to think about…) here.

Related Posts Plugin for WordPress, Blogger...