It’s been a long time coming… but the kitchen is finally ready for its big reveal. We built the new kitchen from scratch from what was previously a den or tv room in the back of the house.
Here’s a look at the den before we moved in three years ago:
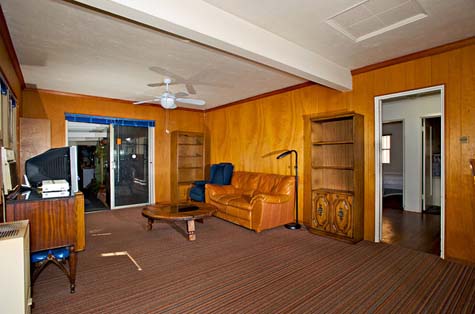
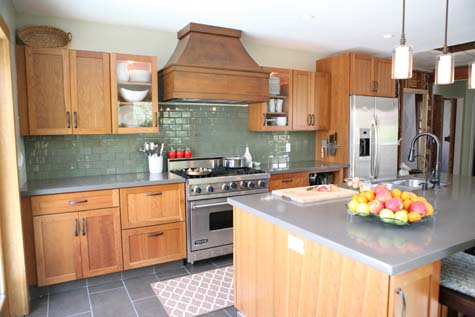
And now the space is a new kitchen!
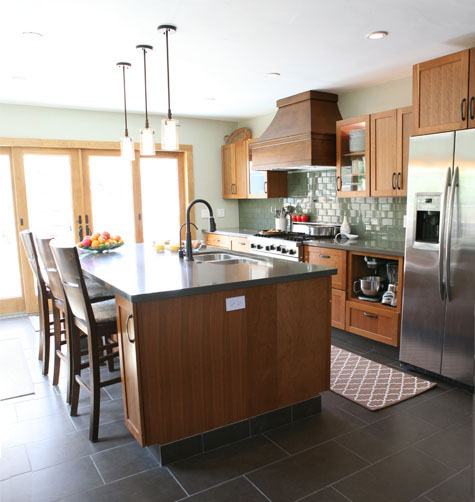
Since our 1930’s home was built in traditional San Diegan Spanish-style architecture, our goal was to create a contemporary kitchen that would compliment the original design of the home. To do that, we chose warm woods, oil rubbed bronze hardware, subway tile and Spanish-style lighting. Beyond that, we wanted a space that was fresh and modern! (Here’s the original inspiration post.)
If you were standing in the above photo looking at the new kitchen, the original kitchen (which received a 1970’s facelift somewhere along the way) was actually behind you. Here’s the kitchen when we first moved in:
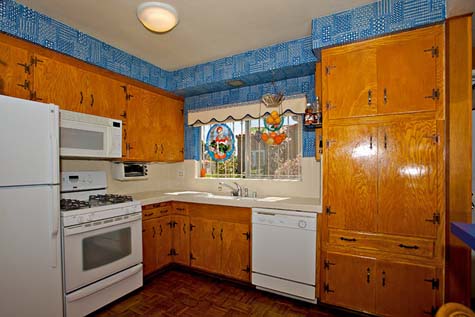
Within the first couple of months we had stained the cabinets a dark walnut, changed out the hardware and painted the walls a sage green – and that’s how our kitchen stayed for about two and a half years.
Here’s a shot from the back of the den looking in on the kitchen:
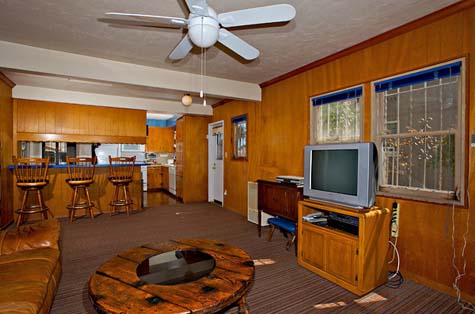
Today the older kitchen is the construction zone for a new third bedroom/office.
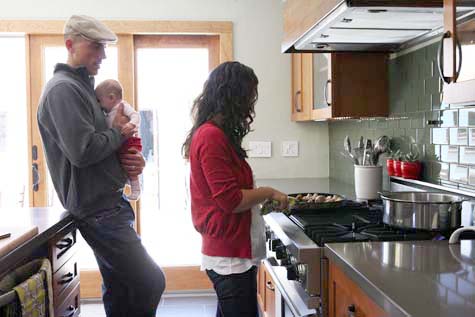
Jen of Papaya Sky (incredible photography if you’re from the SD area) took a few photos of us making breakfast to capture some of the details.
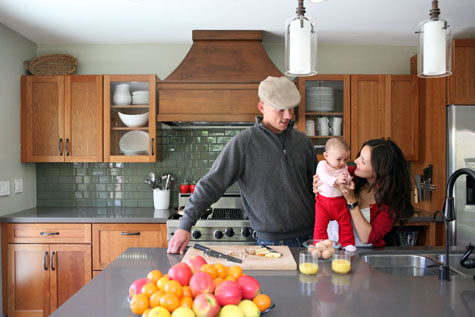
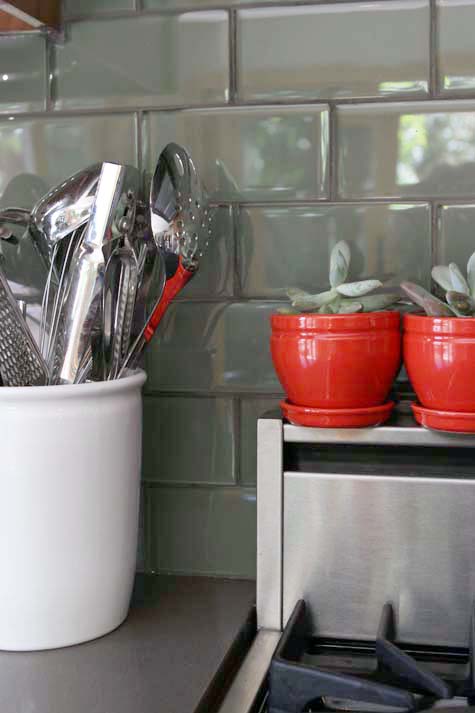
We chose Kraftmaid shaker cabinets from Lowe’s for their easy installation and great price. We found the backsplash subway tile at Arizona Tile and I love how the rich green glass looks against the honey-stained cabinets. Dark grey grout will help to hide stains.
We contemplated open shelving for a long time but settled on clear glass doors that keep dust at bay. I filled these cabinets with white ceramic dishware from our wedding (we chose basic white Crate & Barrel placesettings instead of china) and thrift store finds from here and there.
We began construction on the kitchen on September 1 of 2010, and Kevin nearly knocked it out in three months. The goal was thirty days of full time work – could it be done?
Here’s the breakdown: demo time! week 1, new walls – week 2, doors & cabinets – week 3, new tile & counters! week 4, and of course all of the little projects such as kitchen space planning, lighting details and new bar stool cushions. All in all it worked out to be about 6 weeks of full time work (full time meaning a full day dedicated to kitchen construction – a bit longer than our 30 day goal) over the course of three months. The kitchen worked out to be the perfect project while Kevin was finishing his winter quarter of school.
It was the little details that stretched out the kitchen timeline so that it wasn’t 100% complete by Christmas… but instead this spring :).

Our big splurge had to be the doors which now integrate the outdoor grilling and patio area with the kitchen. We added two 10′ sets of sliding doors along the back and side walls of the kitchen to bring in as much natural light as possible and to make indoor/outdoor entertaining a central function of the house. They also qualified us for a $1500 energy tax rebate this past April (here’s a helpful list to see what home improvements qualify).
Most thought they would be too big for the space – they nearly run into the cabinets along the back wall! – but I think they’re perfect.
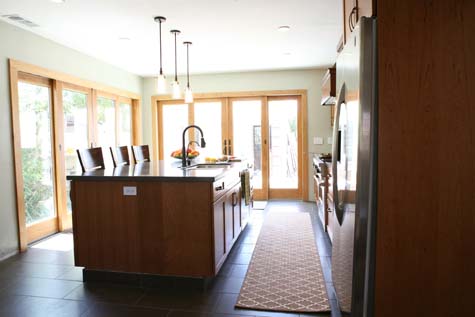

When the carpet was pulled up in the den we found a mis-match of wood flooring running in different directions with several beams through the middle of the room. Most of the wood in the house was salvageable – but unfortunately not in the kitchen. We opted for a dark, porcelain tile and ordered 12×24″ pieces for a modern feel.
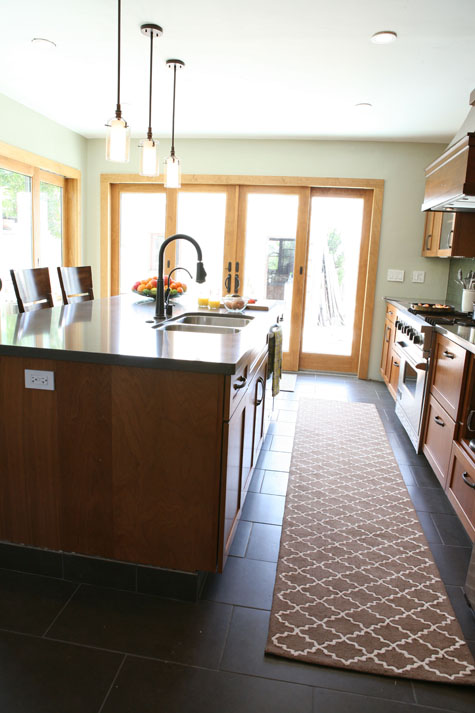
I’ve always been a sucker for dark counter tops… but how to balance dark floors and dark counter tops without creating a dark space? That was the dilemma. And what material? With so many options to choose from we really had to do our research. In the end we settled on Quartz – a fabricated material that combines natural quartz with a polymer resin and has been named by Consumer Reports as the top overall performing counter (plus it’s resistant to scratches, heat and stains!).
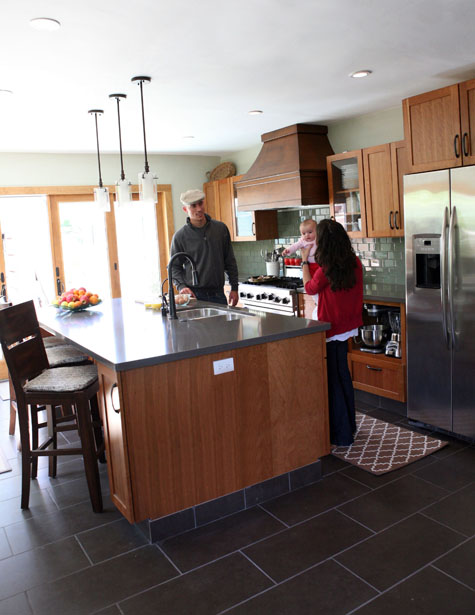
We loved the look of stainless steel appliances and scoured Craigslist every day (in about a 500 mile radius :)) to find pieces that would fit our budget. We scored a stainless steal fridge, viking range (drove over 300 miles to nab this beauty – thankfully it turned into a great roadtrip!), range hood, dishwasher and sink for anywhere from 40-80% off of the original price.
And that’s the new kitchen! All in all we guestimate that we saved 50-75% of what a contractor might charge for the same kitchen had we outsourced the work and bought everything brand new. We know that we’ll enjoy this space for years to come and it was all well worth it.
Here’s a breakdown of the sources:
Shaker-style Cabinets: Kraftmaid from Lowe’s
Quartz Countertops: Hanstone in Tiffany Grey
Porcelain Tile Floors: Arizona Tile’s Metro Leather
Backsplash Tiles: Arizona Tile’s glass subway tile in Kiwi
Appliances: Our appliances are a hodge podge of Craistlist finds. the stove is a Viking and the dishwasher and fridge are by GE.
Hardware and Accessories: the oil rubbed bronze pulls are from Cabinets Galore (a local mom & pop shop), the faucet is a Lowe’s 50% off bin find and we’re still waiting on that perfect pot filler for behind the stove (that’s what that nob is for). Craigslist, we’re watching you.
Rugs: Happy Trellis Rug in chocolate by Shades of Light, two jute remnants found at a local remnant shop that we had bound for next to each set of doors.
Wood Hood for Range: Cabinets Galore (a reject from a previous buyer that we had restained and fitted to our stove’s hood – it ended up costing us just 50% of the original value since it was a castoff).
Paint: Buzz Brown by Valspar
Pendants: Lowe’s Allen + Roth Bronze Pendant
Sliding Exterior Doors: Lowe’s
Bar Stools + Cushions: Craigslist find but I believe they’re World Market. The cushions were handmade handmade and the fabric is Petite Zig Zag by Quadrille Fabrics.
A few more ways to save:
Purchase coupons on ebay to use for big ticket items, sign up to receive store emails for an extra 10% off, ask about in-store discounts (we received 10% off our cabinets because Kevin had been in the military), take advantage of competitor coupons – nearly all stores take them, ask for bulk discounts (such as for pulls for all of your cabinets), check out state rebates (like those for energy efficient updates), Craigslist! for both products and supplies – more than once we’ve scored extra tile, wood planks, even sod from a contractor working on a big project, hire independent contractors (no, they usually don’t have a Yelp review but a personally referred electrician will do the job for half the price of a big business – just be sure they have the appropriate license and insurance), offer to split work (if you hire a contractor, only pay for what you don’t know how to do. If you order anything custom, take care of the painting, installation yourself – we ordered our doors unstained, purchased the same color as the cabinets and took care of it instead – saved a bundle), and finally, DIY as much as possible! there is a wealth of resources out there to help. Every little bit adds up!


