A Little of This & That… Renovating, Decorating, DIY Projects & Family

Living Room Update: Plain, Safe White = Boring?

The living room is secretly getting an overhaul without us even realizing it. As we’ve been concentrating on the new office/guestroom, I’ve casually found items to diy, that are on sale or while Craigslist shopping that happen to be on my ‘living room list,’ and have slowly added them to the mix. But without meaning to, really!

It started with this new mantel, then I jazzed up the new mantel with the mirror from the dining room and decor from the garden (more on that soon…), then added these new cloth napkin throw pillows, after that was a new lamp for the office – but it came in pairs so one ended up in the living room, and just this week – a new rug! For a mere $75, including the super sweet rug pad.
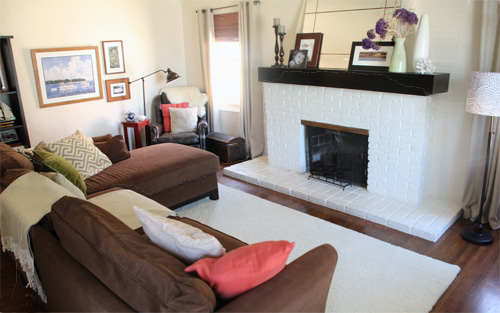
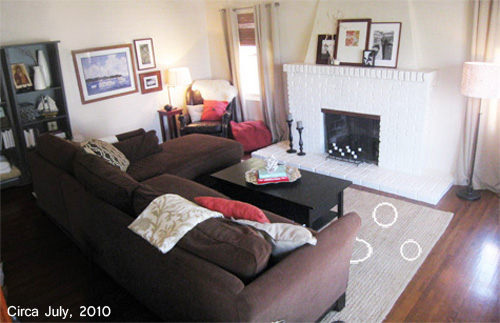
The rug came about quite accidentally. We’ve had the same chenille jute rug since moving in about three years ago and it definitely has seen better days. In fact, I can tell you with certainty which stain on the rug was associated with which unsupervised Bodie incident. Now Bodie is a great dog – never was a chewer and is usually quite obedient around the house. But if we leave him for an extended period of time and there’s, say, See’s candy on the dining room table, or an irresistible bowl of faux orange pumpkins for Halloween, he’ll help himself, settle down into the rug and create a ridiculous mess. Stomach issues aside, he’s inevitably ashamed when we get home and discover the new carpet spot. Bad dog.

This photo is pre-spots – but the circles show where the pumpkin and See’s suckers became engrained in our rug for all of eternity. We tried steam cleaning but it’s not recommended nor really possible on a natural fiber rug. We tried flipping the rug to hide the stains, but low and behold we had already used that trick for a spilled something a couple of years ago.

SO with Liv now crawling I’ve been on the look out for a new rug that would meet some criteria:

  • Cheap! (we’re not ready to shell out $500-1000 for the traditional 8×10 rug)
  • Soft and plush (no more jute – even though chenille jute is soft, we want something softer for little knees)
  • Must be a cut pile rug (Bodie’s shedding gets caught in flat weave or dhurrie rugs which is such a shame, plus the cut pile rug means we can use a carpet cleaner on it, something you just can’t do with jute. And for us that’s huge.)

I really wanted something with a little interest and I have kept my eyes open for a great patterned rug.
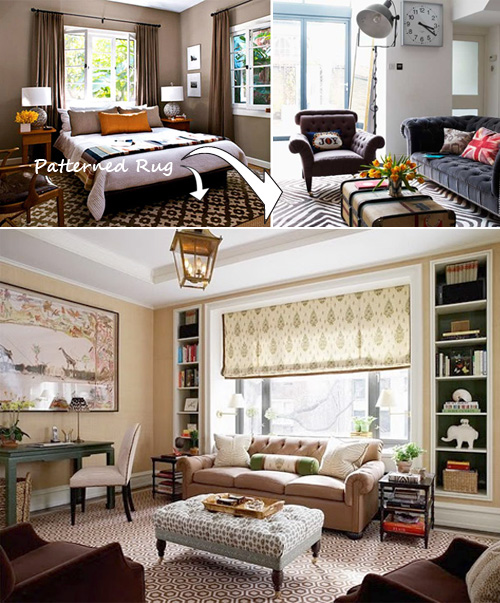
But finding one on a small budget was tough. That plus a pattern that I thought would work well in the room.

And then I fell in love with stripes. How great would a striped rug be?
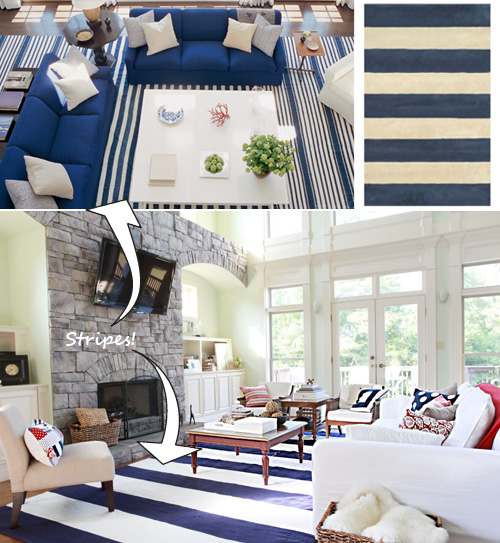
The above striped rug (in the Bower Power living room) is on sale for $159! Alas it’s a flat weave rug meaning Bodie’s shedding hair will be forever embedded in the fibers and your random stains won’t come up with a steam carpet cleaner (our favorite friend). The above right rug is from RugsUSA.org and while it’s cut pile, it was still to pricey for us right now.

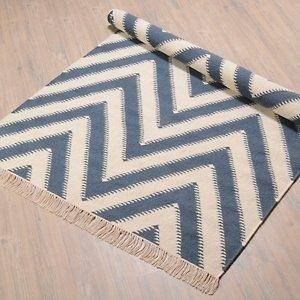
I decided the CSN Nate Berkus chevron rug was perfect before I discovered it was both sold out and flat weave.
Time was a ticken’ (who knew Liv would crawl so soon) and I needed to find something that would work well in the space while meeting all of our criteria. Then I discovered this living room on Houzz:

Maybe a white rug wasn’t so boring after all? Maybe it was a great neutral that would both brighten up our living room and meet all of our needs in terms of cost, ease of cleaning (if it was cut pile we could use a shop vac and water to get those stains right up – it works wonders on white!) and could be found in a soft material for crawling?

I reached out to the designer of the above room on Houzz (a very cool feature, by the way) and this was a pricey pricey rug. But! I decided to track a cheaper version down anyway. It wouldn’t have that beautiful diamond pattern but heck, I needed a kid-friendly rug.
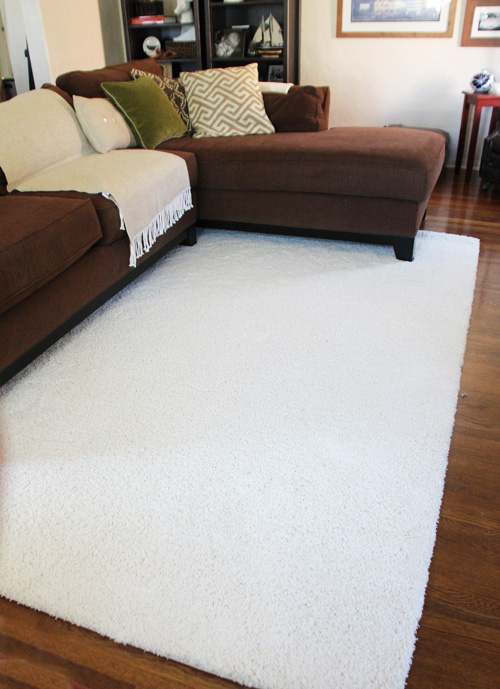
My first instinct was to see if Craigslist offered any options that were still in great shape. Low and behold! An Ethan Allen white cut pile rug for $100. The seller offered $75 if I picked it up right away, and to my surprise, it came with a really thick rug pag (Note: rug pads are awesome. Rug pads should never be skimped on, they make the biggest difference in softness and help to plump up even the cheapest, thinnest of rugs to help pass as the more expensive version!).

When the rug was home and rolled out it looked surprisingly like the carpet we had just installed in the new office. As in identical. Then I began thinking… we actually have remnants left over from that installation that would probably be the right size. A little research revealed a measly $2/foot will get you a brand new, bound carpet rug from a remnant shop.

So when this lovely gets too many baby & dog stains to keep up with, it’s replacement is waiting in the garage. And the price? Probably around $60 to have the edges bound.

Bodie digs the new rug and couldn’t wait to try it out.
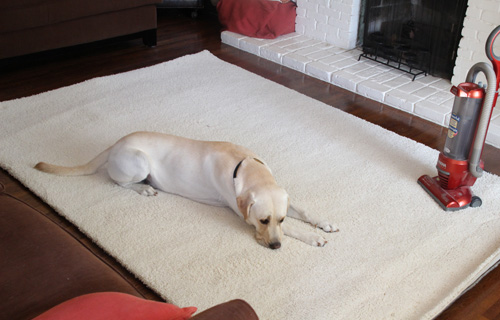
You can’t beat perfect-condition, $75 rug that comes with a rug pad (probably more than $75 itself) that is both pet and baby friendly. One day we may get that striped or patterned rug, but for today this is a great solution.

The coffee table is missing in the above shot, for the moment we have it pushed up against the front window so that there’s premium crawling/entertaining space for Liv.

My main focus is still the office/guestroom – man I can’t wait to have that finished, though I do love the process. But as new little treasures are found for the living room, we’ll see what design ideas grow!

Going Green: Cloth Diaper Update

We’ve been using cloth diapers on Liv for a little over 6 months now and I thought I’d share a little update.

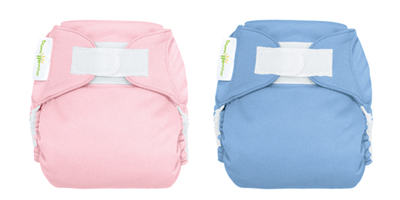
First, while it’s a bit more work than the conventional, we really love it. It’s environmentally friendly (reduces our waste by about 2,500+ disposable diapers), tush friendly (no diaper rash to date) and wallet friendly (to the tune of about $1500 over Liv’s first two years). Plus, they look great with a little dress. Sometimes I even color coordinate Liv’s outfits based on her diaper colors for the day ;).

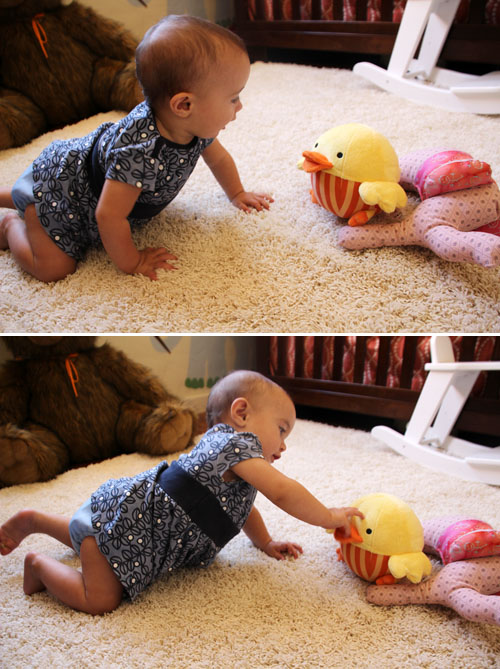
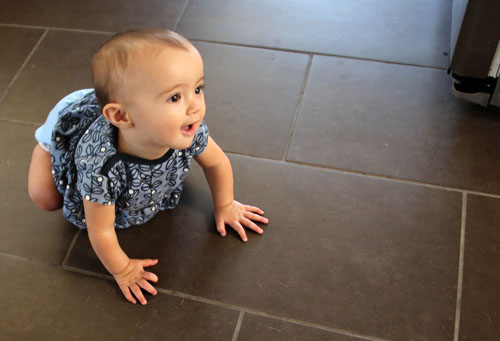
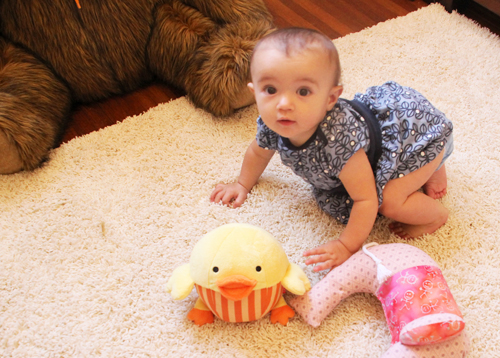
Liv’s crawling! I can’t believe it. Shortly after she turned 6 months old she began the unsteady rock, and then two weeks later, zoom – she can now follow us from room to room.

Back to CDing… As you might recall,  I tried out quite a few of the cloth diapers currently on the market hoping to find that ‘perfect fit’ (in terms of type, sizing, material, etc). Here’s more on CD testing/reviewing 1, 2 and the initial results. In the end I found pros and cons to all of the different brands and styles. The biggest lesson? It’s all about personal preference and what works best with your little one.

So… now that Liv is rounding 17lbs we’re getting ready to size up. Maybe half of my diapers are actually ‘sized’ diapers rather that a ‘one-size-fits-all’ diaper. The sized diapers we use now are extra small and small, and we’ll need to move to size medium soon.

We don’t use all OS (one-size) diapers because I actually really prefer the sized versions. They fit Liv more snugly and without as much bulk. That aside, the benefit of OS diapers is that you can invest in just one stash from about 8-35lbs (so economically it is the smartest solution).

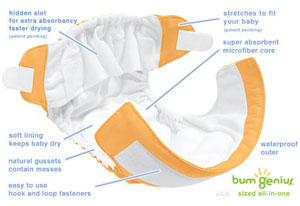
In about a month here, I’ll be retiring maybe 12 small diapers and investing in 12 mediums to rotate into the mix. Which one am I ordering? Of all of the versions that are in my stash, I always reach for the BumGenius 3.0 all-in-one sized diaper first. (Though I must say, my stash of mini/small Happy Heinys is a close second!)

I had mentioned before that Liv is a little bit of a soaker, so I love that this AIO (that’s CD speak for all-in-one) has a built-in liner AND a pocket. I stuff that pocket with an extra insert and we’re golden. The fit is great, the velcro is a huge plus (easy to fasten on a super squirmy baby) and the design is leak-proof for us.

I know, I know – the one thought on everyone’s mind. What about the poop? Breastmilk poop is 100% water soluble so diapers from 0 to 6 months are tossed right into the diaper pail which is emptied right into the wash (yep, the same machine that gets sweaty athletic equipment, dirt-covered construction t-shirts and towels covered in sand from the beach clean does an awesome job on diapers). Just like not having to do a rinse cycle between loads of whites using bleach and regular clothes, your washing machine keeps itself really clean making it so easy.

Now that we’re  to solid foods it’s a bit different… but happy to say, a much appreciated change. Solid food poop – pardon my French – plops itself right into the toilet. I occasionally use a flushable liner or gDiaper disposable (but still biodegradable) insert on top of the cloth diaper by laying one end under the above pocket flap and leaving the rest exposed. Then everything is contained and thrown into the toilet or trash (if I have a biodegradable bag in the trashcan). When our new bathroom is finished, I’ll probably connect one of these.

The bummer? BumGenius sized diapers are discontinued. I don’t know why, but this brilliant little bum hugger is no longer on the market. The plus? I’ve purchased nearly all of my BumGenius stash at a discounted rate through online and local suppliers. (Google them, they’re still out there!)

UPDATE: I have since had several smaller retail shops contact me about these specific diapers – if you’re looking to purchase sized AIO BumGenius 3.0 diapers, please shoot me an email and I’ll get you in touch with the sellers! All are willing to match the Cotton Babies discount price :): morgan@pepperdesignblog.com.

Here’s a great blog to subscribe to if you’re new to or interested in CDing: All About Cloth Diapers, a reader recommended blog: Dirty Diaper Laundry (check out the cloth diaper finder!), and a reader’s blog: Cotton Bottom Mama.

That adorable dress is from Tea Collection, which was just recently featured over at HauteLook at 50% off.

So we’ve used cloth diapers for 6 months now and I hope to use them until Liv is potty trained, and then to use the same cloth diapers on our next baby. But admittedly there are times when a disposable diaper is WAY more convenient, and I’ll be back to share our favorite way to diaper while traveling.

Don’t worry, if you’re not loving all of the dirty talk around here, our office/guestroom is really coming along and it’s just about ready for an update!

Living Room Update: New ‘Invisible Zipper’ Cushions

So the sun has been shining with full force and the weather has been warm! and then just like that the switch was flipped and this morning we have grey skies here in San Diego. Oh funny weather…

A way while back I had mentioned finishing up a couple of sewing projects that involved zippers, one being new throw pillows for the living room. And these aren’t just any zippers, they’re the infamous invisible zippers! I accidentally purchased a ton of these for a few new projects around the house, and then realizing my mistake (and being a bit stubborn) I set out to tackle the invisible zipper rather than return for the regular version.

You’ll find invisible zippers on most store bought cushions and pieces of clothing, they’re great because when applied correctly, the zipper literally disappears within your fabric.

The new bathroom project is hiding there in the background. We’ve had to pause that guy temporarily while we wait on permits and Kevin works on summer school.

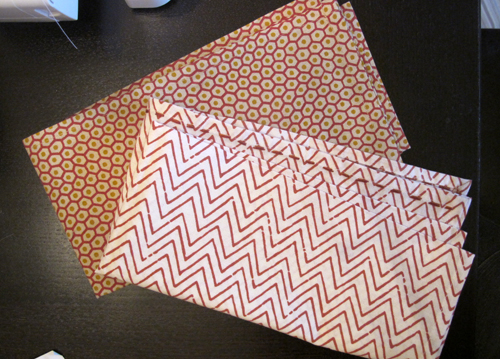
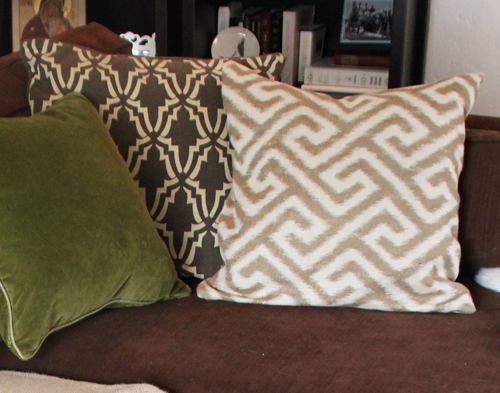
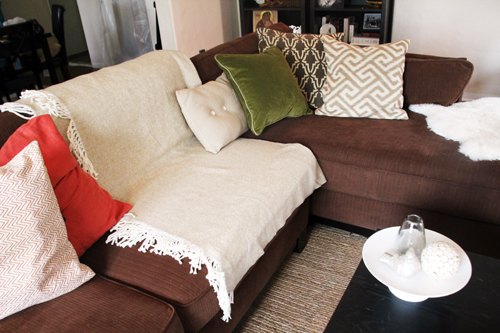
I found a few clearance napkins at West Elm that fit with my color scheme and I knew they’d be perfect for the project at just $4 a pop. That plus left over fabric from my favorite nursery glider makeover (that awesome tan ikat) left me with three new pillows that were quick and easy to sew up.

I researched a few slipcover pillow ideas but settled on adding a zipper because I knew that I wanted these pillows to really stand the test of time. Plus, I was dying to experiment with zippers, something I haven’t tried in ages. The first pillow was a challenge (think twisted, inside out fabric and thread), but as soon as I had the ‘invisible zipper’ down, the other two were easy peasy. It looks difficult, but I promise that if you go that extra step to hide your zippers, you’ll love the results.

For stuffing, I usually cover up an existing throw pillow. You can also purchase bags of filler at your local fabric shop for a few dollars. If you go that route, I recommend making an insert for your pillow as well so that you’re not constantly fighting clumps and wisps of filler material as you zip and unzip your covers.

***************************************************************************************************

Sewing Throw Pillows with an Invisible Zipper

a
Materials: 2 19×19″ squares of fabric for one 18″ pillow OR a set of cloth napkins, an invisible zipper (two inches shorter than one side of your pillow, though you can always shorten a longer zipper by sewing across the zipper, too), zipper footer for your sewing machine, complimenting thread, threaded bobbin, pins, scissors, pillow stuffing/inserts

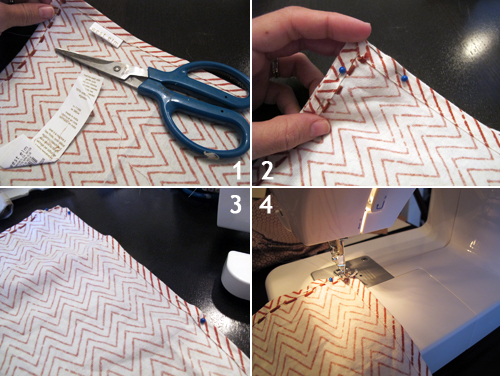
1. To sew an 18″ pillow, cut your fabric into two 19×19″ pieces. This should allow a 1/2 hem on all edges. Remove one set tags if you’re using a napkin – I like to keep one set hidden inside with washing instructions for the future. Baby + dog + dinner parties = definite spots :). Cloth napkins are great because they’re already hemmed and provide a clean finish on the underside of your new pillows. Plus, they’re the perfect size!

2. Pin the fabric/napkins together at the corners with the top sides facing each other (we’re going to do this first step with the pillows inside out).

3. Add a pin roughly half way between each corner.

4. Sew three sides of your pillow together, leaving just the edge for your invisible zipper open.

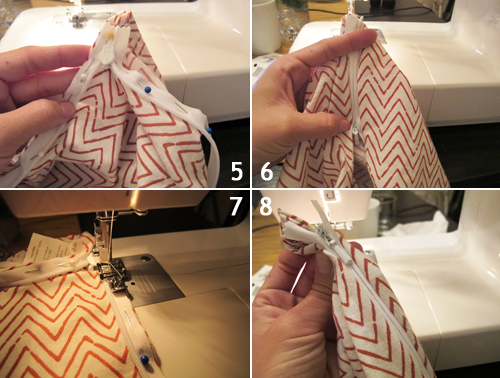
5. Now comes the tricky part. The easiest way to add your invisible zipper is to pin it in place as you imagine it functioning. Go ahead and pin your zipper in a couple of inches from the edge so that you leave yourself a little working space. We’ll close that up at the end.

6. Then flip your pillow right side out and try it. If the zipper opens and closes correctly without twisting any fabric, great job – you nailed it on the first try. It took me a couple of times of pinning, flipping, repinning to get this just right. Note: if you’d like, you can iron your invisible zipper flat before pinning to help you get as close of a stitch to the zipper part as possible.

7. Add your zipper foot to the sewing machine. It usually comes with your machine in that little parts bag below the main compartment, but you can also pick a plastic one up from the store for a few dollars. Sew your zipper edges to the fabric running that little zipper foot right up against your zipper.

8. If you flip your pillow inside out now, you’ll notice that your zipper closes (yay!) and that your fabric edges are hidden.

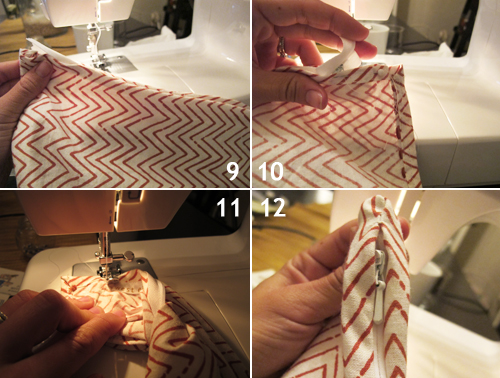
9. This picture illustrates the end of the zipper which has been left open – that’s the extra ‘working space’ we left from step 5.

10. Lifting the zipper out of the way, pin together the two loose ends of the pillow.

11. Now sew the two pinned pieces together, don’t forget to repeat on the other side (don’t worry about the loose zipper portion, it’s hidden inside your pillow).

12. Flip the entire pillow inside out and you should have a clean, finished end and an invisible zipper!

Stuff your insert in your cover and your throw pillow is done!

Love how the new pillows look, the added patterns were just what the space needed.

Related Posts Plugin for WordPress, Blogger...