A Little of This & That… Renovating, Decorating, DIY Projects & Family

Office Makeover: All of the Trimmings

I love moulding. I adore moulding. Rooms that are trimmed with baseboards, lined windows and crown moulding have that clean and ‘finished’ look that’s hard to beat regardless of how much decorating and attention other areas of the room get. It’s the icing on the cake, the cherry on top, the well-deserved encore. I wish I could heed my own advice and install moulding in every room tonight, but it’s one of those painstakingly slow projects that despite the great results, is usually last on the list to get done (part of that is for good reason… you want your carpet and your wallpaper to sit under the molding, after all).

The new office just received her baseboards and window trim, though!
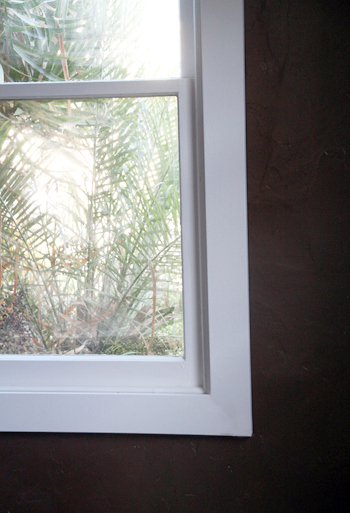
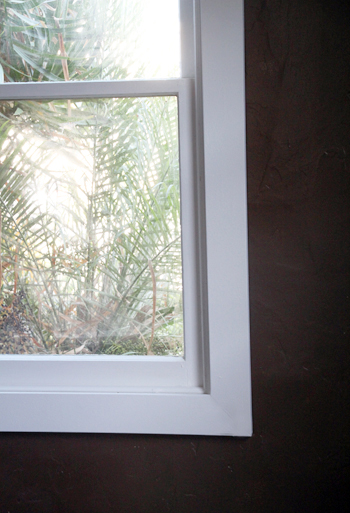
Wow, what a difference. Now that brown pops right off of the walls!

While traditional moulding can be quite fancy with all of the little grooves and edgings, I’ve always preferred classic and simple. It stands the test of time (in fact it looks more original in an older house) and provides a clean framing. I love the simple style so much that when purchasing, we opted for cheaper 1/2″ x 12′ boards rather than the pre-primed moulding options available.

For the floors, we chose a larger-than-average baseboard and it really helps to ground the space.
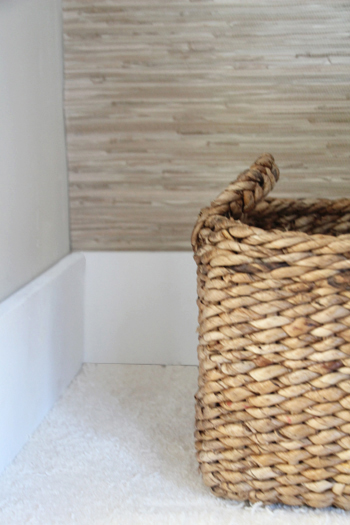
The trick to installing moulding as efficiently as possible is to measure twice, cut once (lesson learned). Each cut received a 45 degree angle so that the corners disappear into each other and it’s oh-so important that that 45 degree angle is cut in the right direction at the right length, otherwise you end up with a lot of re-dos.

With that comes the suggestion to make all of your cuts before you begin painting. It’s almost inevitable that you’ll make a bad cut and it’s such a shame when it’s on a 10′ baseboard that you’ve just primed, painted and repainted.

After painting and drying comes installation. We used a nail gun attached to a compressor for a quick install, making sure to nail the baseboard to the wall at each stud (usually 16″ intervals along the wall). The window trim received a nail each 8″ or so, plus the corners.
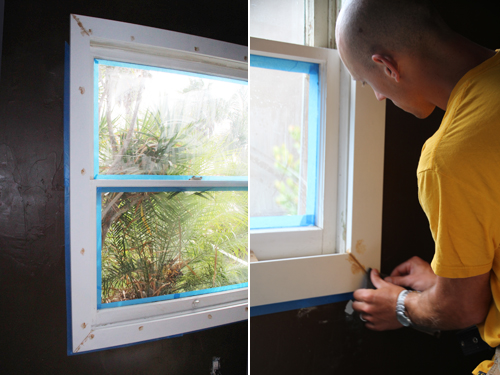
Next is caulking. We used plastic wood, a filler similar to caulking but one that dries as closely to wood as possible for the fewest seams. We filled those new nail holes, creases and gaps and then gave the plastic wood a good day to dry. A generous amount of sanding ensured that the filler was even with the original wood trim.

Finally the molding was painted over one last time to hide all of the new brown plastic wood filler spots. Speaking of paint, I read somewhere that bright white shows the most dust and that a shade just off will help to hide smudges. We’ll see how that works out!
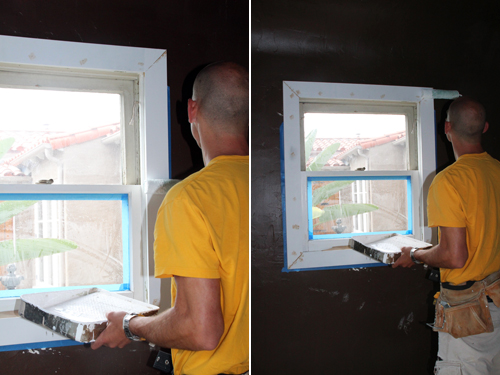
And now those rich chocolate walls have white (or just off-white?) trim to help brighten the space! It looks great and I wish I could wave the magic wand to outfit every room with this simple but great looking moulding.
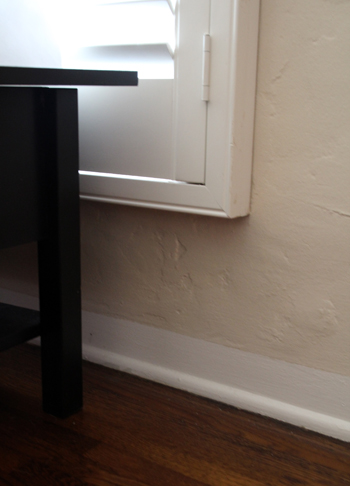
We painted a ‘faux’ moulding while originally painting each room (here’s a little clip of the living room) when we first moved in, hope to replace this with the real deal someday:
While we didn’t tackle crown moulding this time around, the room is beginning to take on that ‘finished’ look!

For more Office Makeover posts, check out: dining table-to-deska new desk & bookshelves, installing remnant carpeting, grasscloth wallpaper, painting the office nookfinding carpet for the office, chocolate brown wall ideas, plastering progress inspiration for a diy desk, back in action!, desking hunting for under $300, bookcases under $300, inspirational rooms, room layout options, demo part 1 & demo part 2.

Office Makeover: Chop It Down, Chop It Down

Hope you had a great weekend! We’ve been busy over here c-l-e-a-n-i-n-g. If there’s one thing I hate about a project it’s that after you tear everything out of a room and transplant it to the garage, you have put it back into the space when you’re finished (on the plus side – our office is finished enough to begin putting everything back!).

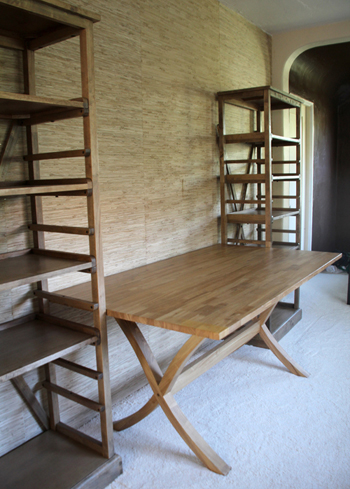
You might remember that I found a dining table for the office that would work perfectly as a new desk. Well, a couple of weeks of functioning as a desk and we’re realizing the table is too big. I was originally hunting down a desk that was bigger than average, but my Craigslist dining table sticks out pretty far into the room when it has a chair pulled up to it (it’s a pretty narrow room). Bummer.

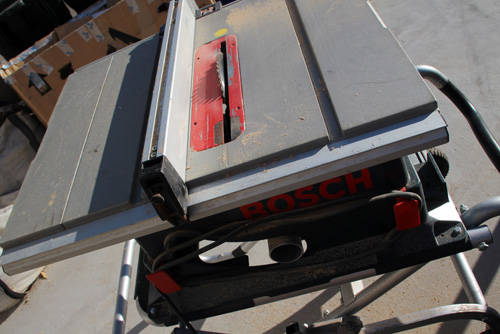
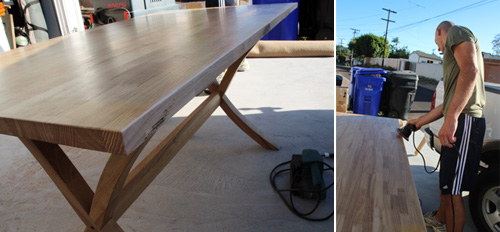
So the solution? Chop it down. We took the dining table out to meet the table saw and after flipping it over so that the table was legs side up, smoothly cut off several inches along the back side. Table liposuction.

Here’s a nice angle showing off our alley and trash cans. The newly cut side received a quick sanding to get rid of any rough edges or large splinters.

The front was left untouched so that we didn’t have to stain any raw wood. Then we brought the table back in and pushed the newly cut edge tight up against the wall.

While a few inches doesn’t sound like much, it made a big difference once the table was back in place as a desk.

Can’t tell the difference? I know… it’s not too exciting but it goes to show how easy it is to modify a Craigslist/antique/thrift store find with a little help from the power tools.

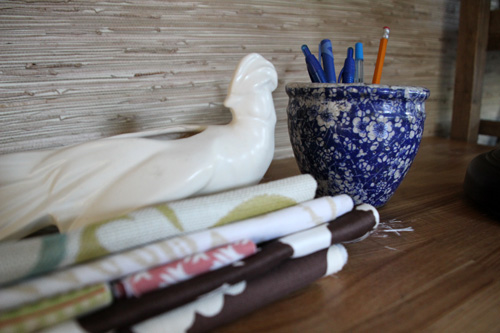
Check out these great souvenirs from our recent trip to Iowa:

Don’t they just scream Iowa? Just kidding. They’re the most unlikely to be picked up on vacation but I saw them in an antique/garden shop in little Woodward, Iowa (where Kevin’s Dad’s family is from) and found a way to stuff them in my suitcase. That’s a white ceramic lounging bird there on the left and an old flower pot on the right. The first accessories for the new space :). And those fabrics are just the start of what I’m gathering for the room.

So cutting down the desk was no big deal – a quick one hour project including moving the piece of furniture, cutting, sanding and putting ‘er right back where we had found it!

For more Office Makeover posts, check out: a new desk & bookshelves, installing remnant carpeting, grasscloth wallpaper, painting the office nookfinding carpet for the office, chocolate brown wall ideas, plastering progress inspiration for a diy desk, back in action!, desking hunting for under $300, bookcases under $300, inspirational rooms, room layout options, demo part 1 & demo part 2.
Going Green: Diapering On The Go

Today’s post is a quick follow up to my last cloth diaper follow up ;) from Monday. I had mentioned that we don’t cloth diaper when we travel, but being huge proponents of the whole Go Green thing, we found a simple solution that’s still earth friendly (I’m such a fan that on days when Kev takes Liv out for errands, I happily hand over these disposables, too).

Biodegradable diaper

They’re called Broody Chick Diapers and they are fully compostable and completely biodegradable (GroVia makes a version as well). What a great combination! We roadtrip tested these and they receive an A+ for zero issues (you know, the usual issues that might make you nervous with a plastic-less bum hugger).

But – and that’s a big but – for that sweet earth friendly combination to work out, you must dispose of them in an equally biodegradable bag or your entire mission is foiled. See, what a lot of people forget is that when you wrap a diaper (or anything for that matter) in a traditional plastic grocery bag or trash bag, it’s now a plastic diaper ball encased in a material that won’t allow it to break down, even if the diaper is a compostable one.

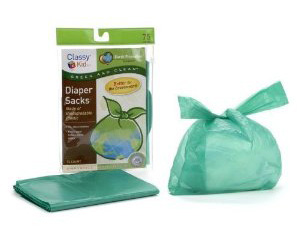
Biodegradable Diaper Bags

That’s why when we travel I also tote around a small roll of biodegradable sacks (the same kind you probably use when you take your dog for a walk) so that I can seal up a dirty diaper and then dispose of it in a dumpster (rather than a trash can which is also lined in a plastic bag). When on long journeys, such as a recent week-long family trip to Sedona, I keep a 3 gallon BioBag in our bathroom which I slowly fill up with Broody Chick dipes – and then toss into the dumpster upon leaving. Just like you might throw away a diaper pail’s worth of normal disposable diapers.

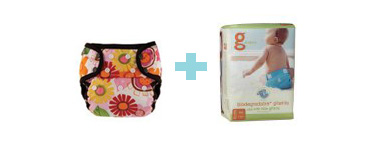
If you’re a CD momma, then you know that a second option for traveling would be hybrid diapers, or diapers that allow you to use a cloth or disposable insert. My choice for a hybrid solution is a WeeHugger diaper cover plus a biodegradable gDiaper insert (gDiaper medium cloth inserts work great with these as well). PS cloth diapers make great swim diapers! So they get two points for their space in the suitcase.

Diapering on the Go

But you kind of end up in the same dilemma – unless you’re tossing that biodegradable disposable insert into biodegradable bag (or flushing it or composting it), you’re thwarting all of your good intentions. The plus is the bags are readily available and super duper hardy – we’ve experience no breaking or splitting that you might expect from a cornstarch sack. Yes, degradation of an insert in a biodegradable bag in a landfill will take longer than composting, but it’s a whole lot quicker than the 500+ year alternative.

And as for the non-biodegradable disposable inserts, my thought is you might as well use a disposable diaper OR a cloth diaper and a small travel wet bag (to carry your dirty cloth diapers) since chances are you’ll be toting around a soiled/wet diaper cover by end of day (disposable inserts mean you can use the cover two-three times with a wet diaper before needing a new one, but the possibility of  a dirty cover is always there).

By the way, if you’re new to and interested in cloth diapering, check out Dirty Diaper Laundry’s AWESOME Cloth Diaper Finder tool to search through hundreds of diapers for your preferred style, size, material, closure and more. Such a great tool – wish I had known about it six months ago (Thanks, Elle, for sharing).

And there you have it – I tote a small wet bag and extra CDs when running errands around town, and Broody Chicks or WeeHuggers + gDiaper bio inserts and biodegradable bags when it comes to long trips for business or play!

Related Posts Plugin for WordPress, Blogger...