A Little of This & That… Renovating, Decorating, DIY Projects & Family

Kitchen Update: A Sticky Situation + A Neat Feature

Hope you had a great Labor Day weekend! We spent Monday relaxing, having lunch with friends and visiting the park. Such a great way to spend the day off!

Here’s a quick fix that I finished up yesterday too – a solution to our slippery slidey kitchen cushions that may just swoop out from right under you when you sit down.
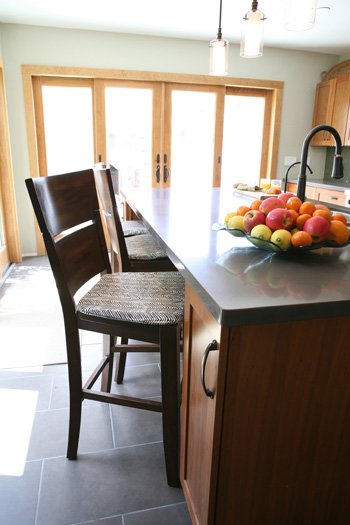
You may have noticed when we added the cushions (from this great fabric) that I decided not to add ties for around the barstool backs.
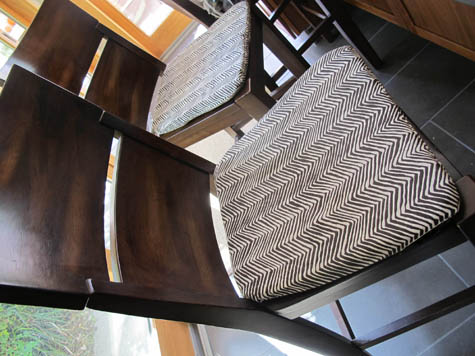
I don’t really love the look of ties (though they are so practical) and I wanted to keep the lines modern.

But… those darn seats slide up and off all the time. I didn’t think I would mind so much, but it’s kind of annoying.

So when I came across these picture frame velcro fasteners at a Joann’s, I thought I’d give it a whirl. These are built for securely fastening objects like frames to walls, and I figured if they’re strong enough to hold a picture, they should be strong enough to hold cushions on a chair (even with the weight of a person sliding forward or back).
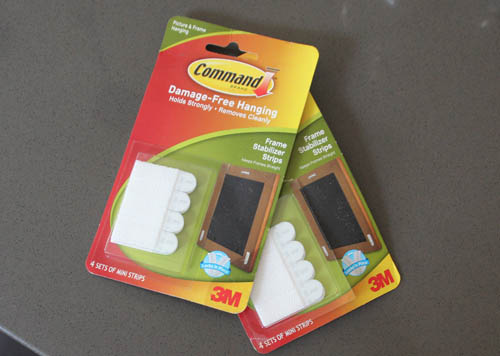
Plus, when you’re ready to remove them from the wood of the chair, a little soap and suds is supposed to take them right off.

The seat of the barstool reieved a fastener on the top and each side, then the sticky end came off and the cushion was applied directly to the top of the sticky velcro. I pressed down on each cushion-to-velcro piece for at least 30 seconds to ensure a very tight stick.
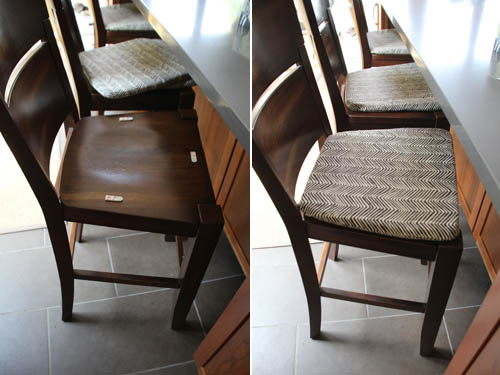
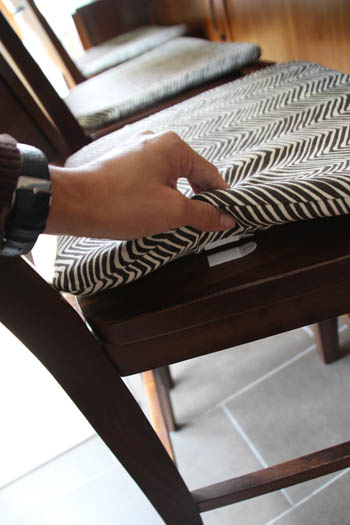
So far so good! This velcro is strong! I attempted the above with just two pieces for a cushion and that wasn’t as secure, four may be even better.

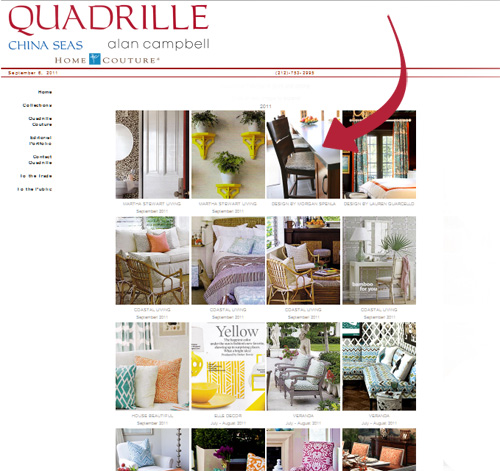
In other news, these cushions made it to the Quadrille gallery! You can imagine my excitement when the marketing director asked me if they could post an image of our kitchen in their gallery (along side my favorite magazines and designers):

Woohoo! Made my day.

Have a great Tuesday!

Going Green: Say No to Nursery Diaper ‘Smells’

Hey all you cloth diaper mammas, this post is for you. This is a little tip I discovered after searching for solutions to get rid of that ammonia smell that comes with the diaper territory. Every nursery, whether using disposables or cloth, deals with diapers and diaper odors (blah) – but the disposable diaper market offers a host of great solutions while cloth diapering is a little behind.

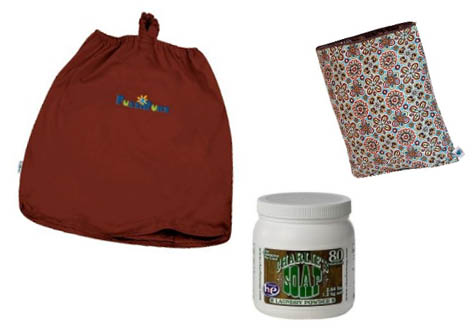
You might remember that when we started this whole cloth diaper thing over six months ago, I had outfitted our nursery with the recommended supplies:

Cloth Diaper Diapering Tools Wet/dry bag for dirty cloth diapers, smaller bag for on the go, and Charlie’s Soap for washing. We still use that great, Planet Wise zippered small bag (have two now, actually) for the diaper bag, but have made updates to our washing routine and diaper pail.

First, we’ve switched over to Tide for cleaning (Charlie’s Soap is great, Tide is a little more readily available and in the BIG cartons).

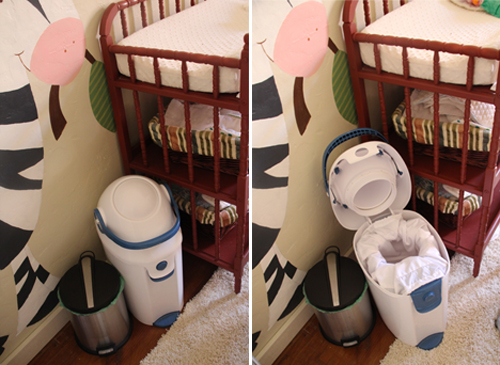
Second, I converted a traditional diaper pail to function as a cloth diaper pail. Here’s the old set up:

And the new Diaper Champ lined with a Thirsties Pail Liner:

The wet/dry bag worked well. But it wasn’t perfect. So I went on a hunt to create a smell-proof solution for the nursery and came up with only a handful of traditional pails that let you deposit one diaper in at a time (without lifting the entire pail lid and getting a smell ‘blast’) while also allowing for a reusable bag. The Diaper Champ was the solution. You pull back the handle and deposit diaper in the top, flip the handle and the diaper drops into the lower area where the liner is.

I’m so happy with this set up that I’ve invested in two Diaper Champs, when one fills up it makes its way out to the garage (and next to our laundry machine) while the other takes its place. When CD laundry day comes (twice a week), I pull the entire bag out and empty it into the machine, throwing in the bag as well. Sometimes I don’t even use the liner in the pail and just give it a good wipe with a rag to clean it out (since we fold up all diapers after changings, the inside of the pail doesn’t ever get messy).

The only times now that you get a bit of that diaper smell in our nursery is if I don’t swap out a full pail quickly enough. Other than that, problem solved!

For an update on how our CD adventure is going, check out this post. And for more on our family’s efforts to ‘Go Green’, try this link.

Living Room Update: Dried Flower Power

I love fresh flowers in the house. It’s one of my favorite splurges because flowers instantly brighten up a room, add that ‘pop’ of unexpected color (like fuchsia tulips in a navy bedroom) and bring life to a space of wood & textiles. I’m always on the look out for ways to bring in that floral feel in a more permanent way.

Branches have been a great way to do this, and the occasional faux can be pulled off if it’s just right (try using a realistic silk orchid in a single stem orchid pot when the flower is dormant). Another way? Dried flowers. I know, I know… not your Grandma’s bowl of potpourri or an upside down bouquet from last Valentine’s Day… but instead a few sprigs of lavender in the kitchen tied together with twine, or even a dozen yellow craspedia (billy balls) poking out of a tall vase with their modern, spherical shape lighting up a room. It’s a careful line between playfully artistic and horribly dated… no plastic ivy, if you know what I mean.

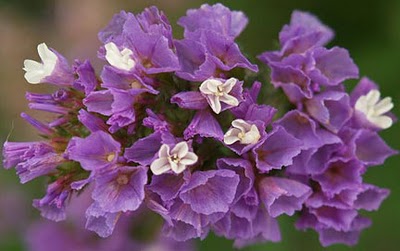
We have a unique plant in our front yard that I pass by everyday and adore, and when Kevin brought me a clipping of Sea Lavender (Statice) while he was pruning, I was pleasantly caught off guard at what a great cut flower it turned out to be.

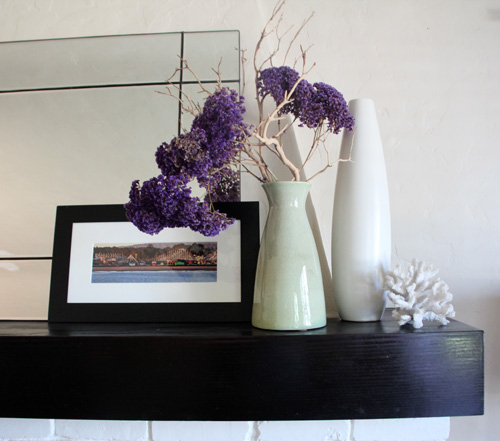
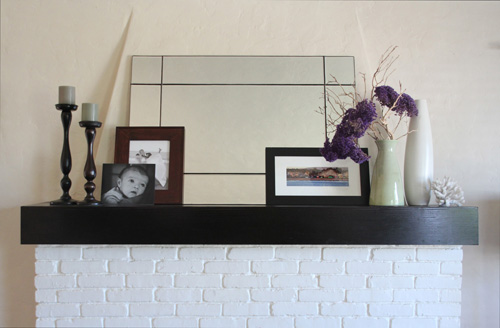
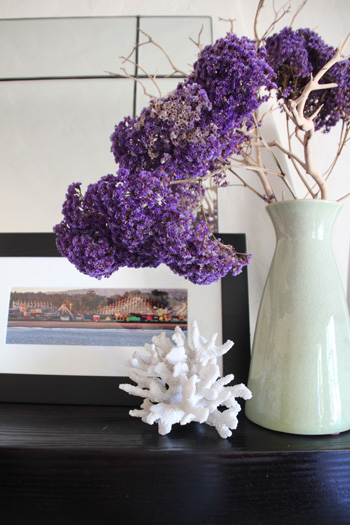
Naturally dried looking by nature, the large clumps of paper-like blooms are beautiful on their own or when paired with a contrasting color. I opted for a sage green ceramic vase and a few bleached manzanita branches – and zero water.

I wanted to see how long the dried-looking flowers would last when, well, dried. Happy to say that five weeks later they’re still beautiful! Providing just enough contrasting color to a dark mantel with a few framed pictures (isn’t that shot of the Santa Cruz Beach Boardwalk stunning? A gift from my dad who took it from the pier and had it printed on metal for that shimmery affect. Santa Cruz is my home town so it’s nice to have a few reminders around).

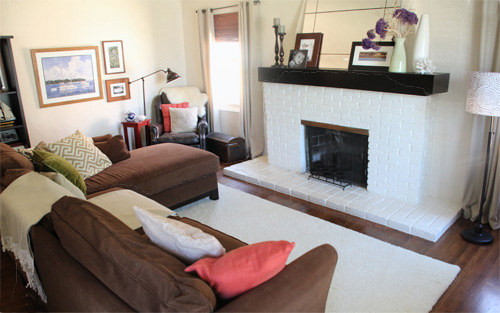
The shape almost reminds me of a Monterey Oak leaning over the edge of the cliffs up near the coast of Big Sur, another favorite spot. And I’m digging how purple way unexpected in a room full of tan, burnt orange and various greens.

That new rug is Liv and my favorite place to hang out during play time – we spread foam building blocks all over and then I build towers while Olivia takes great joy in knocking them down! I think the flowers will be sticking around for a little while, too!

More living room posts here.

Related Posts Plugin for WordPress, Blogger...