A Little of This & That… Renovating, Decorating, DIY Projects & Family

Decorating for Fall: Felt Flower Wreath

I recently saw a felt flower wreath here and decided that I would love to make one for the house, but with my own spin on the flowers. (The wreath by I Can Craft That is adorable by the way, you should definitely check it out if you have a chance.)
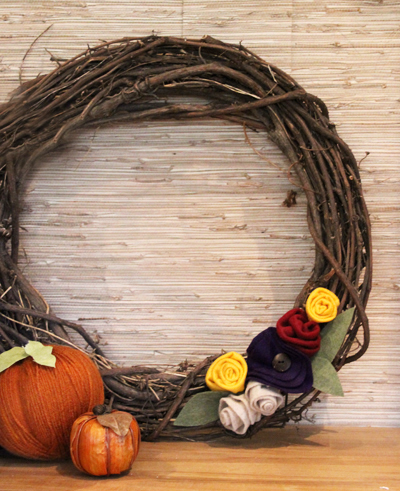
I found the a twig wreath at Michaels for $4.99 (a blank canvas for so many ideas!) and the sheets of felt were on sale for 5/$1. After playing with the felt to create a few different flower shapes, I settled on six that I loved. I generally work in odd numbers but for some reason this arrangement felt right.
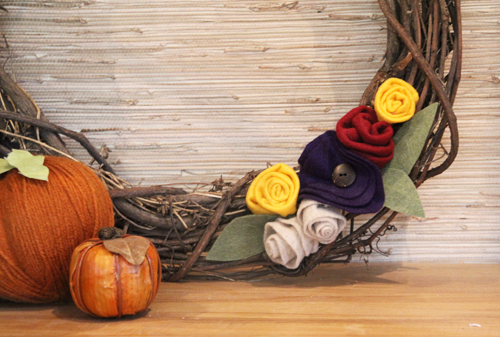
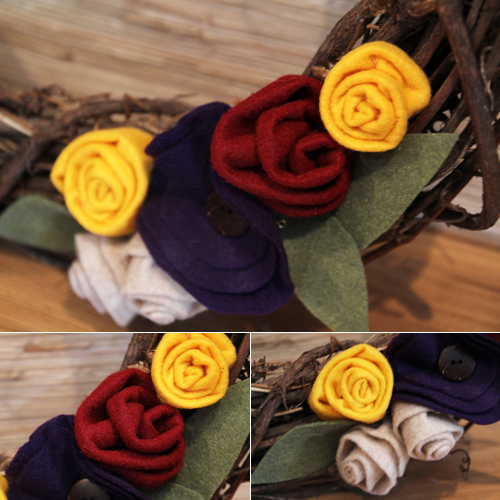
Here’s a close up of the various styles. They all involve felt strips rolled up into the shape of a flower, but for some the strips were left with their raw edge out and for some they were simply folded in half before wrapping for a softer finish. The large purple flower in the center is three sets of circles stacked on top of each other from smallest to largest with a wooden button in the center.
*********************************************************************************

Felt Flower Wreath

a
Materials: Any style of wreath, felt sheets, needle & thread, wiring or glue for attaching flowers to wreath

{1.} Cut felt into various sized strips.

{2.} For flowers with a softer edge (more rose-like), fold strips in half horizontally and add a quick stitch to hold. You could use dots of hot glue here as well to keep your sides together.
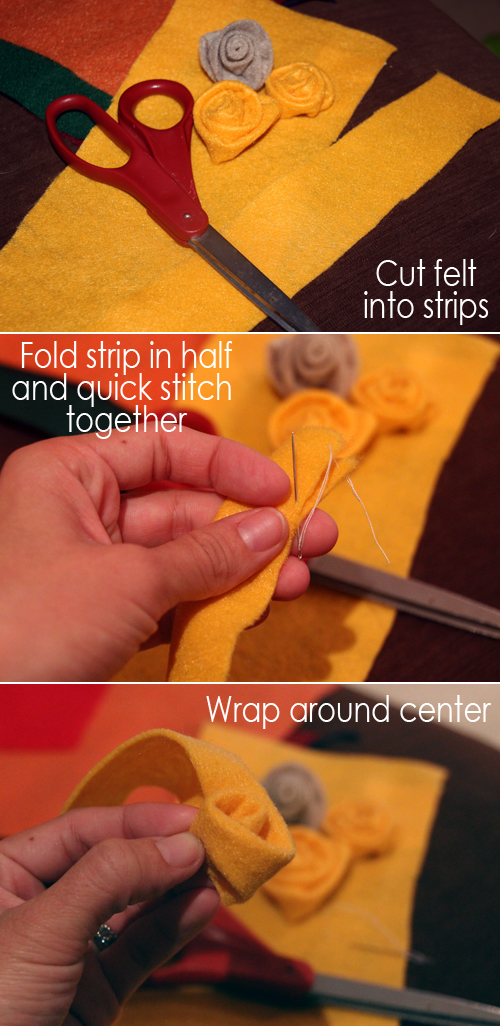
{3.} Beginning at one end of the strip of felt (which will now be the center of your flower), wrap remaining end around and around and around. With every wrap around the center I kept poking the needle and thread back through the felt at the back to hold the new shape, this helped to spread the petals out to a create a short, flat flower that would nest nicely in the wreath.

{4.} Using thin wire (to later remove the flowers for other purposes) or hot glue, attach your new flowers and leaves to the wreath.

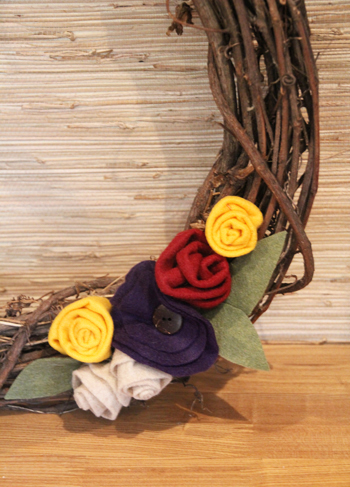
Now she’s ready to display!

*********************************************************************************
More fall decorating ideas found here. Happy Thursday!

Guest Posting on BLW over at Milk-Friendly

If you had a chance to read about our introduction of solid foods to Liv earlier this summer, you’ll remember that we skipped pureed foods and opted to share our meals with her right off the bat. But we’re not crazy parents, promise. We’re actually using a method called Baby Led Weaning. Read more about it over at Milk-Friendly where I’m sharing our adventure with her readers.

We did give handmade pureed foods a try for a few days… I also cover that over at my guest post. *Hint* the only successful recipe was my basic cinnamon applesauce!

 Liv digs it. For everything else, she prefers the solid version however spiced, roasted or textured it may be.

We love that she gets to participate in our meals and enjoys a good steak, fish fillet or pork tenderloin just as much as us! Read about our first intro to it all here.

Office Makeover: Wall Collage Part 1

I’ve been jumping all over the place when it comes to finishing up this office. My corkboard project is taking muuuuch longer than anticipated and while I wait on the prime opportunity between work and Liv’s naps to nail gun that frame together, I’ve started experimenting with the wall collage for the guestroom portion of the office.

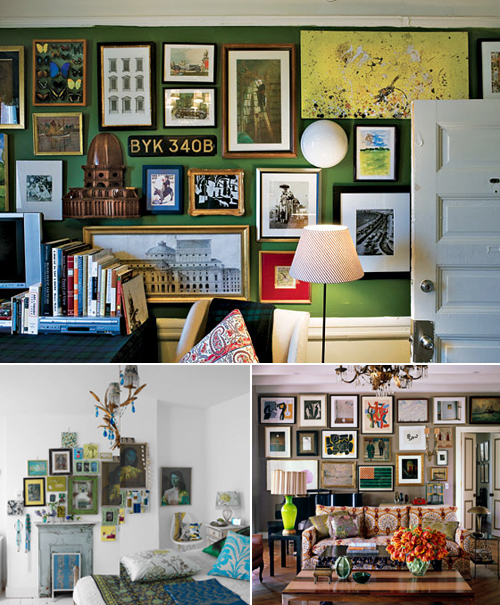
Wall collages! They’re awesome. It’s all about how many photos can I stuff on a wall creatively. Here’s some of the inspiration that I’m working with:

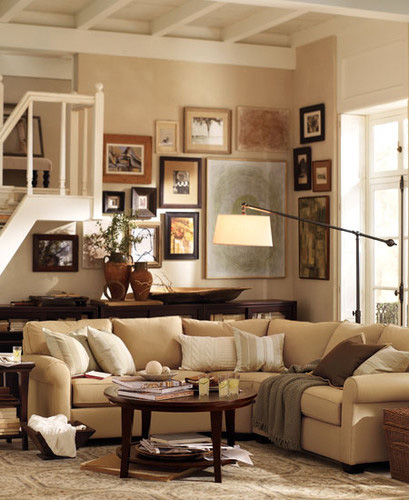
But this image really nails it on the head:

There’s something about that cluster of pictures that I’m especially drawn to. Love the neutral theme and the natural wood frames (kind of matches the theme of the office) and the organized chaos that the wall evokes.

But the wall collage isn’t all about slapping pictures up on the wall. I want each and every photo, painting and object to mean something to our family. Maybe a souvenir from a trip, an art project by one of Kevin’s amazingly crafty family members or a photo of a place that we love.

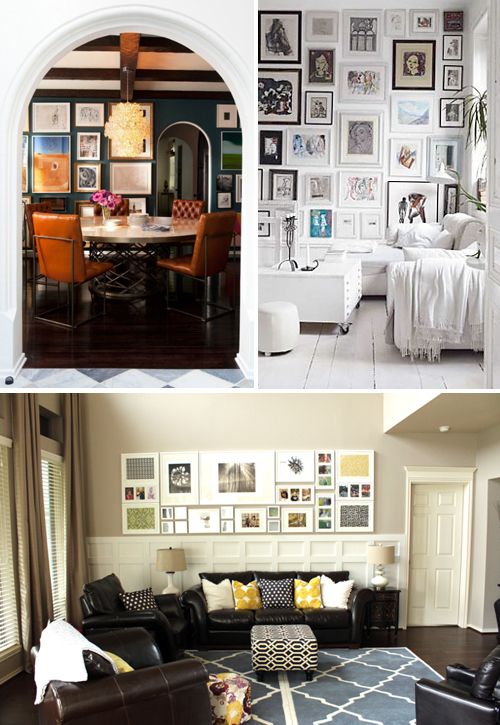
So while I hunt down the perfect pieces (I know they’re buried around here somewhere… I just need to hunt – aka ‘shop’ the house and garage) here are a few layouts that I think will look great on that dark brown wall in the guestroom:

Or maybe this one:

I’m a visual person. I need to see just how the artwork (or bookshelf, closet or anything else I’m organizing) will look before committing. Especially to lathe and plaster walls! These poor walls can only take so many misaligned holes. I’ve learned the hard way.

PS I’m just beginning to really use the magical tool of Pinterest… for more beautiful wall collage inspiration, check out my board here.

Images: Unabashadely Prep, Walking Around Where the Sidewalk Begins (found at a veiled aside), Pottery Barn, Decor Chick

Related Posts Plugin for WordPress, Blogger...