A Little of This & That… Renovating, Decorating, DIY Projects & Family

2011 Holiday Gift Guide: For the Boyz

I’m wrangling up a few unique gift ideas over here for family and friends and thought I’d share some of my favorites. Let’s start with the boys.

Husbands, boyfriends, brothers, dads, uncles… they’re hard to shop for. After several years of shopping for 7 brothers (that’s right, seven when you add Kevin’s and mine together) plus three dads, several Grandpas and quite a few friends and I still haven’t learned much. But every year I give it a shot again.

Here’s what I’m eying this Christmas:
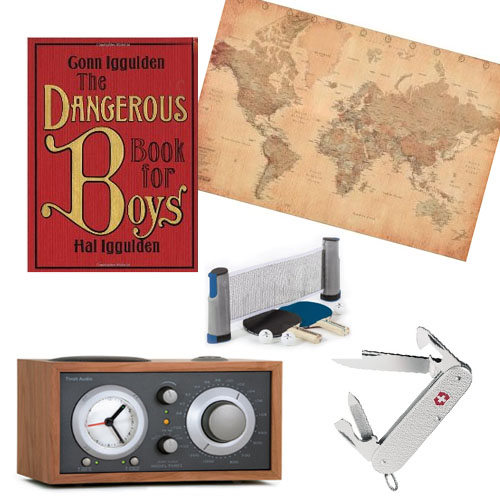
I’m a huge fan of the retro style of this radio alarm clock. Bringing it back to basics with a sleek walnut finish and old fashioned functionality.

This multi-tool knife is perfect for camping, exploring, fishing and general boy stuff.

A vintage framed world map is ideal for an office, the den or even spray glued to a cork board as a learning tool for the little ones.

Dangerous Book for Boys. Enough said.

Table tennis on the go – for the guys that love a good bet and perhaps even a better impromptu drinking game.
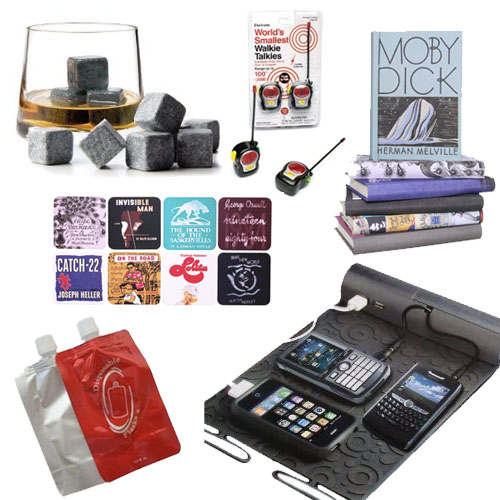
Reusable soap stones that keep liquor chilled without diluting your drink – something every hubby (and his friends) can appreciate.

Equally cool coasters for your whiskey on the rocks.

These disposable flasks are perfect as creative stocking stuffers! Love that they will fit easily into the inside pocket of a ski jacket for some peppermint schnapps on the slopes.

This roll up travel charger is great for the globe trotter (I’d actually love one of these for Christmas – charge the electronics all at once while traveling!).

These mini walkie talkies are just cool. A friend mentioned finding these and I think they’re perfect for pint-sized fun on Christmas day for the little boys or boys at heart.

Out of print favorite novels can still be found in journal, t-shirt and even ereader jacket form here.

Our friends love a good game of poker and I’m sure they’d be keen on a traveling set so that different homes could host (the girls would be keen on that, too) ;).

This t-shirt sums up Kevin’s and his brothers’ life philosophy. Ha!

If your guy is a fix-it kind of guy (or a late-night road biker or even a climber) this headlamp is perfect. Kevin uses his ALL of the time! Even when grilling to check when the meat’s done after dark.

And a Hardy Boys set? Because every boy should read these!

The sea has stolen three cell phones from Kevin. Yes, three. If someone you’re shopping for this Christmas is a lover of water sports (or sailing, kayaking…) these are awesome.

Looking for a great gift for someone who’s crazy about fishing? This ultimate fishing tool claims to do everything but reel the fish in.
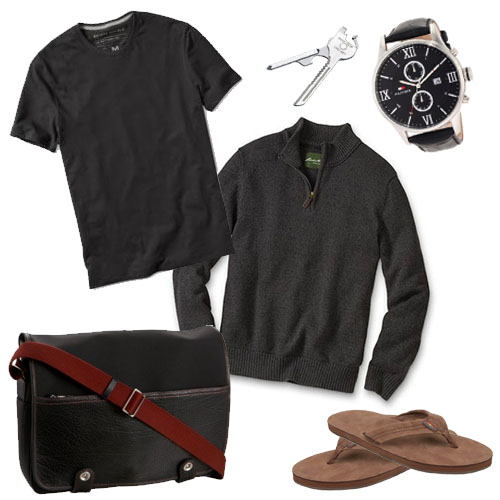
This is my staple shirt for Kevin. He’s tall (6’3″) so regular tees always fit too short and that’s a pet peeve for me. Banana makes these classics in both a standard and tall length and usually around this time of the year they’re on sale.

And this is my favorite quarter zip sweater. Perfect for casual or dressy events (pairs nicely with jeans or slacks) and Eddie Bauer also carries both regular and tall sizes with great deals.

If it weren’t quite so pricey I might splurge on this messenger bag as well.

Every guy needs a great pair of sandals and these are king. The whole family rotates through a new pair each once a year or so and these see every day use. Rainbows last and we love em.

I love this watch. It’s classy and handsome but would be a great everyday piece as well.

This key chain add on serves double duty as a bottle opener and a Swiss army knife. A convenient and practical stocking stuffer!

There you have it, my idea of a great Christmas for the boys in every price range. They’re hard to shop for and I hope this list makes it a bit easier!

I shop Amazon Prime for Moms for just about everything (free two-day shipping!) which is why nearly all of the affiliate links are Amazon. I highly recommend :).

Christmas Decor: Handmade Wooden Pod Trees

Hope you had a wonderful Thanksgiving! We spent ours with family from both my mom’s and dad’s side and I had the chance to catch up with friends from my hometown over the weekend. It was a really nice four day break from the usual hustle and bustle.

The best part about Friday, November 25? Christmas music. I ventured out for a black Friday sale or two with a friend but what I loved even more than the discounts was ‘Jingle Bells’ playing on the radio! My favorite holiday has finally arrived.

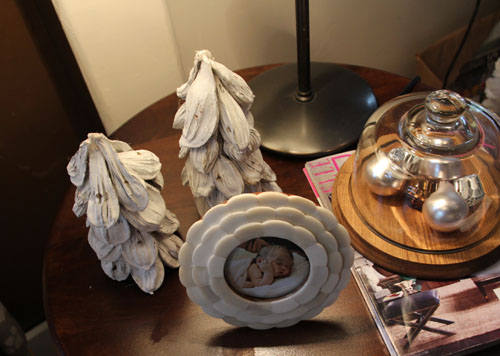
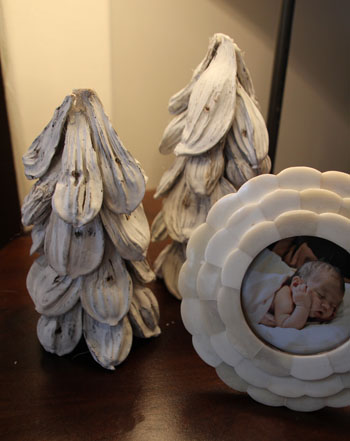
It’s not too early to start decorating, right? Here’s a little Christmas tree project I recently put together for our guest room:

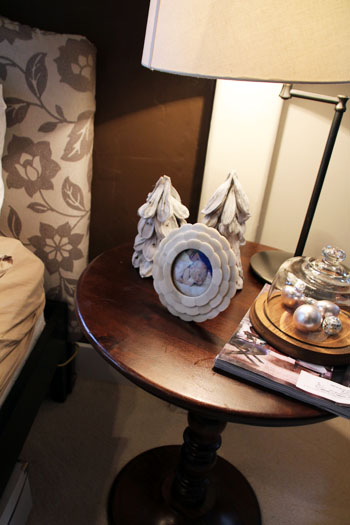
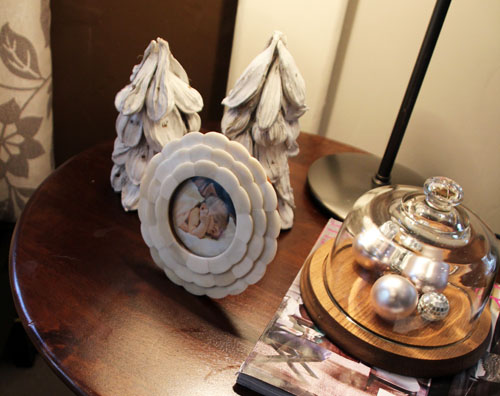
The little white washed Christmas trees are made out of wooden seed pods and cost a mere $1 each to make. Their current home is on the sweet new pedestal side table that we just recently found on major sale at World Market:

Sorry about the awful lighting. I assembled my diy trees in our living room late at night while watching a movie with Kevin.

I was inspired a while back to build little driftwood Christmas trees after seeing trees like this or these, but finding the right driftwood was near impossible (so jealous of all those that live on Lake Michigan). I searched high and low and they do sell bundles on Etsy and even eBay, but boy are they pricey little bundles.

Then when I was perusing our local West Elm, I came across the neatest white washed wooden ‘pods’ (or giant seeds?) in hanging strands in the clearance section. Each bag had been marked down from $16 to $.97. Sweet, really really sweet. (I’ve searched and searched for a West Elm link but it seams these garland strands are waaaay last year and might only be available at a West Elm in your city, they’re called the Nipa Pod Strand and they might be at the very bottom of the Sale bin.)

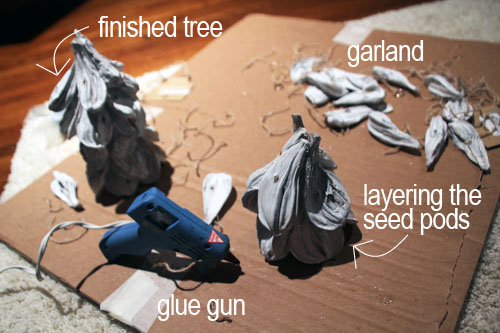
Assembly was easy. I cut my garland strands apart and built little pyramids by stacking the pods (it kind of reminded me of how you lean pieces of wood against each other to start a campfire) and gluing into place with a glue gun. Then I continued to layer.

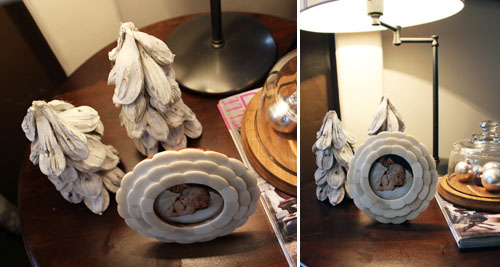
I love the results – they’re the perfect little shabby chic accent for the guestroom this Christmas and the colors tie in great with the neutral space.

Christmas is here! :)

Office Makeover: New Custom Bulletin Boards!

Back with the how-to for the office’s new custom bulletin boards. You might remember the inspiration from this post and how I was really wanting to incorporate a colorful fabric into the otherwise neutral space (especially with the tan grasscloth wall, natural wood bookshelf and desk, and brown & white office organizing supplies).

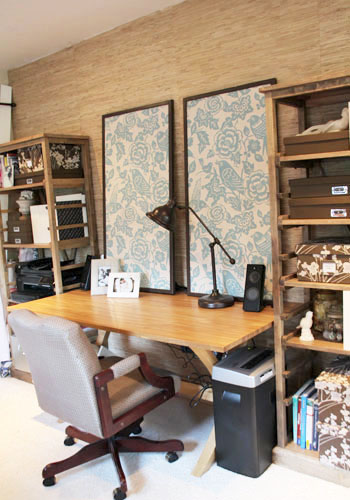
My solution was a teal Thomas Paul fabric in a fun print!

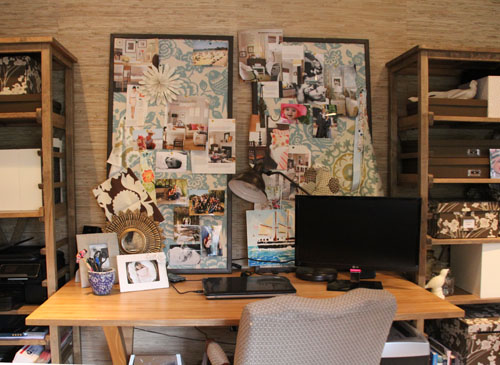
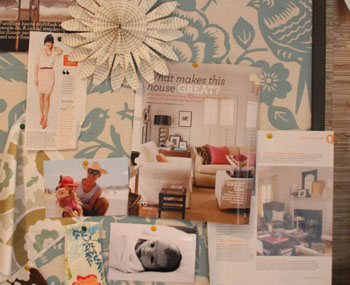
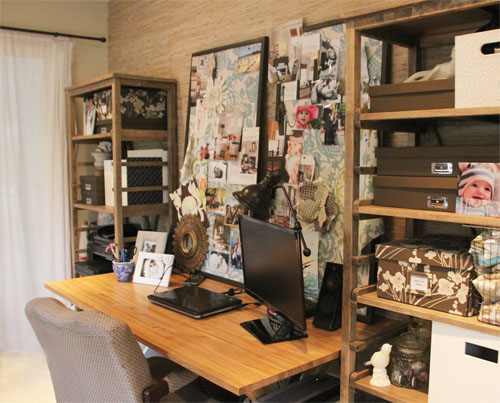
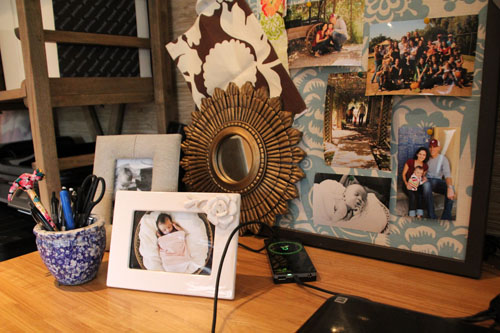
That image was before the boards were covered with inspirational images, photos of the family and other general mementos (such as invites, birth announcements, etc) that in general make me smile. A happy office is a productive and comfortable workspace. :)

PS that’s a new Craigslist office chair find — I love the casters and the wooden frame, though she needs a good reupholstering!

I’ll admit that it looks a bit crowded on camera but up close it’s the perfect mix of whimsical inspiration and practical projects that I’m hoping to tackle. I’m sure it will get less and less ‘pretty’ as the days go on and it gets stacked with calendars, to-do lists, excel spreadsheets and the like.

The best part is that this is the view from where I sit every day:

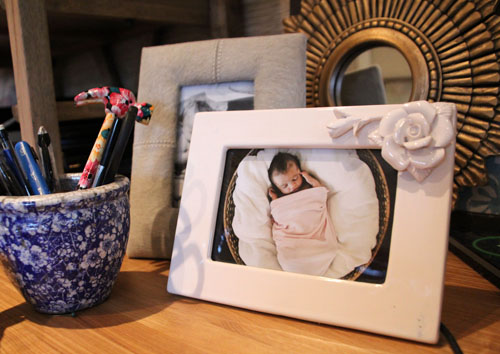
I had set aside enough photos of Liv to cover five of these boards, but I had to edit to several of my absolute favorites {how cute is that sweet baby!}.

**************************************************************************

Custom Fabric Bulletin Board
m

Materials: board cut to size (this will be the back of the bulletin board, I used dry erase board from Lowe’s because it was light weight), wood molding, fabric, cork (I found upcycled cork placemats from Goodwill and similar sheets at Joann’s to fill in the gaps–the thicker the better!), spray adhesive or white glue, miter box (or another tool for cutting 45 degree angles), spray paint, glue gun, nail gun, caulk and a caulking gun, rag, small bucket of water

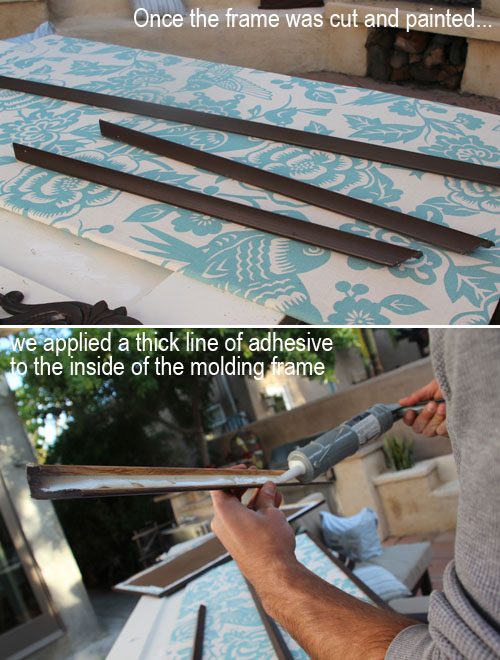
{1.} I began by building the frames for my custom bulletin board. Using fabricated molding from Lowe’s, we measured the desired length out and cut apart the molding into four pieces per frame. Then a 45 degree angle was cut into each end so that when placed together they created a rectangle (thanks, Andrew!). A miter box is helpful for doing this by hand, but if you have access to a table saw that’s your quickest cut.

{2.} Next each piece was spray painted with several coats of matte brown paint (for best results spray at least 8″ from the wood and rely on multiple coats for the best finish. One close-up coat will definitely result in dripping and bubbles).

{3.} While the frame edges dry, let’s focus on the bulletin board itself. Choose a sturdy backing for your bulletin board and have it cut to size (Lowe’s helped me with this one and I ended up using a light weight dry erase board that they sell in sheets – though a stronger material might have prevented a bit of curving).

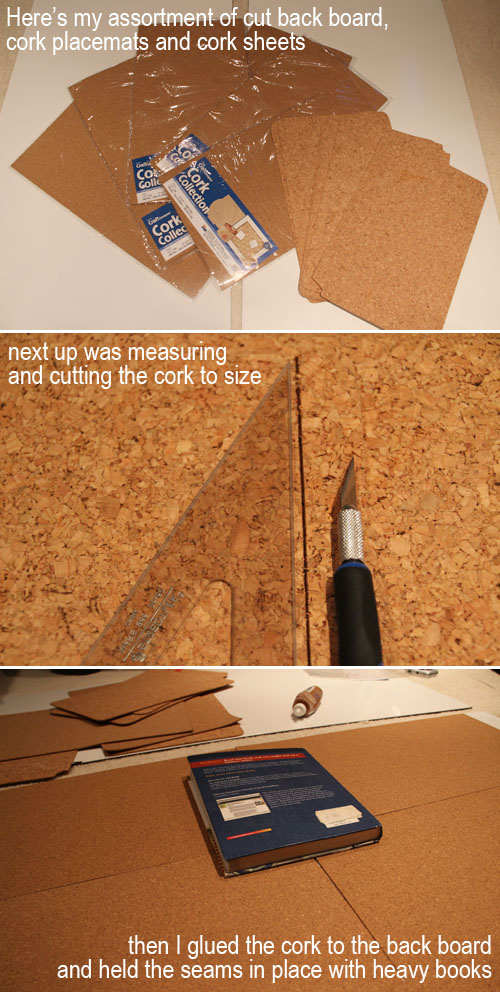
{4.} Use a spray adhesive or white glue (such as Elmers) to attach your cork to the board backing. I used an x-acto knife to help me cut apart my cork to completely cover the board.

{5.} Cut your fabric to size allowing for at least a 2″ hem on all edges. Flip board over onto fabric so that the board and fabric are facing down. While pulling taut, glue gun fabric edges to back of board to secure fabric in place (I first tried this with a spray adhesive but it wasn’t strong enough to keep wrinkles at bay). These pictures disappeared from my camera card! So here’s a recap of my formula for attaching the fabric:

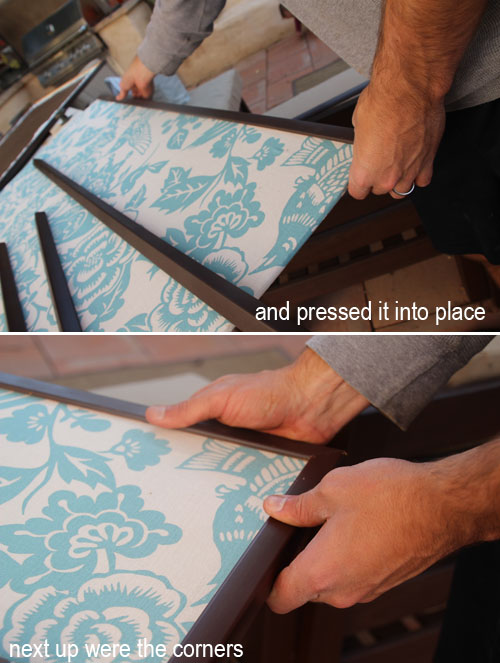
{6.} Now it’s time to assemble the bulletin board. Attach each premade edge of the frame directly to the board with a strong adhesive (we used an adhesive that fit a standard caulking gun but you could even use a glue gun here).

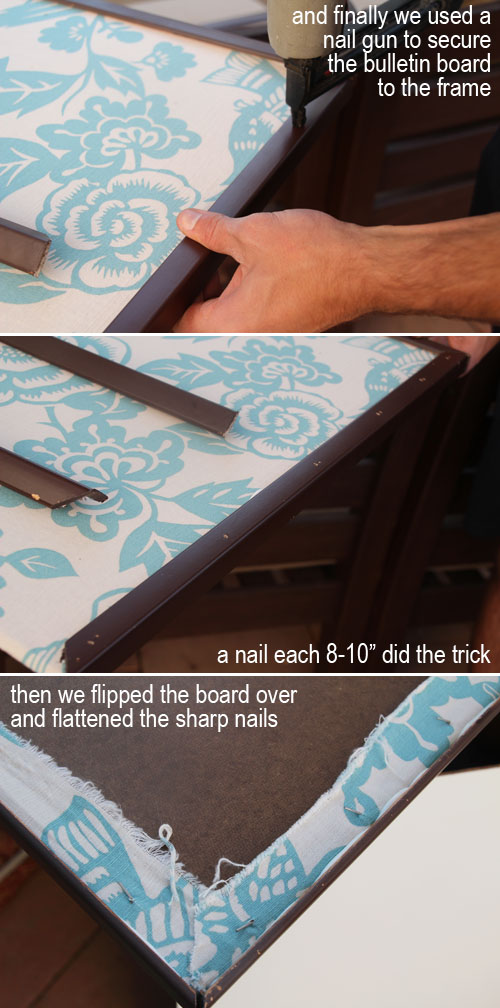
{7.} The adhesive keeps your edges in place while you secure the frame to the board with a nail gun. Be sure to flip the board over and use a hammer to flatten all of the pointy protruding nails.

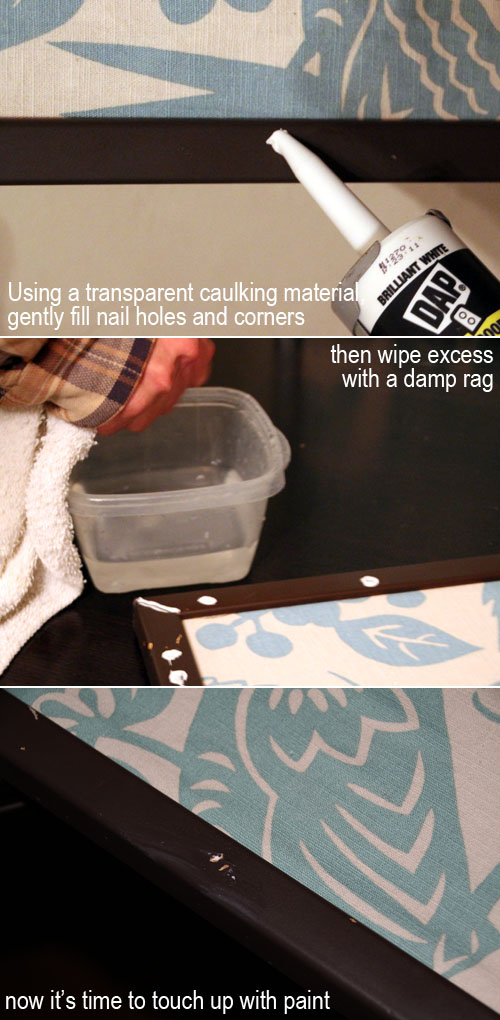
{8.} Flipping the bulletin board back over, apply caulk to your new nail holes and all corner gaps. Wipe any excess with a wet rag (keep a small container of water near by so you can keeping dipping as you wipe).

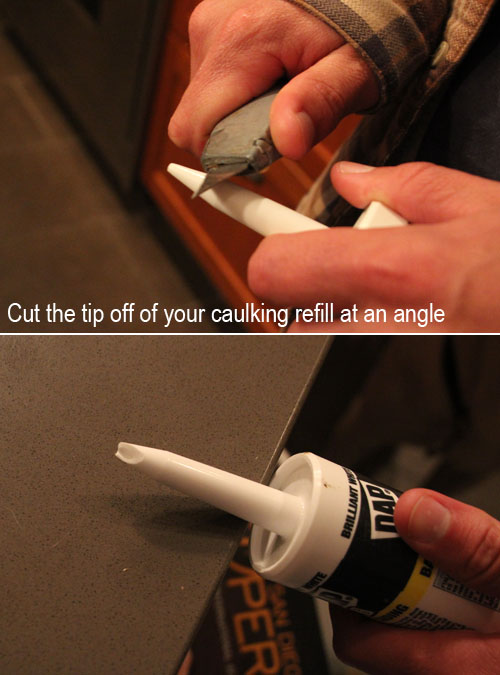
Here’s a tip for adding a new container of caulk or sealant to a caulking gun: always cut the tip at an angle with a strong utility knife, and be sure to cut away from your body.

{9.} Wait until the caulk dries and touch up any spots with paint (I simply lined the inside of the bulletin board with newspaper and spray painted over the spots needing a touch up, but you could use a brush as well). You might have a few holes still show through a bit, but it’s not obvious unless you’re verrry close.

You’re probably wondering why you couldn’t skip the first painting step and I considered this, but I was too nervous of covering the beautiful fabric with accidental spray paint leaks and found that just touching up at the stage (since the fabric is now in place) was easiest.

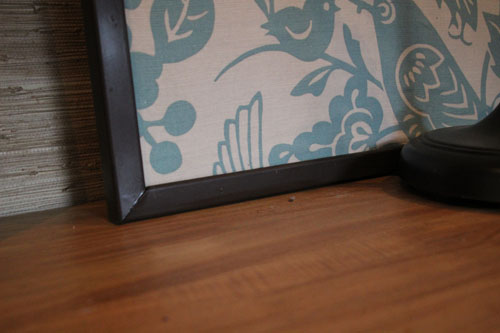
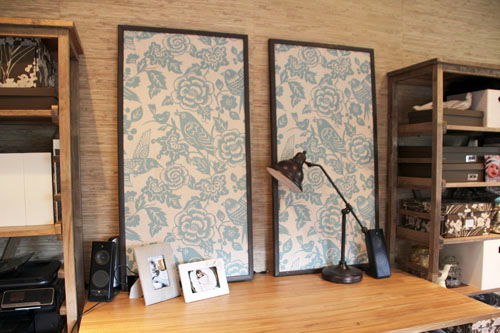
Now the bulletin boards are ready to be hung! I opted to lean mine up against the wall rather than hanging above the desk:

**************************************************************************

Yay for one more project crossed off of the list! And I really do love how they turned out.

For more Office Makeover posts, check out: handmade capiz pendant light, organizing the bookshelves, wall collage part 1, part 2, fabric bulletin board inspiration, (new) inspiration board, new lamps, wallpapering open shelves, finding the perfect credenza, new trim, dining table-to-desk, a new desk & bookshelves, installing remnant carpeting, grasscloth wallpaper, painting the office nookfinding carpet for the office, chocolate brown wall ideas, plastering progress inspiration for a diy desk, back in action!, desking hunting for under $300, bookcases under $300,inspirational rooms, room layout options, demo part 1 & demo part 2.

Related Posts Plugin for WordPress, Blogger...