I mentioned a while back that I travel quite a bit for work. The plus is that I have the awesome opportunity to work from my home office 90% of the time. The downside being that I do pack up my office, Liv and myself for a week every month/every other month to travel up to the Monterey Bay area (Northern California) to touch base with our corporate location. BUT Liv travels with me! How fun is that? And she gets to play with her grandparents while I’m at the office (I hail originally from Santa Cruz which is in the Monterey Bay area).
Over the past six weeks alone I’ve made three trips up to Northern California and back down to San Diego (for various work, weddings and family related events) and it occurred to me that I might share a few tips that I’ve learned over the past year and a half (and 40+ flights!) on traveling with an infant and then a toddler solo. Feel free to share your thoughts and your own tips in the comments below! Let’s get a little group think going on the best traveling dos and don’ts with kids.
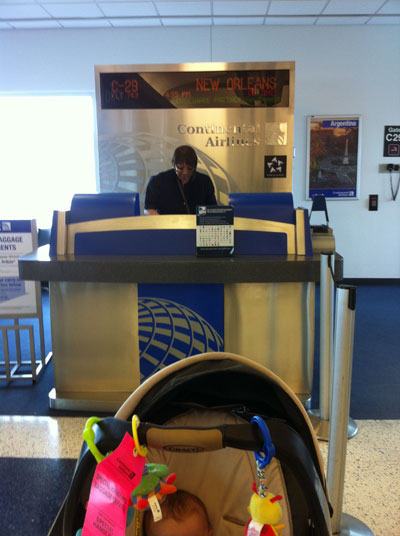
My rules:
1. Carry as little as possible. I’m sure this is true across the board, but when traveling alone with a baby carrying the bare minimum is really a plus. I can say with a slice of humble pie that I’ve been that crazy lady wheeling carry-ons, a diaper bag, individual brown bag sack lunches, baby on hip, stroller filled with my laptop and camera bag, coffee perched in one hand, boarding pass in the other while hurriedly weaving my way down to a various gate. Stressful.
About five flights in as a new mom I figured it out. Now I always check my one carry on (and it’s always one for a reason, see #3), take advantage of priority family boarding and bring just one small bag with me on board (sometimes two if my destination calls for my camera). We’ve really nixed toys, reading materials for Mom, pack n’ plays (though I do try to arrange one at my destination, otherwise we co-sleep) and travel high chairs for a very simplistic load. But I haven’t given up my brown bag lunch, coffee, diaper bag and laptop case, I’ve instead consolidated them into one easy solution.
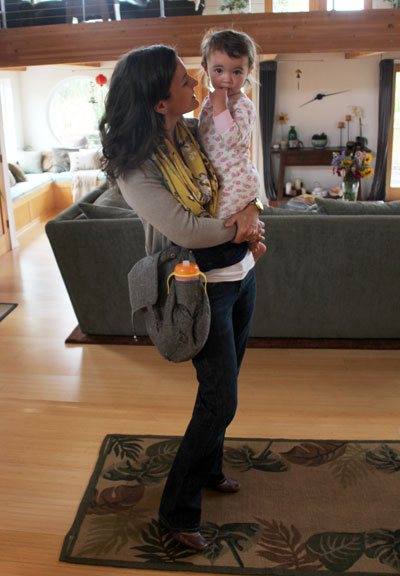
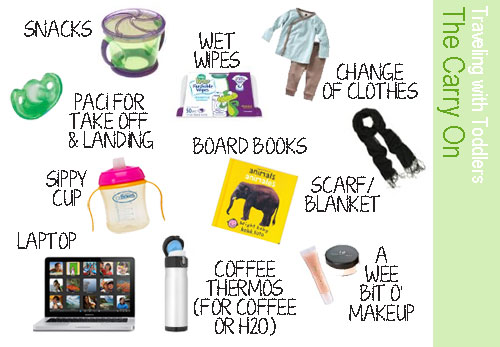
Here we are at my parents with my travel/diaper bag. I worked with Etsy artist ThreadBeat to customize a herringbone patterned messenger bag that fits my laptop, notebooks, a few board books for Liv, snacks, lipgloss, keys, a change of clothes, a paci for take off and landing, a spare diaper, a small pack of disposable wipes (for everything), a loose scarf that acts as an impromptu blanket – each with their own little spot. The bag is usually quite stuffed when it’s at full capacity! The best part is that when we arrive at our destination the messenger bag transforms into a briefcase.
And the most important customization? Pockets on the outside large enough for a sippy cup for Mom and one for Olivia.
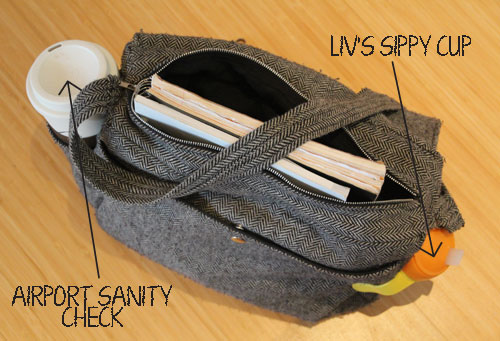
Traveling can get a little stressful (long layovers, bumped flights) and my travel coffee mug (with extra snug lid) is a necessary treat. Sometimes I swap out a skinny thermos for an even tighter lid on long, cross-country flights when there will be lots of marching through airports and plenty of Starbucks.
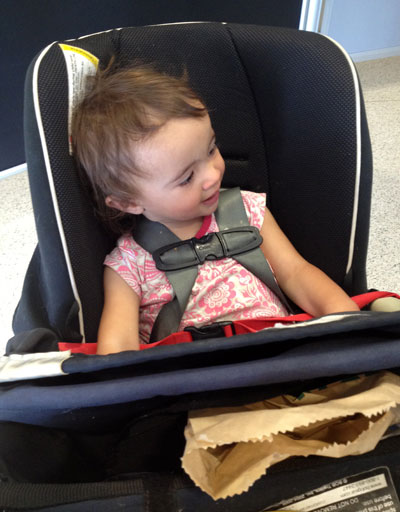
2. Be prepared. My favorite flights are the Southwest one hour hops with a plane that is less than half full. These are the flights where the attendants happily let me bring my Combi Cocorro on board (gushed all about why I love this guy for toddlers and traveling here) and I’m able to schedule a flight around Liv’s nap time. When she’s hooked into a car seat there’s a 50-50 chance she’ll be snoozing for the trip and that can make all of the difference! Note: falling asleep happens during take off and the rise in elevation – don’t miss the opportunity to offer a pacifier, sing soothing songs softly and drown out light.
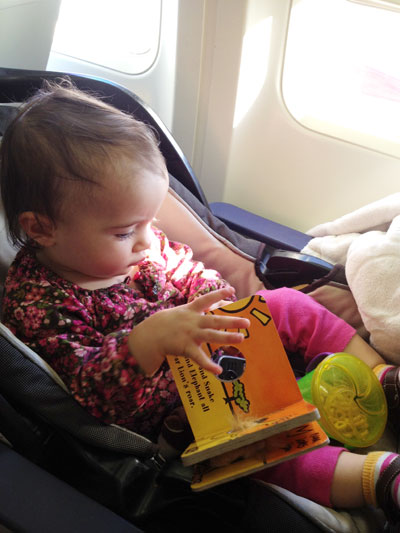
I have yet to buy a seat for Liv and when she’s a lap child flights tend to take on a new challenge entirely. When I suspect she’ll be riding with me for a long flight I avoid nap times like the plague because sleeping while sitting while on Mom’s lap is out – and a whiny, tired toddler makes the entire flight tougher on everyone. Thankfully traveling is becoming second nature to Liv and she doesn’t mind the change of scenery so much.
These days I realize that catching up on my latest This Old House and Martha while in flight is a thing of the past, so instead I pack useful travel tools such as toddler-friendly books (best, easiest toy! we can flip through the same board book five times picking out first shapes then colors then animals then counting the animals…) to keep us all entertained.
3. Pack like a pro. This is two fold: it’s extra important for me to have an organized checked bag as it is for my carry on to be well-stocked.
I’ll start with the carry on. As mentioned above, my staples are minimum but mandatory (nothing like being stuck in a city overnight without a few bare minimums). For Liv, that includes: change of clothes, diaper, wipes, snack trap with dry snacks, easy meals (string cheese + cheerios + apple slices), board books, paci (for take off and landing to help her ears – suckers, a bottle or nursing works equally well depending on age), sippy cup full of water (can be switched out with milk at destination but not while flying since liquid will inevitably end up on Momma). For me: light scarf (impromptu blanket – no jacket necessary since lugging child + car seat down airplane aisle = sweat), similar snacks to Liv, travel coffee cup (I fill it with water once on my flight to rehydrate and to avoid little plastic cups on the seat tray with swinging toddler arms), light make-up (what I could survive with if my bag didn’t make it).
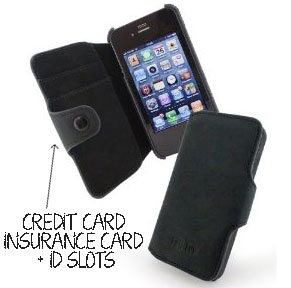
Oh, and of course my favorite accessory. Have I ever introduced you to my purse for the last two years? It’s an iphone case + wallet (best invention ever – until it slips out of your bag during landing and is left on the plane floor) and it’s this plus a lip gloss in my back pocket. That’s it these days. Other odds and ends can go in the diaper bag or purse or briefcase or whatever else I’m toting that day – but because this wallet makes me carry just the bare minimum, it’s pretty much what makes getting out the door for me possible hands free:
Items I avoid in my carry on: toothbrush/paste (if I get stuck in a city overnight the hotel will have these staples), gooey snacks (most fruits, yogurt, etc that result in sticky hands, faces and clothing :)), bags or purses without shoulder straps, games that require noise or moving around, crayons (that roll easily from a tray).
Next up is my actual checked bag. I limit myself to one piece of checked luggage because even the short distance from the car to the gate check-in area and vice versa can be quite a bit of work for a mom with a stroller, carry on and one piece of roller luggage. Any more and I’d surely tip over.
My checked bag usually consists of work-related outfits as well as down time/casual wear and sometimes even dresses for events and what not so I try to pack strategically. One outfit per day, one or two extra just in case. One pair of long jeans with heels and another shorter version with flats (jeans and blouses are work appropriate, thank goodness). PJs, toiletries, curling iron, a couple of rolled summer dresses. On top of that is a layer of Liv clothes and a few more toys, I purchase disposable diapers at my destination and we use the snack trap and sippy cup all week from the flight for Liv’s eating utensils (though sometimes I throw in a soft spoon or kid’s plate/tupperware, too).
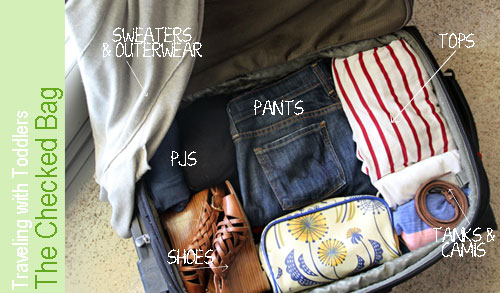
I’ve developed a little packing trick that makes it easy to see that I have everything that I need and to find a certain item in a jiffy. On my frequent trips I always pack the same item in the same place. Always. PJs are upper left corner, tops upper right. Miscellaneous tanks, camis, belts in the lower right and shoes in the lower left. When Liv is fast asleep at night in our room I can reach into my bag in the dark and find my pajama pants easily! Items are stacked, rolled or wedged in, outer wear is draped across the top.
You’ve all heard of the color rule, right? Sticking to a few different shades (such as blues and greens) so that everything in your bag goes with everything else? Well I’m not that packing savvy but I do tend to stick to brown or black. Black shoes, black belt, black jacket, or the opposite. I don’t think we’re nearly as matchy-matchy today so matching brown pumps with a black cardigan is really no biggie to me, but if you’re nervous of over packing choose one and stick to it.
As far as airport-friendly accessories, this is the set up that I roam airport terminals with.
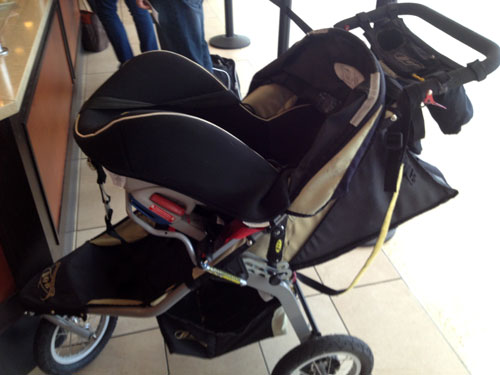
Our BOB stroller easily holds the toddler Combi car seat (with the safety harness and all), delivering us quickly to our gate destination. I gate check the stroller and sometimes the car seat (when there’s no room for a freebie seat) and bring Liv and my tote down the aisle. This awesome car seat is light enough for me to carry and snap in too, if that allows.
There you have it! My thoughts on traveling with a baby and how easy it can be! Just a few steps that help to make traveling slightly less stressful – then it’s time to enjoy the ride :).
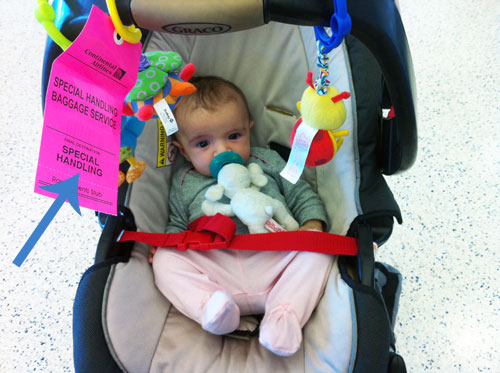
Here we are on our first cross-country trip. This was back when I could carry Liv around the airport in a sling! (A huge plus when a baby can’t yet hold her own head up.)
Any travel tips to add? We might have a pretty lengthy plane trip coming up and I’m in need of a few successful strategies for keeping an 18-month-old happy for hours on end in a confined space ;).
Happy travels!

