
This room has come together over time. It’s taken a lot longer than expected (as it usually does), and even with a final vision in mind for the space, each element has been carefully considered and contemplated in a way that is both soothing and totally stressful. I love to create a space. I don’t see just a room, I see children playing on the soft rug and sleeping babies in cribs and toddlers dancing in dress up clothes.
And now that Taylor is an amazing eight months old, I sort of find myself beginning to envision this room as complete. Not complete in a we-can’t-change-anything sort of way, but complete in a this-room-will-grow-with-time sort of way.
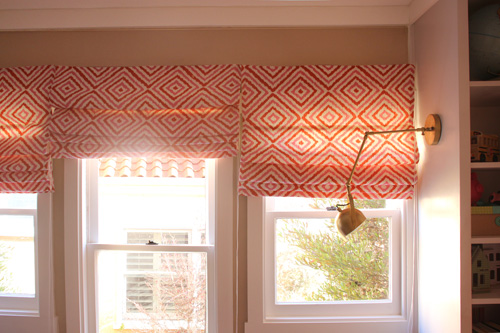
Six months ago I ordered fabric for the windows and I have waited on pins and needles to hang the new coverings. I’ve been secretly so nervous that I would totally regret my ages ago decision on a bright and bold diamond print for the roman shades.
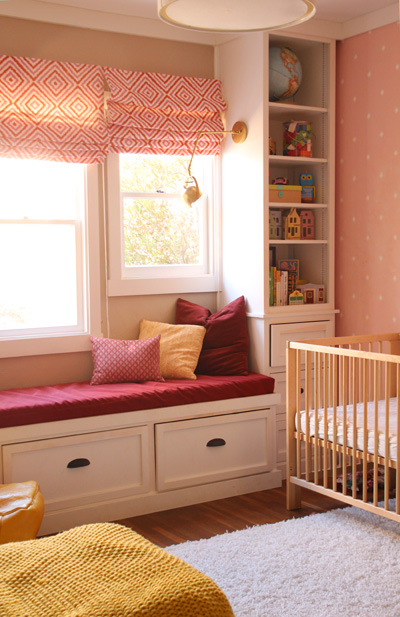
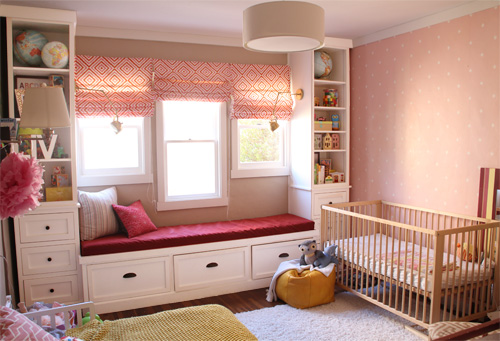
But I absolutely love it! Instead of feeling overwhelming, the fabric plays so nicely with the solid window seat bench and the wallpaper. I’m almost ready to mix more patterns in with throw pillows. Actually, I’m a little up in the air on what to do about the pillows. I think that that might be one of those ‘time’ things.

These windows hug right up against our neighbor’s kitchen and I have always felt just a little bit odd watching them make dinner while rocking the baby to sleep. And I know they have a clear shot of me playing with Liv, reading books, nursing… it was definitely time to get some curtains up.
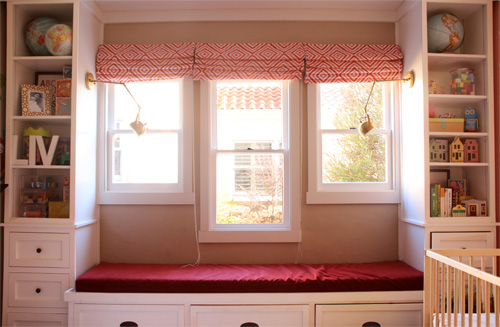
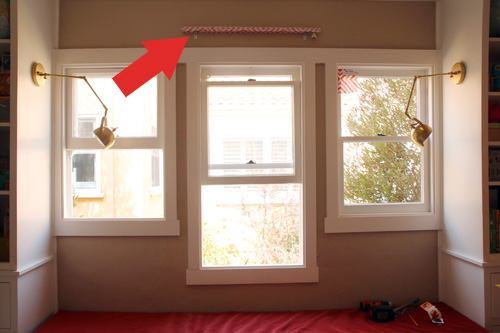
In regards to light, I installed the roman shades (and left enough fabric to still completely cover the windows when they drop) above the windows so that they could let in as much natural light as possible when pulled all the way up. That’s one of the things I love most about this room! All of that beautiful light!
It was a tough time of day to photograph… but I was so excited to share the new window curtains with you :).
I chose to work with Melissa over at Windows by Melissa to have the roman shades made after reading great reviews from her by Kirsten. You guys, she has been the most wonderful individual to work with. The roman shades function perfectly, they were sewn impeccably and were the right price for my budget (especially compared to local bids). I can raise and lower all three shades in a few minutes as I put the girls down for a nap or attempt to wake them up via natural light in the morning. Installation was the easiest thing ever thanks to a couple of tricks Melissa has added to her shades (more on that in a minute).
They are up and they are perfect. I walk by the room and let out an audible sigh.
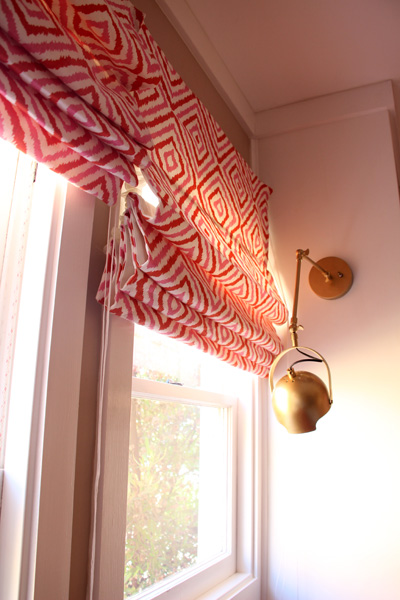
I still plan on doing something about those hanging cords… I initially had purchased ‘cordless roman shades’ through Melissa thinking that the cord was somehow concealed in the sewn shade, but cordless actually refers to there being no cord and a hook and loop mechanism for raising and lowering the shade instead (hence the name, silly me). Thankfully Melissa is so forgiving and was able to re add that cord after I realized my mistake.
I found the red and pink diamond patterned fabric through U-Fab (though sadly I’m not sure they have it in stock now) after considering so many variations from Spoonflower, Joann’s, local fabric shops, fabric books, online searching… For me the trick to the roman shades was going to be introducing a pattern of a different scale but one that still fit in with the coloring of the walls and the rest of the room. That’s a difficult oder to fill when the wallpaper (and main pattern) is mostly solid with the exception of small white stars. It’s like a micro pattern played out in large scale. Almost every sample I had just didn’t fit or feel right.
I have to admit that when I finally said ‘yes! I’m doing this’ to my diamond pattern, I felt very daring actually ordering the fabric. I sort of think of myself as much ‘safer’ than that. My main concern was finding a pattern that would grow with the girls and myself, the last thing I wanted to do was completely change them out (or hate them) in just a couple of years. When the fabric arrived in the mail though I was so thrilled that I took the plunge. These guys are awesome in this space and totally give the room life! I can picture them in a more ‘grown up’ version of this room in years to come, too.
Let’s talk about fabric for a moment… I have a really hard time making fabric decisions for the house and it doesn’t help that most online fabric shops offer way more than the eye can possibly take in. It’s like hunting through vast, endless fabric thumbnail images when what we really all need is just a very well-curated selection of beautiful prints in great colors at great prices. I initially heard about U-Fab when they were featured in a giveaway over at Young House Love and I hopped on over to their site to check them out. My fabric hunting exploration went from ‘I can’t find anything I love for this space’ to ‘which of these five patterns would work best’? I ordered samples and hung them in a window for months.
Actually, you can probably see the winning samples in many of the older progress photos from this room.
![]()
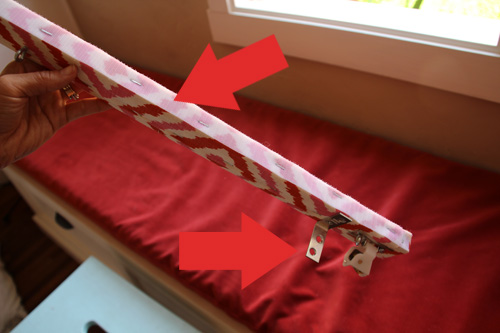
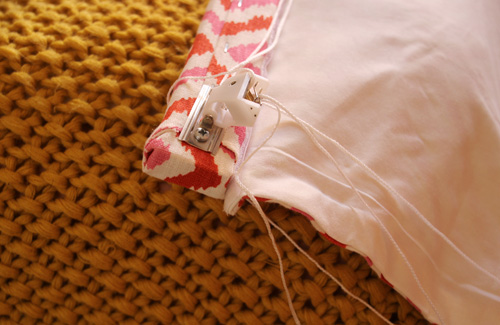
There were two tricks to the installation of these roman shades. The first is that the curtain panel of the roman shade actually completely disengages from the mounting portion via velcro making it a total breeze to install. The second is that they come with and are secured with L brackets, a piece of hardware found at all home improvement stores and an installation system too easy to mess up. I was so happy this was so simple.
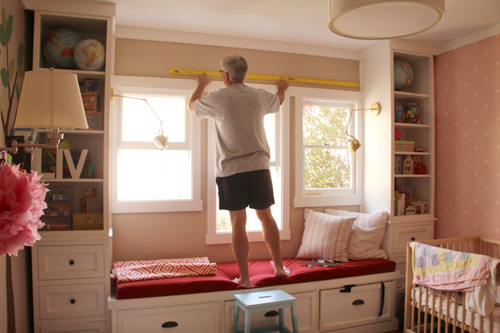
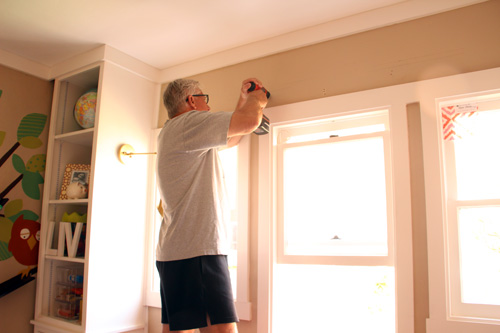
I borrowed my dad to help me with this two person job (though I’ll admit that he kind of took over from here). Dads are great.
Our steps for installation included: measuring to account for all three shades and where they would be drilled into the wall. Thankfully we were drilling into a header so we didn’t have to worry about plaster screws or anchors. Next up was screwing L brackets into place on the shade mount according to measurements, pre drilling holes into the wall for the bottom half of the L bracket, screwing L brackets to the wall. Bam, bam, bam.
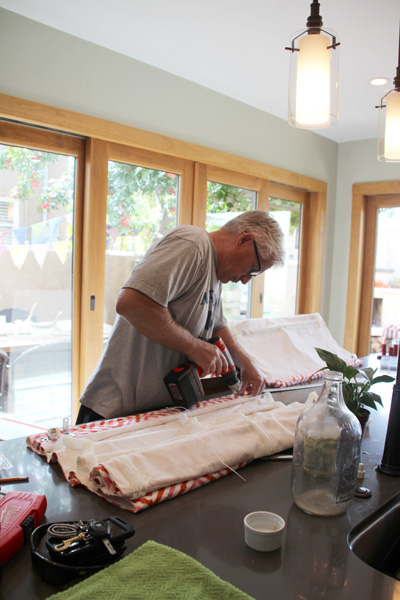

Again, the velcro is genius. Rather than become tangled beneath the roman shade as your drilling the mount to the wall, simply separate the curtain panel from the mount.
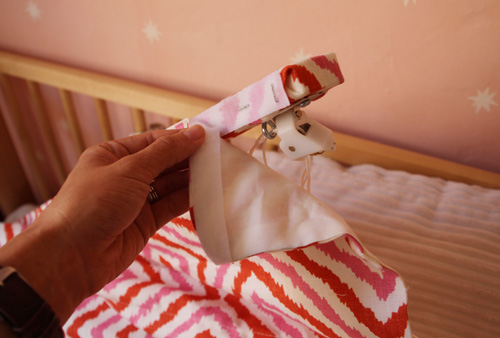
The pull cords come pre strung but to separate the curtain panel from the mount via velcro we had to unstring the shades. Thankfully they’re very simple to thread back through once they were up on the windows.
I’ve been playing with them for the past few days now. Up, down, half way, two-thirds of the way…
I think that I love it when they are mostly all the way up with just one or two with a bit of length…
Too much pink? Just right? It’s good to be a little girl.
I’m over here typing and smiling ear to ear about this space. The custom bookshelves, the wallpaper, the gold lights, the roman shades… it’s my happy place right now. If you’re curious about those details, the transformation of this space is chronicled right over here in the girls’ room gallery.
Baby, you’ve come a long way.
Now I think the only projects left in here might be artwork, figuring out that throw pillow bit, installing a new sweet arm light for above Liv’s bed (came today!), wall hooks for backpacks and such, finishing touches on some new art boards and some serious organization for Liv’s ‘makers space’. I guess we have a few more projects to go…
This post was sponsored in part by U-Fab who provided the fabric for these roman shades as a sponsor of the site.

What a difference shades make right? The room already looks fabulous but with the shades to add accent to the room really completes it. I love how you post your step by step instructions along with pictures to show how easy it can be when you are determine to add pizzazz to your room. Thanks for sharing!
I love that room! It couldn’t be prettier!! I’m just amazed by all the things you do!! Wonderful job and lovely fabric!
Another gorgeous addition to a pretty little girly room! Seriously, I love them. The diamond pattern is bold, but perfect at the same time. And I really like how you hung them high above the actual window, it really helps to make the space seem much taller (at least it does in pictures!)
I love how this room is looking, Morgan. Great work!!
Too much pink – NO WAY! Those shades are awesome and I completely agree that is a pattern and color they can grow with for a very long time. :)
Oh thank you! I’m glad you concur because I might be going a little pink crazy…
I’m definitely going to have to look into this for our office! We’re still a far way off from having roman shades made, but that’s the end goal. Yours look amazing and I’m glad you mounted them above the window to allow as much light into the room as possible.
http://jax-and-jewels.blogspot.com
I definitely recommend Melissa! She makes the process very simple. :)