
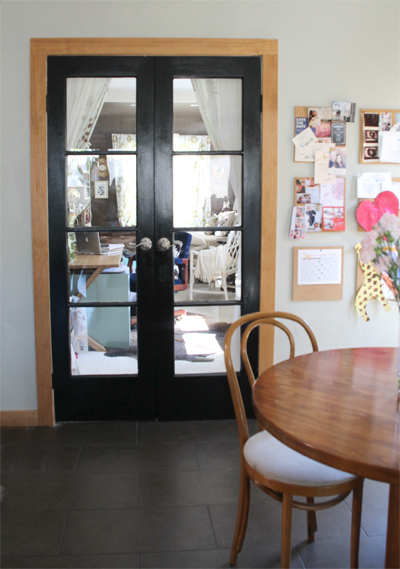
So back to these doors…
The crazy thing about these french doors is that they have been on my mind for almost three years. Perhaps since the day we installed them back during the office & big kitchen build.
It doesn’t hurt that I walk through them umpteen times a day as I wander from kitchen to office and back to the rest of the house again during my usual routine. This is my zone right here, my commute, my little world in a single transit path.

I have spent a lot of time staring at those doors.
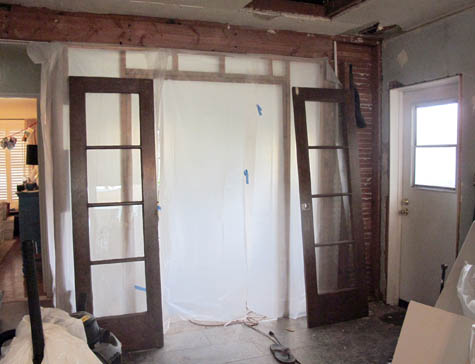
When we found these doors waiting to be recycled on the side of the road (and then asked permission from the homeowners before taking), we were thrilled to have found something so big (and pricey) and full of history – they were just what we were looking for for this exact space in our kitchen/office transition.
Unfortunately refinishing these doors was such a very long journey. It took about 2 years and nine months longer than I expected to find a way to close them (doors should, by all means, naturally know how to do this) and about 2 weeks longer than I expected to fill holes, prime, paint and install hardware, once I built up the courage to paint them (in order to close them). I think that sometimes that’s just the nature of the DIY beast. And a happy end result makes it all so worth it.
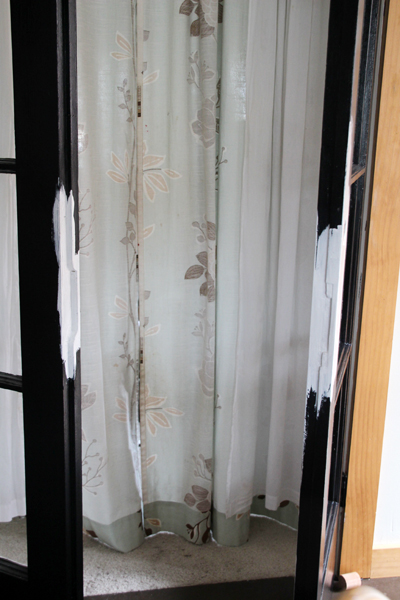
I shared more about why, even after sanding and rehanging, these doors went black here, but in the quick and dirty it was two part: first, we weren’t really able to restore them to an unfinished wood glory despite a lot of time and resources:
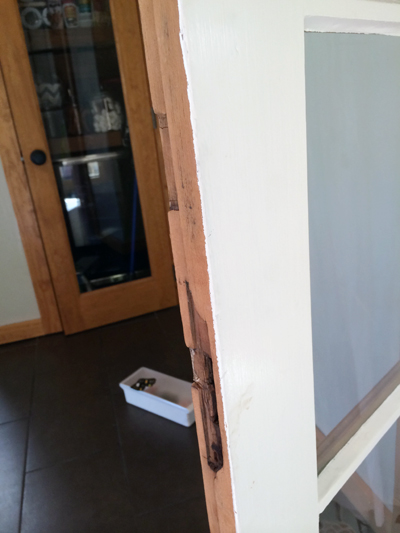
And second, the very old and unique double jointed shape of the doors and latch system meant that finding a proper handle set would be near impossible. (In fact, the near throw-in-the-towel moment came when I had a historically accurate window and door reproduction carpenter tell me that I would probably never really be able to find the existing locking mechanism for this door to match the holes that were in place. My heart fell about three inches when he said those words because we had just assumed it would be so easy).

Two months ago I was close to spending some of our savings on new custom french doors for this space since doors that closed and functioned were a growing must to keep my work-from-home professionalism alive.
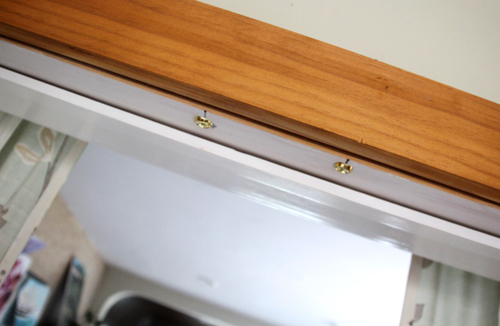
But my ah-ha moment came about two weeks later and none-too-soon. Friends of ours were hosting a super bowl party at their new home and about half way through the party, I watched as one of their young sons went from his bedroom into the living room through a narrow set of french doors. When he turned around to shut the doors behind him, there was a little ‘click’ of door shutting satisfaction – but no latch. I hopped off of the sofa and investigated immediately. At the top of the door was a small cup that ‘caught’ a small rod (topped with a ball) as the door closed. Why hadn’t any of these professionals shared this idea with me? It was such a happy moment!
It worked just like this:
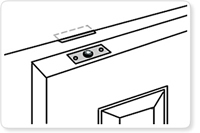
That week I raced to a specialty hardware store and picked up their last little baggie of 6 ball and cup latches for $5. Problem solved and I could ignore the existing latch holes on the door to make this all work. No major drilling necessary.
But before any door latch could be installed, I had a seriously naked door to contend with.
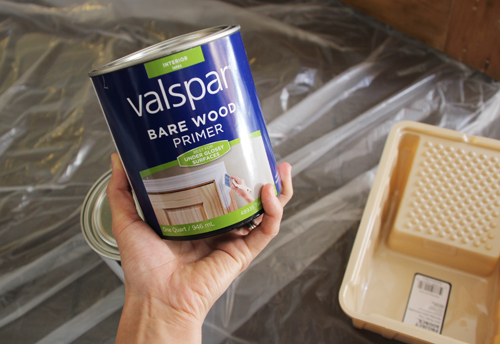
Using a bare wood primer was a recommendation to me that I almost passed up. I’m not a huge fan of priming anything, it feels very much like a useless extra step in most circumstances and I hate to do double the work (love me a solid paint+primer in one). BUT I heeded warning and am so glad that I did. This initial coat of primer was a breeze to apply and it made painting on my glossy black latex paint afterwards feel like buttah.

Raw wood absorbs a lot of the moisture out of your paint leaving you with a slightly courser, grittier surface. By using the primer as this initial surface, my final coat of black on the doors was smooth and pretty.
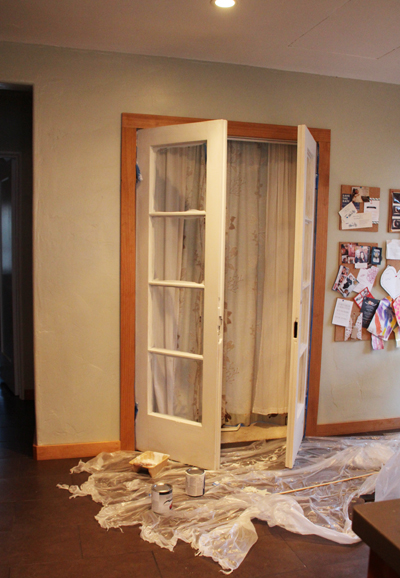
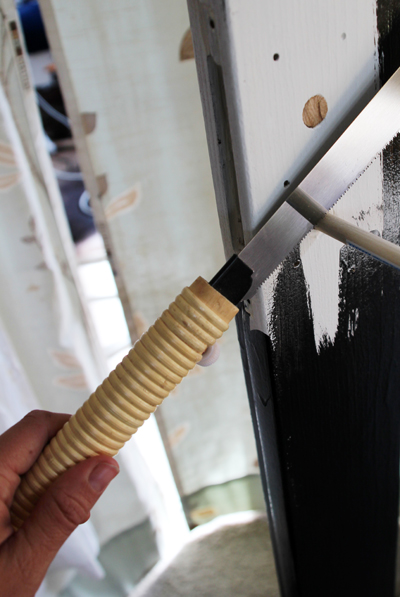
It did take a few hours to get this sucker finished. I taped off the hinges and molding but I didn’t worry about the glass panes because I had heard how easy it is to scrap these free of paint with a razor. In hind sight it was possible but not so easy, I wish I had taken the 20 minutes needed to tape off the paint to save myself an hour or more of scraping towards the end.
Then it was on to black. I wanted the glossiest black I could get my hands on.
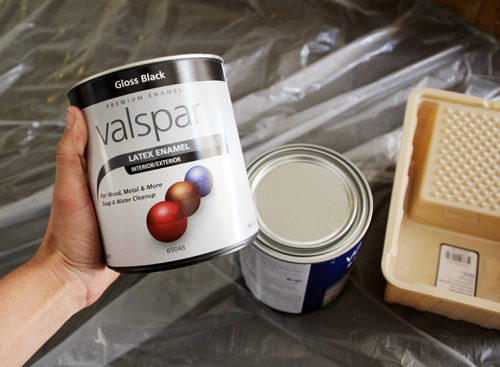
I initially imagined using an oil based paint for the type of finish I was leaning towards. The paint experts told me that either latex or oil would do and would provide similar results, so in the end I went with latex since I think that it’s so much easier to apply and clean up.
I suppose I should mention here that the correct order would have been to fill those massive latch holes prior to my primer, but I was a little anxious (and short on time) the weekend I tackled these doors and needed to accomplish as much as possible during my free time. So while I waited on collecting more supplies to correctly patch the latch holes, I threw on the primer and first coat of black.
When it did come time to patching the holes, I took a three-phased approach that took me about a week to finish up (using the spare time I had here and there).
I didn’t rush the process because my goal was ultimately to do this right.
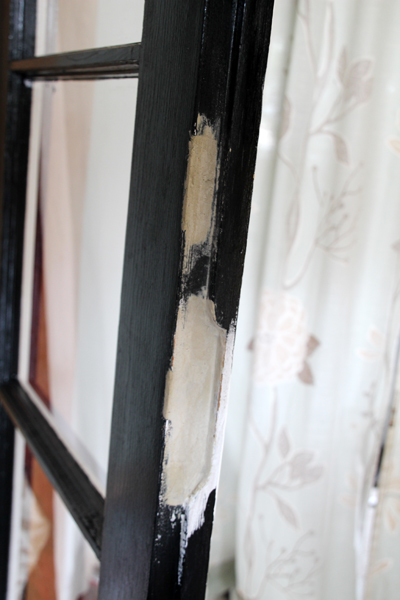
The first step was to fill the unnecessary extra latch holes with small cuts of wood and dowels pieces cut to size.
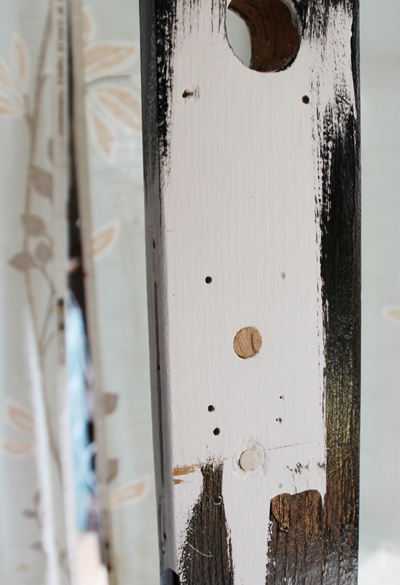
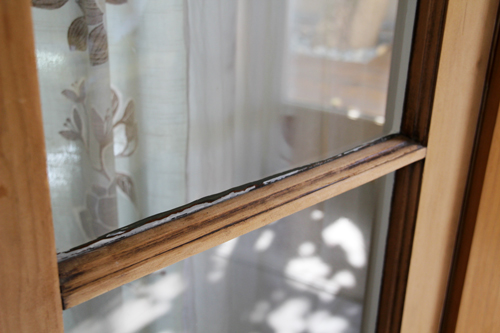
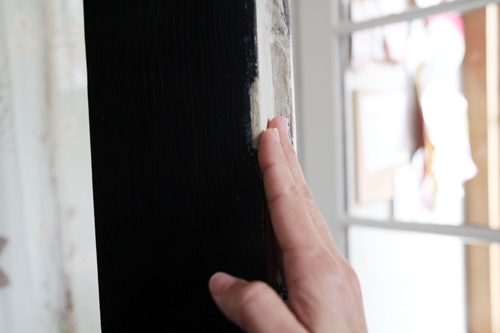
I applied wood filler over the wedged and tapped-into-place wood cuts in the doors and let dry, sanding when finished.
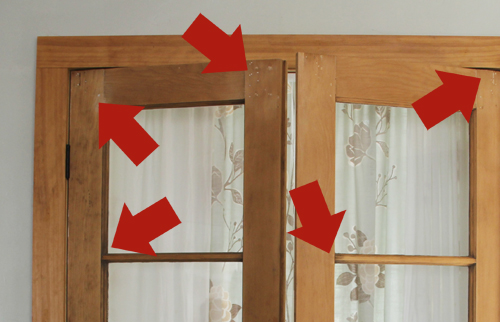
If you take a look at the top right though, you’ll see my disappointment with my first filling technique. The wood filler became porous when dry and took on an odd shape – not smooth at all, even after much sanding. You can even see the porous nature through a coat of primer, which I was hoping might hide more texture.

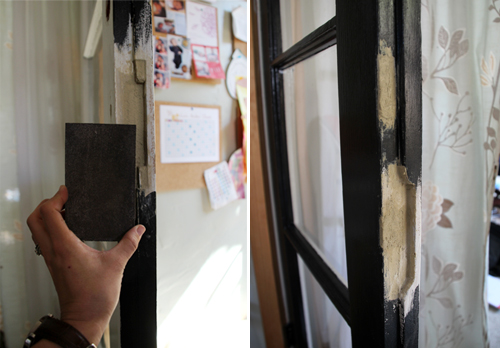
Determined to do this job better, I followed the suggestion of a neighbor and used an epoxy putty next. My choice? All-Purpose Bondo Putty (originally made for cars, now apparently for use on anything).
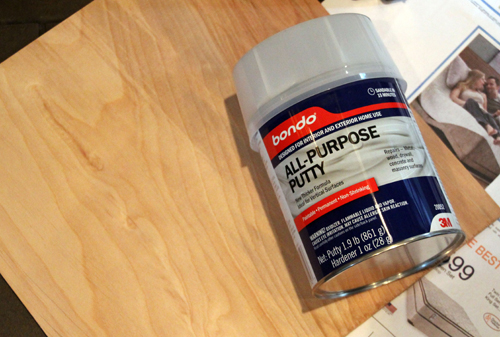
It’s a two part system with quite a few chemicals. I recommend a mask and keeping your windows wide open.
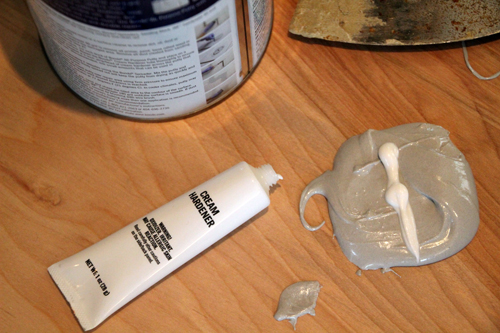
Once the two parts are mixed together well, the mixture can be applied to the holes with a spatula, just as the wood filler was added.
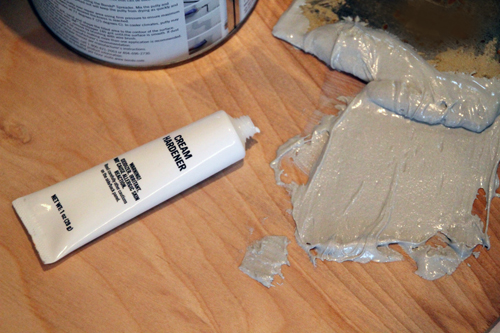
Soft and smooth and perfect for priming! I can’t speak highly enough regarding Bondo for these sorts of fixes. A quick note here that Bondo dries in less than five minutes while wood filler takes closer to twenty. Wood filler is easier to mold and manipulate (even with your fingers to get the shape just right) while with Bondo you probably would want to avoid contact. They each have their own perfect purposes.
Building up the rough spots and patching the door purposefully (with plenty of sanding in between) felt like I was doing the doors justice. I probably sanded and reapplied wood filler or bondo or paint (or whatever step I was on) many times over about five days until I was happy with the patch.
The next step was to install the ball and catch at the very top of the doors. These were pre second coat of white paint (again, a little out of order but sometimes you tackle what you can get done or what you might have help with in that moment).
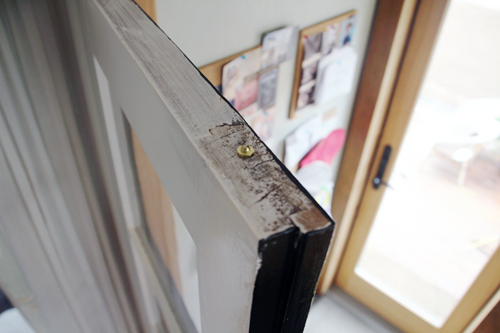
Now when the doors were shut – they stayed shut with that satisfying ‘click’! Woohoo! A sweet, sweet sound for the ears.
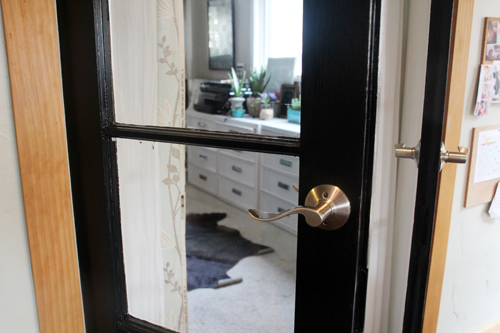
To open and shut those doors we installed dummy handles. Dummy handles drill right into the door and don’t actually open or close a locking mechanism. They’re perfect for a spot such as this one.
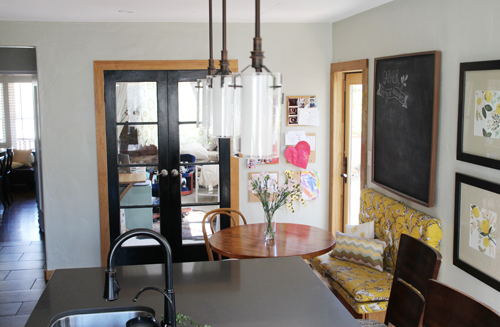
There they are! Done and done. It feels great to have this project crossed off of our list.
I’m pretty proud that I finished these up, and now my commute from the office and home again is so much prettier. :)
PS more pictures of the above and process of building the office & new-from-scratch kitchen. All of the black french door ‘after’ photos posted here, and great black door inspiration right here.

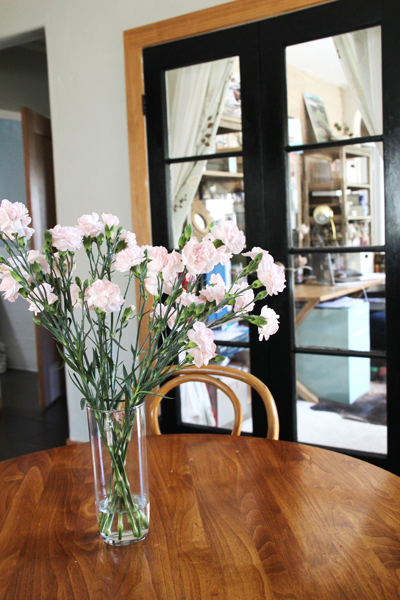
Great tutorial on painting those doors. Love the picture of the doors from over the breakfast table! I wish I had known about the Bondo when I built my craft table a few months ago – I had the same issue with wood filler, and it really shows in the final product. It’s doubtful, but if I ever get the time to go back and fix it up, I may have to look into it. Thanks for the tip!
You have a very pretty and enviable commute! I really like the contrast between the glossy black doors and the wood trim.
http://jax-and-jewels.blogspot.com
Oh why thank you! I enjoy it much :).