This past weekend I had the honor of creating a wedding cake for my friend, Katie. Boy, what an undertaking that was! But because I’m always up for a good challenge and because I love to create personal gifts for those that I care about, I gave her an enthusiastic ‘yes’ at the request.
I’m breaking this saga into three parts: baking, filling & fondant, and assembly/wedding. Join me over the next three days to partake in the journey! If you’re not really interested in the art of novice cake baking, feel free to head right on back here Thursday. If you love up close pictures of chocolate ganache (that’s so good you could just eat it right off of the computer screen) or are slightly amused by such a ginormic challenge, then I invite you to join along ;).
Let’s begin. My mission was to design a wedding cake that melded the bride’s organic, rustic-themed wedding (rustic might not be the right word, but think beautiful lace + rugged burlap) while also baking a deliciously yummy dessert that could feed the 150ish guests. Inspiration from the bride included:
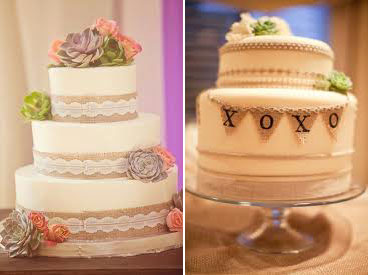
Beautiful! I was immediately smitten with the entire look and feel of this future cake.
But gah, I am no cake expert and wedding cakes are a category of their own. I have just two wedding cakes under my belt: the daisy covered cake I baked for a friend a couple of years ago (where I learned that buttercream and I are not best friends) and the beast of a cake that I did for my own wedding – which I really, truly loved (you can see pics of both by scrolling through this post). But even these two projects (years apart, really) make me an absolute beginner at the art of giant cake baking. You will find a million excellent tutorials on the proper baking and styling of wedding cakes from the galore of tasty food blogs out there (one such that I depended heavily on was this one) – but you might also enjoy the ramblings (fortunes and misfortunes alike) of me creating this special dessert. Just please don’t judge (wink, wink).
Let’s start off with the world’s tastiest cake recipe. I made a very similar version for my wedding, but I can report that this one is that much better. It is rich but not overwhelming, it is deliciously moist (in that dense sort of way) but also holds its form well. We went through the entire cake (the below is supposedly enough for 149 people, but maybe I cut too big), and I am hoping that that means I have finally found a good recipe. If you are in need of such a chocolate (with just a hint of of espresso) recipe, look no further. It’s so good it’s worth bookmarking.
Rich Chocolate Espresso Four-Layer Cake
Adapted from Smitten Kitchen’s Chocolate Butter Cake (which was adapted from Sky High: Irresistible Triple-Layer Cakes)
I sought out this recipe because I was searching for a tried-and-true wedding cake story (not recipe but blog story, with plenty of reviews and suggestions included). I’ve found that there’s a big difference between chocolate cakes and wedding chocolate cakes – the latter being sturdy, holding its shape well and still being tasty, just any ol’ chocolate cake recipe won’t do. Deb highly recommended this guy on her blog so I gave it a go.
Another huge plus is that this cake recipe is made nearly entirely in one bowl without the usual separating out of dry and wet ingredients. Convenient. Because of this unique assembly, Deb shared that she had issues with deposits of unmixed butter and flour that she had to scrape down often in her mixer bowl, I used very room temperature butter and didn’t run into this issue at all, but it’s worth noting just in case.
Makes one 12-inch square cake layer (or two 8-inch layers). My total cake is three tiers high with a 12″, 8″ and 5″ tier – four layers per tier.
3 cups flour (some use cake flour but I find the regular stuff works just fine and is quite a bit more economical)
3 cups sugar
1 1/2 cups unsweetened cocoa powder (not Dutch process)
3 teaspoons baking soda
3/4 teaspoon ground cinnamon
3/4 teaspoon salt
3 sticks (12 ounces) unsalted butter, at room temperature
1 1/2 cups buttermilk
3 eggs
1 1/2 cups freshly brewed coffee, cooled to room temperature
1. Preheat the oven to 325 degrees F (I should note that the original recipe calls for 350, but I have come to prefer to bake my cake layers for much longer than a recipe traditionally calls for and at a lower oven temp, and have found that this results in a deliciously rich, flat cake layer that is ideal for stacking). Line the bottom of a 12-inch square baking pan with parchment paper and butter/cooking spray the paper and edges of the pan.
2. In a large mixer bowl, combine the flour, sugar, cocoa, baking soda, cinnamon, and salt (because I’m making so many layers, I prefer to have these ingredients premixed in ziplock gallon bags. One recipe batch per bag and one more step that can be completed a day or two earlier). With the electric mixer on low speed, blend for about 30 seconds.
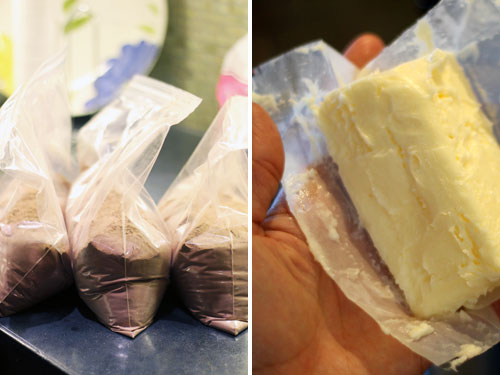
That butter should be soft.
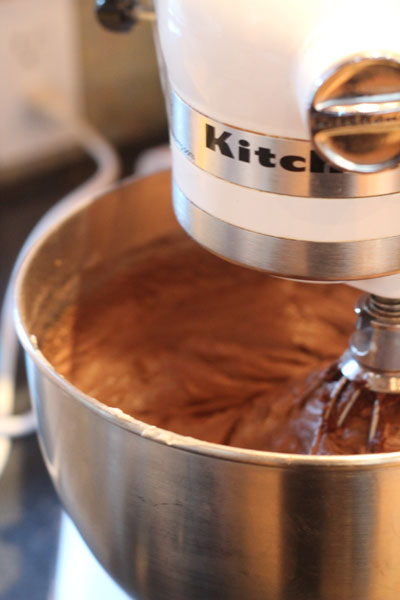
3. Add the butter and buttermilk and continue to blend on low until moistened. Raise the speed to medium and beat until light and fluffy, 2 to 3 minutes (now’s a good time to taste! Your batter should be amazingly delicious and sans eggs)
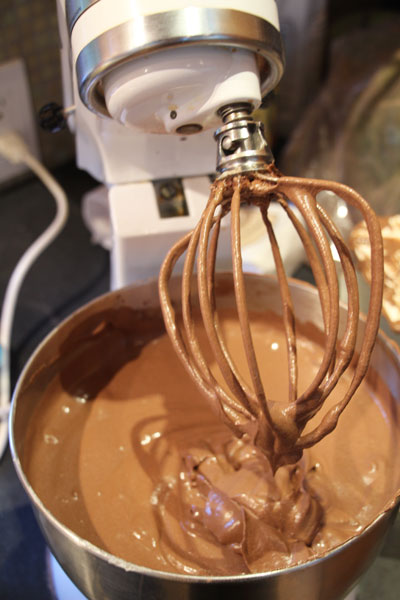
4. Whisk the eggs and coffee together (both should be room temp), and add to the batter in 3 additions, scraping down the sides of the bowl and beating only until blended after each addition. Pour into prepared baking dish. If using 8-inch pans, split between two.
5. Bake for 40+ minutes and watch carefully. 8-inch layers may take close to 40 minutes while 12-inch as much as 50-55, the lower 325 temp means that baking time is increased over the average cake but be sure to not over cook! Cake is finished when a wooden toothpick comes out clean. Carefully turn them out onto wire racks and allow to cool completely. I prefer to keep the cakes right side up (to prevent any breaking if the edges or center rises higher than average), so I flip them twice. Once to remove them from the pan (the layer is now upside down) and once again onto a wire rack for cooling (now it’s back right side up). Leave those parchment paper liners on for refrigerating later.
*A couple of thoughts on baking a flat cake. I have used both a heating core (if you use, grease well!) and baking strips in the past and I find both to be helpful (especially at calming the nerves – so if you’re that type I highly recommend), but the best tip I have ever received is to drop the temp of a recipe and bake for a longer time. As mentioned above this is already a step I suggest to create a dense cake, but it also yields near flat results as well. I baked near all layers above with neither the core nor the strips, but that’s mostly because I forgot the former at my house (baking at my parents which is in the same city that the wedding is) and forgot to apply the latter to most cakes prebake.
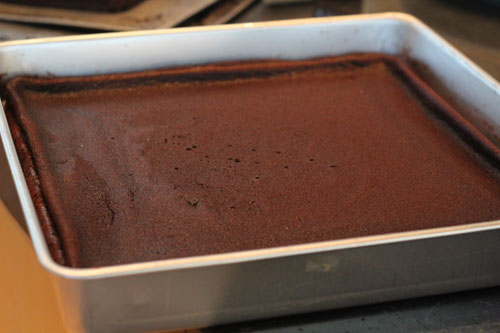
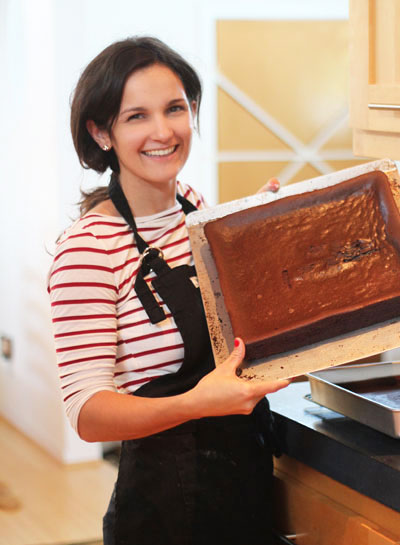
If you do end up with a tiny extra lip like above, a simple serrated knife should do the trick. Start at each corner and work your way towards the center.
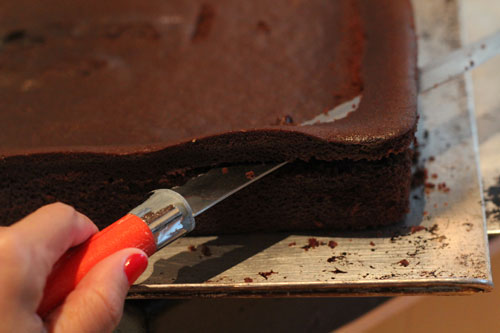
You can use this technique to slice thick layers in half (my ideal cake layers are 1/2-3/4″ tall and four layers thick per tier).
If you’re keeping track, this three-tier, four-layer-per-tier cake calls for about 6lb of butter, a 5lb bag each of flour and sugar, 3lbs of cocoa, 2 dozen eggs, a half gallon of buttermilk and 12 parchment squares. Dang.
Next, I cut out foam core bases for each layer of the cake. This is crucial if you make the cake in advance and require refrigeration or freezing. Even if you’re brave enough to bake the entire thing the day before, you’ll want at least one foam core (or store bought cake board) per tier to serve as your sturdy cake tier base.

An exacto knife is super for this.
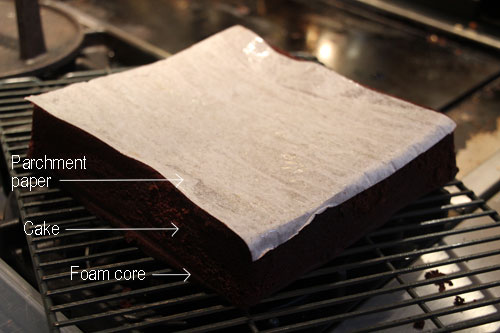
Each layer of each tier received a foam core base and a healthy wrapping of seran wrap before they were stacked in the fridge. I baked nearly all layers on the Wednesday prior to the wedding which meant that the plastic wrap didn’t have to be terribly tight or thick, but if I were baking cakes a couple of weeks in advance (as I had originally intended) I would opt for at least three layers of wrapping and zero exposure of cake before freezing and finally moving to fridge five-seven or so days in advance.
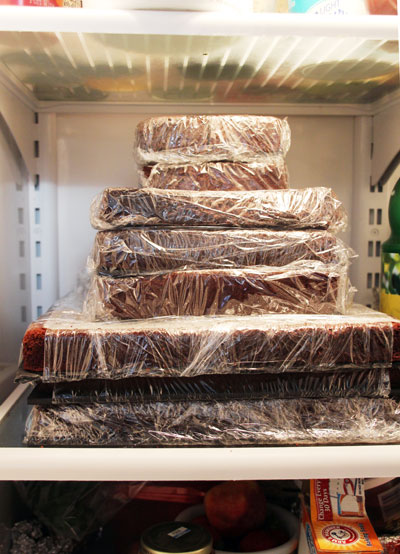
The above was my stash as of last Wednesday, Thursday brought with it the baking of at least one more layer for each tier plus a whole lotta buttercream and ganache. Oops on that little corner peeking out.
See you all here tomorrow! Where the baked cake gets its delicious raspberry ganache filling (another to-die-for recipe), buttercream crumb coat and fondant shell.


hi there i want to ask what is the alternative to used for the cake base instead of chocolate? sorry im pregnant and i cant eat any chocolate one i feel bad if i eat it. and i will be making my wedding cake for this august and need something thats not chocolate is. hope to hear from you.
Hi Denise, you could definitely use any flavor of cake that you’d like (I’d just recommend that it’s a recipe for a ‘layered cake’ which tends to be stronger). Lemon, red velvet, vanilla, the sky’s the limit! (congrats on your pregnancy ;)).
hi thank you for the reply, so if i remove the 1 1/2 cocoa i just add additional 1 1/2 flour so it will be balance plus vanilla essence? i hope i get it correct sorry i do also bake chocolate cake more often but this time can eat it and feel bad if i dont have a taste of my made cake.
Hi! oh no, don’t do that – find a solid vanilla cake recipe (specifically design as a ‘wedding cake recipe’ so that it’s strong enough to hold layers). Martha Stewart will probably have one as will many baking blogs.
Full respect to anyone who even attempts to make a wedding cake. Given how important the occasion is that it is made for I would be too nervous to even try!
I’ve never used foam cores before to give support to the tiers. I’m in the UK and can’t really find what you were using, any help?
Hi Hannah! Sorry for the late reply, Christmas has been so busy :). In regards to alternate ideas for foam core, you could try any sturdy cardboard (I’m even thinking shipping box pieces cut to size from the holidays) or art board. You could also try taping together flimsier cardboard to make one thicker piece as well. If you’re baking a standard sized cake, you could check out bakery supply shops for cake boards like these: http://www.amazon.com/Wilton-19-by-13-Inch-Cake-Board-6-Pack/dp/B0000CFN6B/ref=sr_1_2?ie=UTF8&qid=1356821905&sr=8-2&keywords=cake+board or search online for delivery to the UK.
Good luck!! Let me know how it turns out!
Making a wedding cake at home itself is a big thing, but you have described it so beautifully that i just can’t wait to bake at home soon.. really i liked your recipe, from baking to decorating and assembling all are perfect.. love it..
I am excited to see how you executed it. I made a friends wedding cake once and its A LOT of work. I was looking forward to your recipe but you lost me at coffee. Personally loath espresso flavored stuff, best way to ruin some good chocolate. anything I could sub in place of it? like just water maybe?
Haha, I have the opposite reaction to coffee but I completely understand! I think that you could use any flavored liquor (hazelnut, almond, vanilla or raspberry?) that was watered down or even a juice or extract. I’ve even heard that baking cocoa + water helps to keep the cake moist but also flavorful. Another blog I’ve read recommends steeped tea! Like a raspberry roobios. Yum.
Wow – what an undertaking! Way to go… and thanks for the tips esp to bake at a lower temp for a longer time for a denser cake. I will try that next time!
Rebecca
Yes, you will love that one after a while!
Oh my gosh Morgan…way to make a girl hungry!! I’ve been drooling through the whole post. Just the mention of homemade cake sets my taste buds a-twitter. But then you really took it over the top with the mention of raspberry ganache! I can hardly wait for the next exciting episode!!! :)
btw, kudos to you for doing this for your friend!
Janelle – thanks so much! Always love your comments!