Happy Friday! Today I thought I might share a few tips I’ve learned with Pinterest. You may have heard of a few of these before, but I hope that you find some of them helpful!
*Find out how to see which images from your site/blog have been pinned
*Find the original source of any image
*Let friends, bloggers and websites know that you’ve pinned them
*Add ‘search engine optimization’ to your pins
*Collaborate with friends on boards
Are you on Pinterest? It’s quite addicting!
1. If you have a blog and are curious as to which images from your site have been pinned, there’s a quick and easy way to find out.
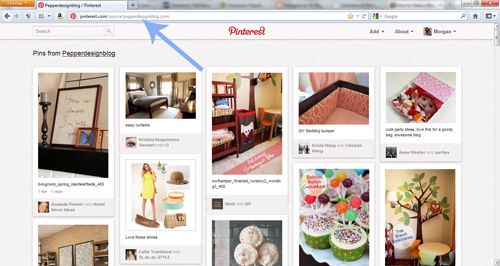
To find out which images have been pinned from any site, add the url address of that site after: www.pinterest.com/source/. For example, Pepper Design Blog would be: www.pinterest.com/source/pepperdesignblog.com. This little tip shows which images have been most recently pinned, not all pinned images ever.
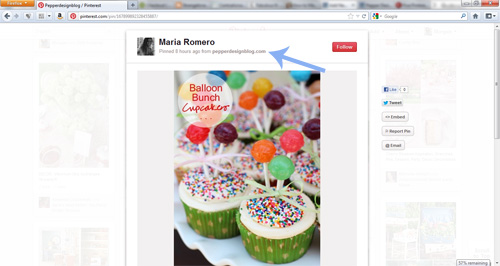
2. Pinterest has really improved in helping users to find the original source of an image, but it’s not quite there yet. You can quickly jump back to the original url of an image by selecting the link right under the pinner’s name:
But here’s my favorite trick! When that doesn’t work, or when you want to find the original source to any image online, simply pick up and drag that image into a ‘new tab’ in your browser window. Here I’m dragging one of the posts from my PDB feed from above right over the little ‘+’ sign that indicates a new tab.
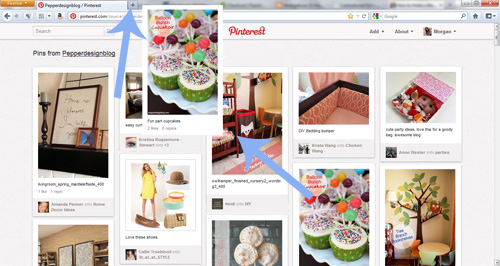
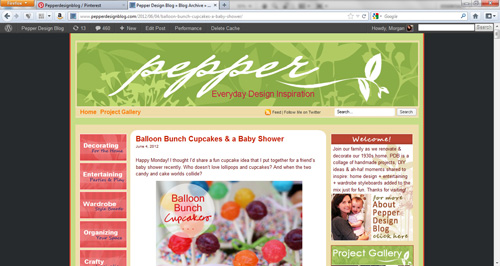
The new location that opens is where the previous pinner found your image. You might have to drag and drop the image a few times, but eventually you’ll be led right back to the original post. The only time that this doesn’t work is if the pinner pinned an image from the homepage of a website rather than the particular post that that image came from (which is why it’s key be sure you’re on an individual post url when you’re pinning images, too. You can usually select the heading of any post on any homepage to be taken to that post’s individual url). PS A commenter mentioned that you can double click on an image and it will take you right to the source – I tested it out and it works! An even easier solution!
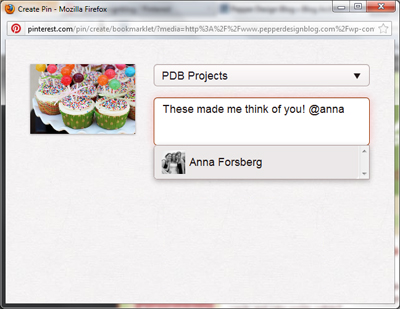
3. If you ‘follow’ a pinner, you can notify them that you’ve pinned their image (much like Facebook and Twitter). This is helpful if you want to ask a question or offer a comment on an image that you’d like the originator to see, or if you want to share the image with a particular friend. Tag someone in a description by using the @ symbol and then by selecting from the drop down list as you type out the name/blog/website that you’re following.
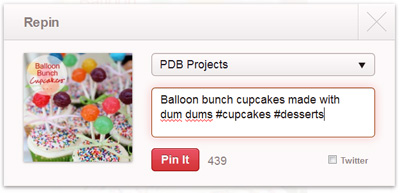
4. Pinterest uses the descriptions of images to help other users find those images when they are searching for a particular word or phrase. Feel free to help Pinterest out by using hash tags (#) in front of keywords in any description for an image you’re pinning, it will help your fellow pinners at some point in the future! PS Furthermore, Pinterest will default to a description that just lists what the image was originally saved as ‘desserts_ballooncupcakes_400px.jpg’ which isn’t useful at all to other pinners. Be sure to rename to help future searchers out :).
5. This features is actually new to me because it wasn’t around when I joined Pinterest, but now you can collaborate with friends directly just be identifying them when creating a new board. Now the bride-to-be can add her bridesmaids for collecting ideas, or a designer can work directly with a client by collaborating on an Living Room Makeover board.

Well there you have it, five new tips that I’ve found to be very helpful. Not on Pinterest yet? You’ll love it :), and come say hi by finding me right here.
Have a wonderful weekend!


Thank you so much for sharing this info Morgan. I love Pinterest too, but have to monitor my ‘visits’. It is soooooo addictive! :-\
So helpful Morgan! Funny seeing my name there :) I am a pretty obsessive pinner, even had to give it up for Lent. Far and away the hardest thing I have ever fasted from.
I didn’t think you would mind if I used you :). That would be the hardest fast. ever.
Thanks for the great Pinterest tips! I never knew that you could find the original source by dragging the image to a new tab…must try that. It gets so frustrating when people don’t pin from the original post/link or they pin from a search!
PS Torey commented that you can actually just double click on the image – didn’t know that one!
This is the best Pinterest guide I’ve seen! Thanks for taking the time to pull it together. And yes, I’m on Pinterest and a bit obsessed. :)
Thanks, Katie! That’s so kind!
Morgan, Wow – Thanks for putting together this great tutorial on pinterest! Esp. love the ability to create boards with friends. So fun!
These are some great tips. I really love Pinterest. There are so many amazing ideas and fun things to find :) Love and hugs from the ocean shores of CAlifornia, Heather :)
Usually when you click on the image and it pops up, if you click on it again it will automatically take you to the original source in a new window. No dragging and dropping required.
Torey, that’s great to know! I will have to try that!
Awesome tips! I had no idea half of that was possible!
Great tips, Morgan. I didn’t know about adding hashtags and how to add other pinners, good to know! :)
Really helpful! Thanks for sharing!
Hope so! Thanks Ann :).
Thanks for this! I had no idea that you can do all that. :)
Hope it’s useful! Thanks Alex!