I’m excited to share with you my Pinterest Challenge project! As mentioned last week, this quarterly challenge is all about tackling a project that’s been inspired by a pinned image or idea.

On Thursday I announced my hallway makeover plan and how I wanted to create a neat accent wall on the large and blank surface that greets us when we head back to the bedrooms.
I actually had a hard time nailing down just one project so I’ve got two more to share (this cool painter’s tape gold chevron cloth napkin design from yesterday and the other a surprise for later this week :)).
Of the three projects, the biggest to tackle was by far the hallway.
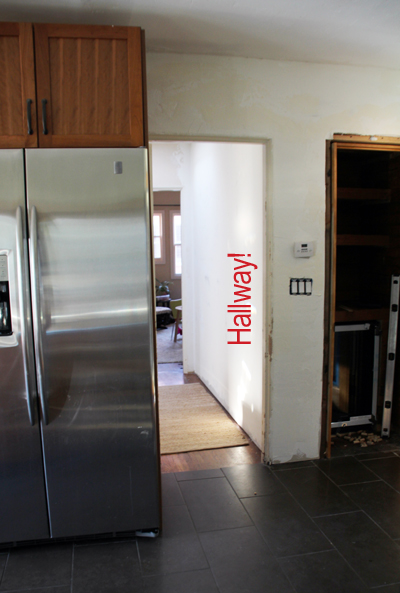
Since taking the above photo, we’ve actually patched and painted that wall of the kitchen (on the outside of the hallway) and have added molding where you can clearly tell it’s missing. It’s a nice update, too.
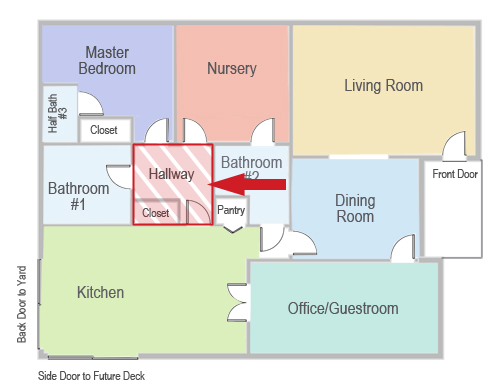
The wall originally hosted two closet doors and the entire space started as a tan color, but when we built that new middle bathroom the wall came down to help with electrical and plumbing, and went back up as a solid white blank canvas.
But today? She’s not empty anymore.
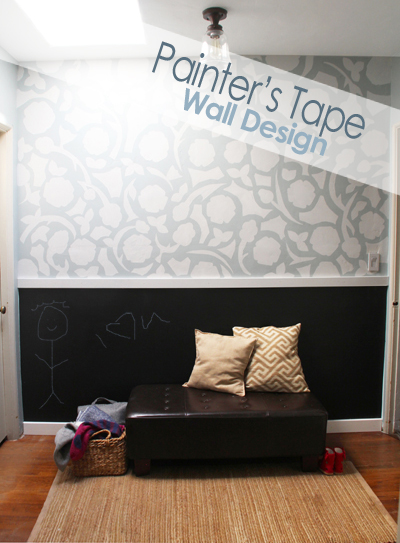
I created the block print design out of painter’s tape, scissors and two contrasting colors of paint. I attempted to stick with shapes of tape that were pretty easy to assemble (in front of the TV, while on the computer, etc) so that I could whip out a whole bunch of the same shape at the same time.
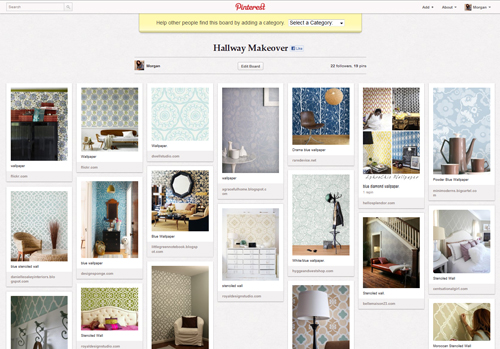
My inspiration for the project developed out of this Pinterest board:
I had started with the idea that I’d wallpaper that upper section above the chair rail and then I moved on to stenciling. But after hunting for just the right pattern for a bit I decided to try something creative by making my own. Check out this project for a different sort of hand painted (and very awesome) set of walls, too.
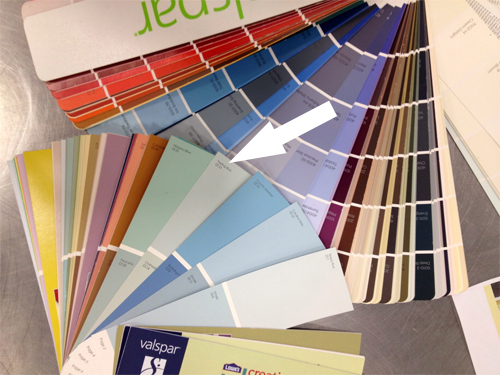
When it came to prepping the actual wall and hallway for this project, we first patched, plastered and painted with a primer. Three of the hallway walls were painted “Feeling Blue” from the Valspar paint deck but that last accent wall was left white.
I’m really happy with the blue that we ended up using in the space. I was searching for that perfect gray/blue and this one is close to fitting the bill. It looks very grayish at certain times of the day but over all feels fresh and blue.
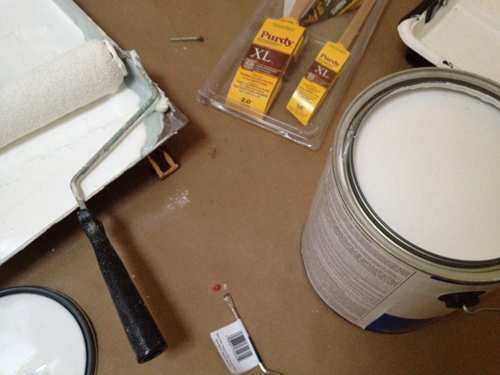
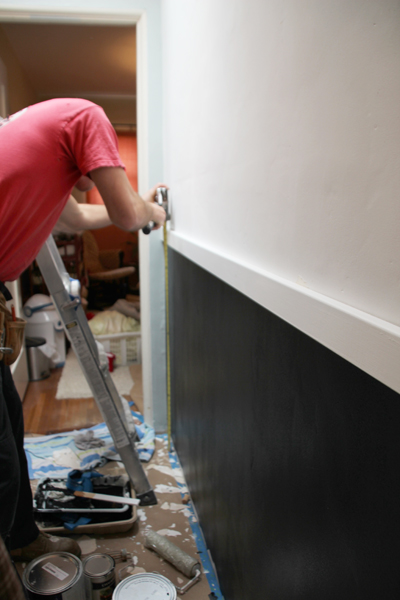
After painting the hallway, we measured out the bottom chalkboard portion of the wall and gave that several good coats of chalkboard paint (that little portion used up an entire quart!) until the section was a rich black.
Kevin lined the top and bottom of the black with baseboard and a chair rail painted the same white as the ceiling and trim (that we’re slowly cleaning up).
Then came the fun part!
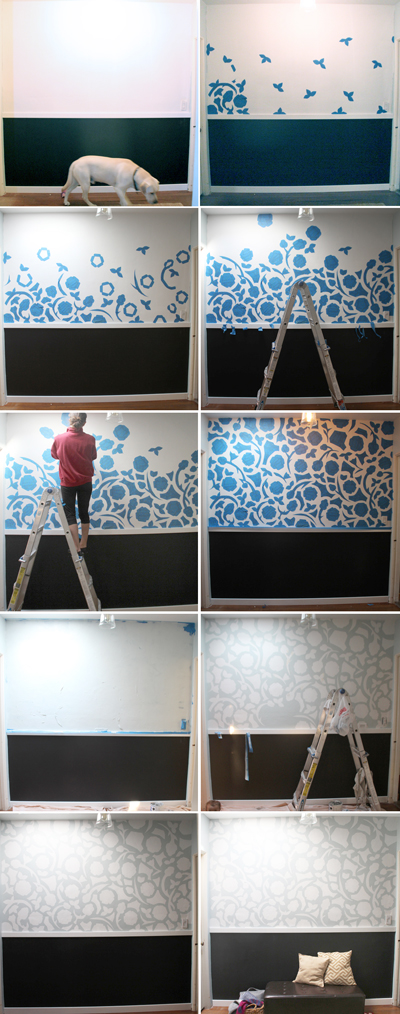
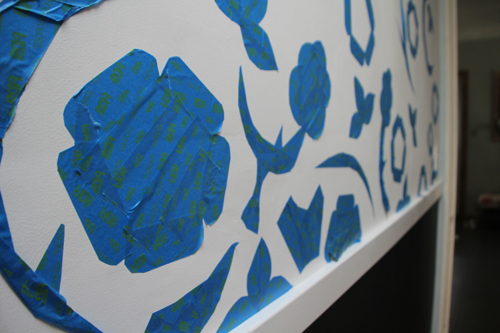
I slowly began filling in the space with my painter’s tape shapes until the wall was completely covered. Instead of sticking to a strict pattern or design, I sort of just filled in the gaps to create a fun block print that wasn’t too overly detailed.
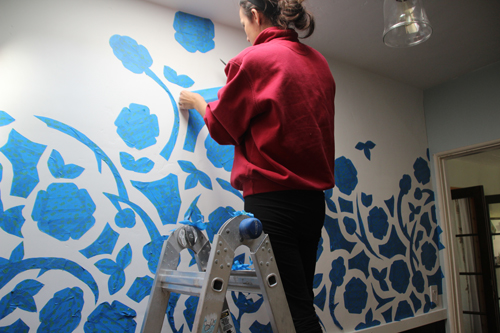
The design consisted of little bunches of leaves in twos or threes, a five sided round flower, a hycinth-esq flower on a curvy stem (the hardest shape to create) and then filler shapes in various sizes as needed.
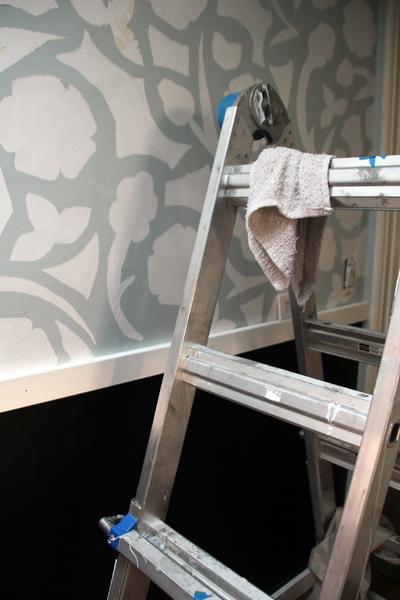
When all of my taped shapes were up, I painted over the shapes with the same Feeling Blue as the rest of the hallway and let dry. The next day I began slowwwly peeling my paint off.
If I were to do this project again, I’d first paint over the wall in my same base coat of white to really help seal those edges, just like I did when painting stripes in the nursery, then I’d top that with my blue.

The first snafu that I actually ran into is that I had left the tape up for too long! And had probably taped too closely after the primer had been applied (maybe a day) because as I pulled tape I also began to pull up chunks of the paint from underneath.
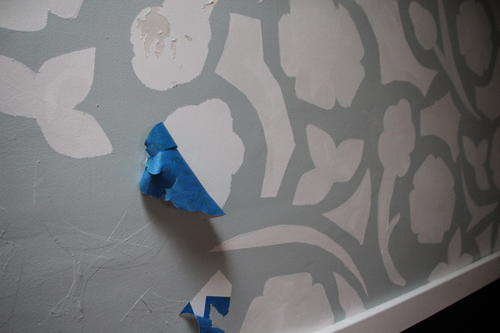
Oh so devastating! To fix, I used a sanding bar to break up the rough edges of the peeled paint and then repainted in white. Thankfully this wall has a slight Spanish texture (as do all walls in our bungalow) so this last-minute fix wasn’t too noticeable.

I also found myself retracing all of the shape edges with a small angled brush and more white paint to keep from the blurry bleed lines that appeared around the edges.
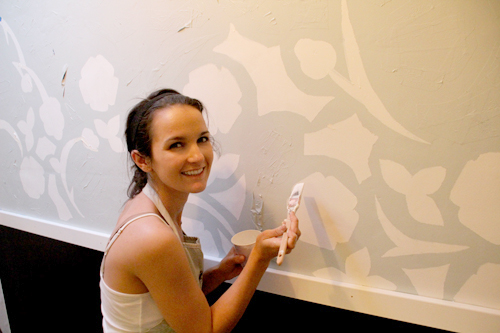
A late night photo! I ended up tackling the wall section by section, first pulling up tape and then touching up with white paint before moving on to the next section.
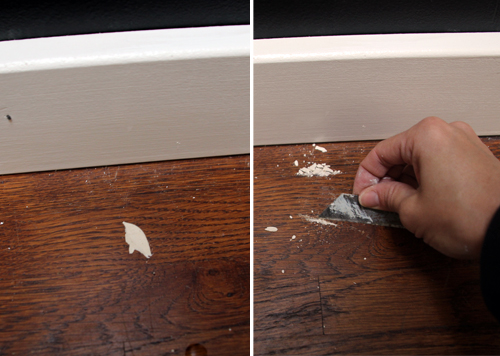
I used a dropcloth for the big paint jobs but for my minor touch ups just relied on a straight edge raiser to pull dried paint right up off of the hardwood floors. A nifty trick!
My set backs meant that this was not an overnight project by any means, but I really love the results so I’m definitely happy I put in the time and late night motivational pep talks to get ‘er done.
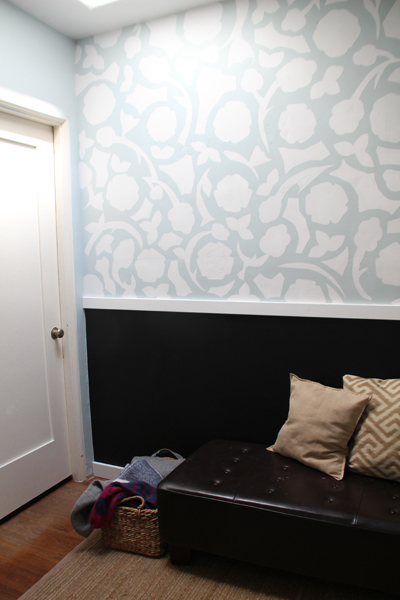
I love the idea of using the space as a drop zone for bags and coats, and a comfy place to slip shoes on and off. We don’t have an entry or mudroom and an easy spot to set your purse/diaper bag on the way in is a must. This particular bench might be too big for the area but we’ll see how it goes.
I also want to make sure Liv has plenty of access to her new huge drawing board! And while she can’t scribble now (yes, I did those stick figure drawings in the ‘after’ shot *sigh/wink*) I know she’ll dig it in a few months.
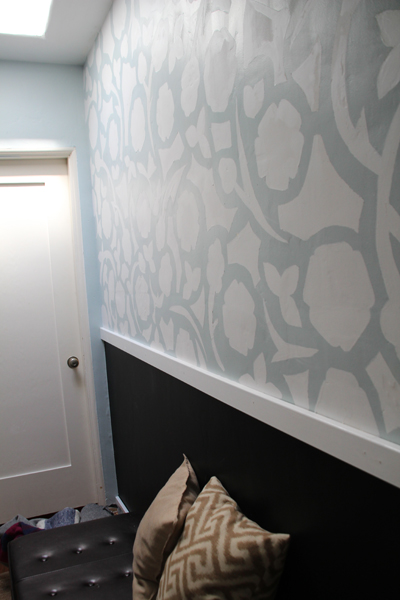
I’m thinking maybe a picture wall above the chair rail? That plus the rest of the doors and trim are screaming for a fresh coat of white! I had hoped to finish the entire hallway but that just wasn’t in the cards.
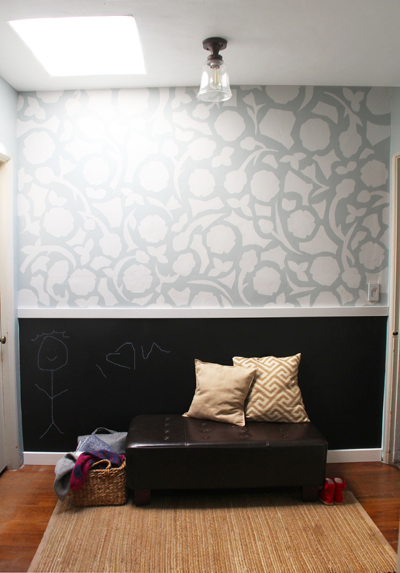
What do you think? I hope you love it as much as I do! Did you participate in the challenge? Would love to know what you worked on.
PS You can check out my DIY capiz pendant from the Fall Pinterest Challange right here!


This is a great idea and job! I wanted to let you know there is a different type of painters tape that you can leave on longer then the blue tape for delecate surfaces that would not tear off all your hard work. I found it at http://www.tapesolutionsinc. I also called there and the owner was able to send me samples of the tape so that I could see which one worked best with my project and she gave me advice and it stopped me from having re-work of my paint job. I would recommend checking them out. I love what you did and I think I may use something like it for my nursery!
So gorgeous and what a great technique! The pattern and chalkboard paint compliment each other so nicely! :)
Thank you do much, Victoria!
Wow Morgan! You never cease to amaze me!!! I love the wall, it looks awesome and the way you created that look even more awesome! I was also so excited to see the chalkboard for Livvie and all her friends, they are going to have so much fun with that! :)
This is seriously impressive! I can’t believe you came up with such a cool design using just painters tape! Mind officially blown.
Awesome job!!
Thank you, Catherine! Really appreciate that.
What a great pattern! Looks really great.
I just found your blog from Young House Love and have added you to my favorites. Impressive! I have a wall, in our front hall, that I have been wanting to do in some technique…you have inspired me to stop thinking and start doing!
Welcome! And I hope your wall turns out great!
WOW, just when you think there’s nothing left that’s new along comes you and your amazing wall. I realize this was inspired by another project but you have just blown me away with this amazingness.
Carol, that is so kind! Thank you!
Gorgeous! What a fantastic effect! I love the chalkboard on the bottom, too!
I am in awe! What an amazing idea…I’ve been trying to figure out what to do with my hallway and this is quite the inspiration!
If paint is coming off with the tape, try using a blow dryer to warm up the tape as you peel it off. It softens the adhesive, and makes it a little easier to get off.
That’s such a great suggestion! Thank you :).
Wow, you spent a lot of time and it looks adorable! I hate it when the paint bleeds through, and that primer and paint coming off – the horror! Good thing it’s easy (if not time consuming) to fix :)
Love the final look!
That looks awesome! I can’t believe you created it using only painters tape… it looks more like wallpaper. Beautiful job!
Thanks, Jenna :).
Oh my! It looks great :) All of that time and effort, wow – Good job girl!
(don’t you just hate when the paint peels off the wall? :( the last apartment we moved from did that to us when I was taking things down from above the stove. But, that was their fault b/c apparently they painted over the old wallpaper. Way to go.)
Oh it’s the worst! It was a peeling nightmare regardless of how long I waited until the top coat had dried/not dried… lesson learned! Give primer at least a few days to cure.
A beautiful job! Clearly alot of work and it shows! I’ve been thinking of stenciling a wall and you’ve inspired me to think a bit more outside the box when designing my pattern. Also, love the blue you chose.
Thank you, Rebecca!
That turned out really well! It looks like no small amount of work either.
LOVE this!!! You are so talented (and very patient with projects!) I don’t know if I could ever pay that close attention to details. I really love the chalk board area for Olivia! So cool!!
Thanks, Kellie!
Your wall looks AMAZING! I can’t believe you made all those little tape shapes yourself – you have WAY more patience than me! I love the design you created, and the blue is beautiful.
I have a couple of painting tips for you (I’ve done a LOT of painting!) First, definitely let fresh paint cure for a while before you put painter’s tape on it. Second, remove the painter’s tape as soon as you’re finished painting – don’t wait for the paint to dry. And the best tip I ever learned – after you tape off your wall, paint over the edge(s) of the tape with the same paint that’s already on the wall. That way, any paint that bleeds under the tape is the same colour as the wall. It also seals that line between the tape and the wall. When you remove the tape after painting the new colour, you’ll have crisp lines that require no touching up. I hope that makes sense!
Hi Kelly, thank you for the suggestions! I literally ran into each of these solutions as I went, but of course at too late of notice. When I striped our daughter’s nursery I did use the trick of painting first with the base color to seal in that sharp edge and it worked beautifully! I’m not sure why I didn’t think to give that a shot here. I also attempted to lift the tape off of the wall an hour after painting rather than waiting until it was fully dry but it was still bleeding horribly – I’m thinking that base coat would have been the best idea.
Thank you for your comment!!
Looks great! Wow, Im really impressed, I wish I had the patience for something like this!!
Wow, your wall is gorgeous! You created such a beautiful pattern, love it!
You did a great job on both projects! I don’t know how you find the time for everything you get done!!!