I took on the Young House Love + Bower Power Pinterest Challenge and I’m excited to share my results!

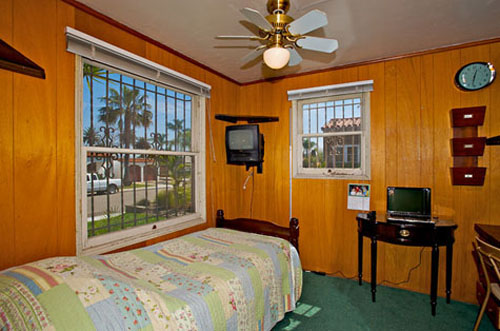
So the room is no where near done (you can read about the progress here), but you might remember that it started as this:
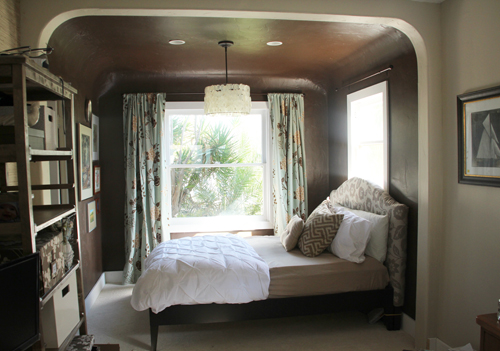
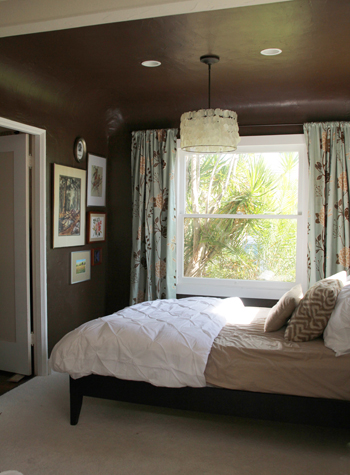
Some major demo, a little bold paint and a few other fun additions later, and we’re left with this:
But back to the challenge… I wanted to make a chandelier for the guestroom ‘nook’ (aka the far end of the office with the Spanish rounded ceilings) and I decided to try my hand at a capiz shell pendant. I saved this beautiful Serena capiz chandelier by Oly in my ‘favorites’ folder a long long time ago, it’s so stunning!
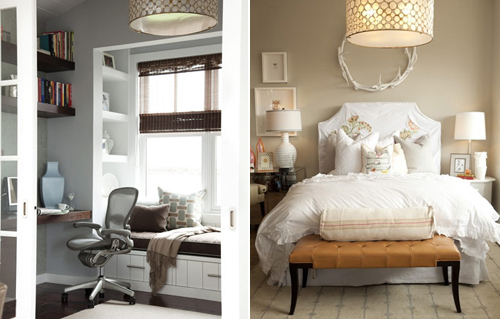
Actually, I had no idea who it was by or how crazy pricey it was (north of $1,500) until I began pinning similar styles on Pinterest.

So after much deliberation for how a not-so-fancy version could be DIYed, I set out to hunt down my main materials.
First, I needed capiz shells to line my new pendant with. I searched eBay, Amazon, online vendors… you name it. And then I remembered a shell shop near the beach in San Diego that was sure to have exactly what I was looking for. Best part? The shop is always 50% off. It’s funny, locals are on to the game, but when I stopped by earlier this week to peruse capiz shells, I overheard one of the owners tell a tourist wondering when the sale was going to end ‘Oh, you know… we never know. Maybe a few weeks?’ I wanted to whisper into the girl’s ear ‘Don’t worry, if you come back next year it will still be on’.
Nevertheless I found my best option. This chandelier was $39 and at 50% off it beat my online finds. If you’re looking for something similer though, this online chandelier or several of these capiz strands could definitely be used.
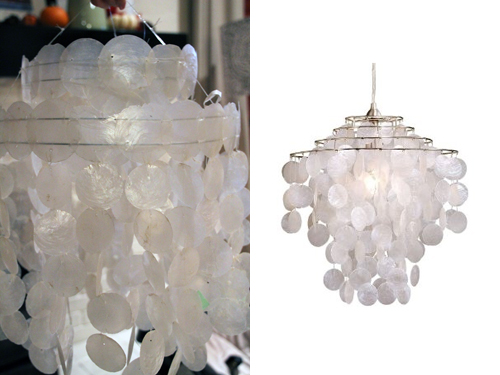
Mine on the left kind of looks like a super cheap version of the Laura Ashley chandelier on the right.
Now that I had my shells I set out to make the pendant frame. My initial thought was to hunt down a drum lampshade at a thrift shop, but I searched and searched… and then I thought that maybe I could build the frame from two tapered lampshades with the same sized bases (I was looking for about 18″). That turned out to be quite pricey because only the big box stores had them in stock. Finally, I ended up at Lowe’s searching for wire that I could shape into a circle and solder together. I realized I was taking on a huge project when I sat there deliberating where the clamps might be put and how I could weld two perfectly straight ends into one long circle.
I decided to give HomeGoods one last shot late in the evening last night. I was hoping to find a drum lampshade period – no tapering, no fancy schmancys. Just one that I could take home, take apart and begin my project. Wow did HomeGoods come through in a big way! Not only did I find my lampshade (the Perfect shade!) but it was coming apart at the end and I was able to get it and the base lamp for $15. Sweet.

The last piece of the pie was a basic pendant light from Lowe’s for $20. I found a similar one at Home Depot but it was $39, so that one will be going back.

Now it was time to get crafty!
*********************************************************************************
Capiz Shell Pendant Light
a
Materials: pendant lampshade, 200 capiz shells with at least one hole drilled into each – preferably pre-strung (this number will depend on the size of your shade and the length that you’d like it to hang), white thread & needle, craft glue (any glue that will dry clear), pendant kit, paint (in the same color/finish as your pendant kit) & paint brush, spray paint (in the same color/finish as your pendant kit), light bulb, x-acto knife, Goo Gone (plus rag and gloves)
{1.} I began by disassembling the lampshade so that I had just the top and bottom frames. My x-acto knife really came in handy for this one – I started with scissors but quickly realized that a thin blade would be much better at pealing the outside right off. If you’re left with a gooey mess, try wiping down the frame Goo Gone and a rag, just be sure to use gloves.
{2.} I spray painted the metal top and bottom frames a dark brown to match my bronze pendant kit.
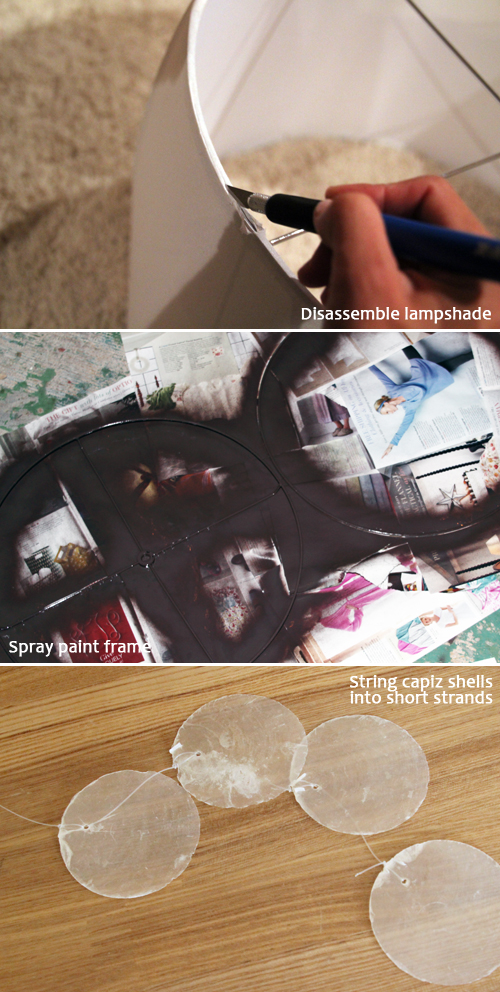
{3.} While the paint was drying I began to take the shell chandelier apart. I kept strands of five shells strung together and restrung (with white thread and a needle) any loose or shorter strands so that I had nearly 40 strands of five shells.
{4.} Then I slowly began attaching the strands of five to the top frame of the disassembled lampshade.
{5.} When all 40 strands had been tied to the top frame, I measured the length of the shells and tied the bottom frame directly to the top frame at the same distance with thread (fishing line would work great for this step as well). I wanted a ‘top’ and ‘bottom’ to the pendant so that it really did resemble a lampshade, but you could always forgo the bottom and just let the pretty shells sway.
At this point I found it helpful to hang the lampshade from a floor lamp (removing the previous shade) so that I could work with it while it was hanging.
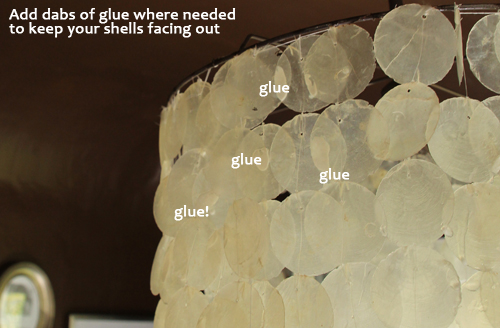
{6.} Now it was touch-up time. First was gluing stray shells together so that the shade had a flat look to it (totally optional), previous to gluing the shells sort of ‘spun’ on their own.
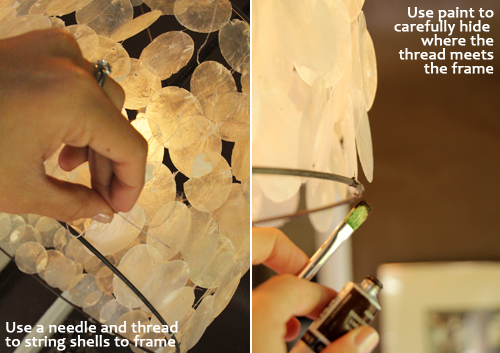
{7.} Now that the pendant was upright and hanging, the next touch-up step was to restring and retie several of the shells that had come apart or out of order. I even tied several strands directly to the bottom frame so that some stayed taught.
{8.} Finally, I used brown paint and a brush to cover up the points where the thread wrapped around the now brown lampshade frame.
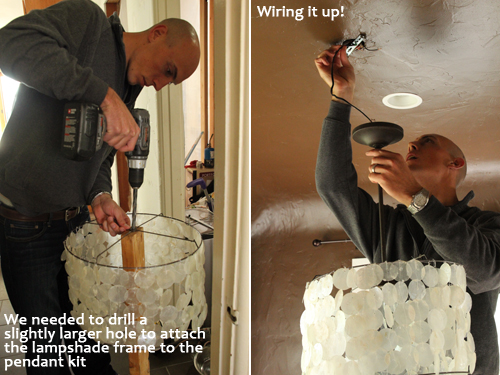
{9.} Depending on the lampshade that you chose, you may be able to attach it directly to your pendant light kit and wire ‘er up! We had to make the washer in the top frame of the lampshade slightly larger to fit our pendant kit.
{10.} I posted an ad on Craigslist for a licensed electrician (a good tip is to ask them to bring a copy of their license with them right in the ad to weed out anyone that could do damage and not be accountable) to hook the pendant to our existing light switch for $25. An electrician from our neighborhood responded and rewired the new light the next morning! When that was taken care of Kevin simply attached the new wires to the existing box. You can tell from this shot that we took out two of the three arms of the pendant kit so that it wasn’t quite as long.
*********************************************************************************
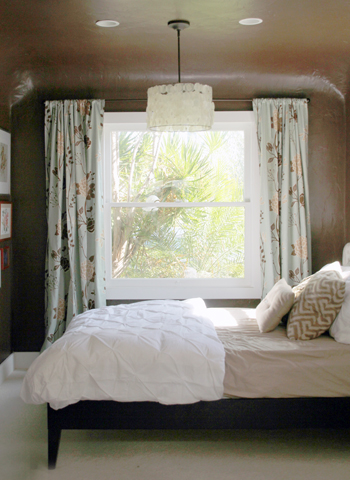
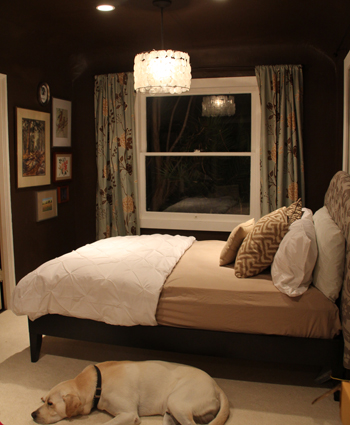
Here’s a shot at night to see how the shells make the pendant sort of ‘glow’, I love that. For this photo Bodie decided he was definitely not moving.
And there you have it! I’m linking over at Katie’s, Ana’s, Erin’s, and Sherry & John’s blogs… come check out all of the great ideas.
For more Office Makeover posts, check out: organizing the bookshelves, wall collage part 1, part 2, fabric bulletin board inspiration, (new) inspiration board, new lamps, wallpapering open shelves, finding the perfect credenza, new trim, dining table-to-desk, a new desk & bookshelves, installing remnant carpeting, grasscloth wallpaper, painting the office nook, finding carpet for the office, chocolate brown wall ideas, plastering progress, inspiration for a diy desk, back in action!, desking hunting for under $300, bookcases under $300,inspirational rooms, room layout options, demo part 1 & demo part 2.


WOW, what a fantastic light fixture you’ve created, Morgan! I’ve always loved capiz shells, and you’ve certainly put them to good use. The entire room looks just beautiful!
(By chance, is the shell store in OB???)
Thanks, Janelle! and yes! The shell center is in OB :).
~Morgan
Aha! I thought so! :)
I love that you identified that!
Love this! i have been wanting a capiz pendant forever, just don’t know if I have the patiende–but yours is awesome!
xo Mary Jo
http://on-pch.com
So happy to hear that Mary Jo, hope you have the opportunity to make one!
~Morgan
It looks great! A great place to cozy up at night! :D
Awesome!! It turned out amazingly well. Room looks fab too. Love the paint color.
Love it! I’ve been eyeing capiz chandeliers for a while (just need to convince the husband!). The whole area works so well, it really looks like it’s own space, but being open to the office really keeps it from being cramped. Great job!
Morgan this looks incredible! I want to take a trip to SD just to check out this 50% off store… :)
You did a beautiful job on this pendant. And the ceilings are to dye for in that room. Beautiful.
Thanks everyone for your kind comments!! Really appreciate the love!
~Morgan
This looks amazing! I bought some capiz shells last year and didn’t have a clue how to repurpose them. I think this might be a future project for me. Great job Morgan
What an awesome project!! I have an old capiz wind chime that I’ve been thinking of making into a chandelier.. you’ve definitely inspired me to try it out.
Wow! This turned out fantastic! The whole room looks great. (I have the same West Elm duvet – love it!)
Wow! This turned out just beautifully! I’ve been wanting to DIY my own capiz chandelier ever since I stupidly passed one up at a garage sale for $7 what is wrong with me? Haha I’ll have to try this :)
Wow, great job, looks like a LOT of work! Your room is coming together beautifully! :)
WOW…that room has taken on a whole new look!!! The difference of the before and after is crazy…..love the light. I have an old West Elm Capiz light fixture so I really should give that a try!
This looks fab! I love your take on it. Great job, and the curtains are just adorable!
this is really pretty. i’ll bet it looks beautiful when the light shines through.
This looks great! I love the whole look of the room. Great job! -Sarah
This is AMAZING!!! Great job! Love this capiz shade. I just wish I had a place to put one. Gorgeous!
Gorgeous! Great job!