Hope you had a great weekend with all of the dads and granddads in your life! I hope to post a few photos of ours soon.
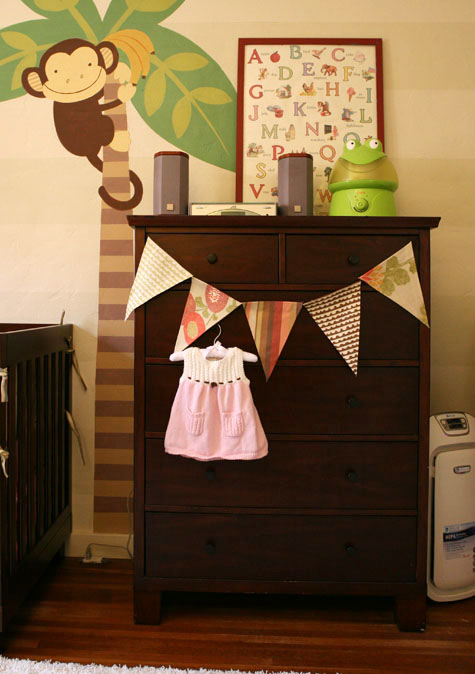
Crossing my fingers you haven’t seen enough of it… but I wanted to revisit a little project that you might have spotted during the nursery reveal – it’s easy to miss in the larger room photos but here’s a close up.
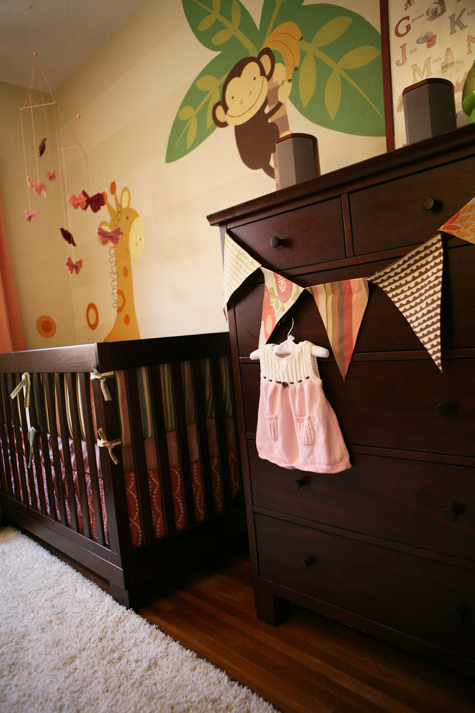
I’ve been looking for creative ways to incorporate the remaining fabrics from the initial nursery fabric selection (and here’s the line up before we knew whether we were having a boy or girl) from over 4 months ago, and I thought a little set of pennants (or flags) would be a great way to introduce different fun patterns while staying within the room’s color palette.

To keep the project short and simple, I turned to my trusty no sew hem tape. One hour later and the pennant strand went from squares of extra fabric to finished!
*********************************************************************************
No Sew Fabric Pennants
a
Materials: Fabric remnants, no sew hem tape, iron and ironing board, scissors, ribbon the length of your final set of ‘flags’
{1.} Cut triangles (two long even sides, one short top) out of fabric, keep in mind the size of each hem and cut your triangles roughly 1/2″ wider on each side.
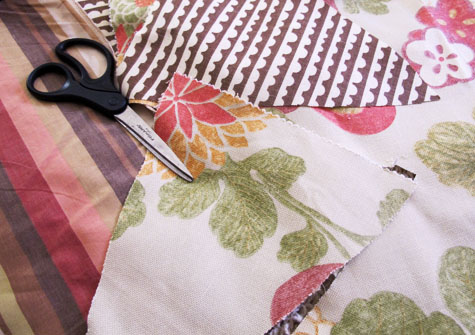
{2.} Fold each side of the triangle creating a 1/2″ hem, iron to create a crease that stays put. Tempting as it may be, don’t skip over this step – it makes adhering the hem tape and creating a clean, straight edge for your pennants 10x easier.

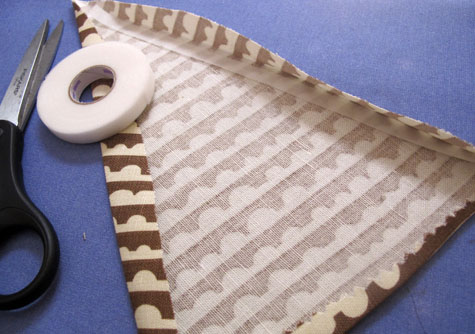
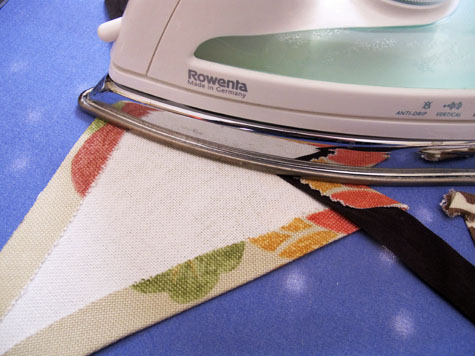
{3.} Use hem tape to line the inside of the two longer portions of the triangle, apply heat of the iron for at least 10 seconds to each side (moving iron back and form slowly over crease) to create a permanent adhesive. The bottom corner of the two longest sides may require a bit of layering of the hems to look even. Leave the top hem open.
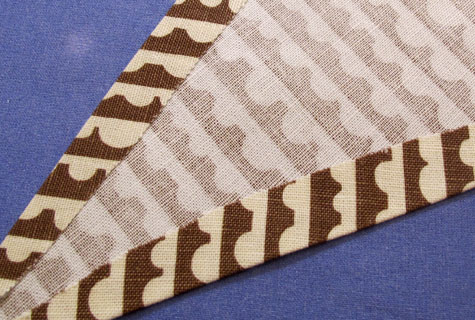
{4.} Once each flag or pennant has been ironed and hemmed (on the two longer sides of the triangle), line up pennants along your ribbon to create your pattern layout. Flip over (you may want to mirror your trial run exactly or you may be fine with giving each single pennant a direct face as I did below) and line the ribbon up along the top edge of each pennant.
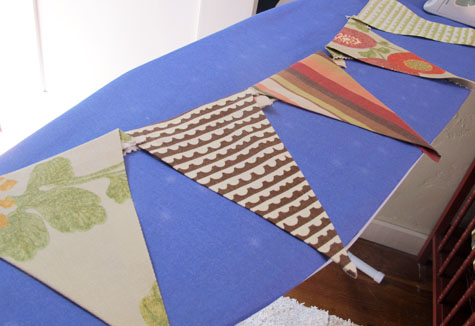
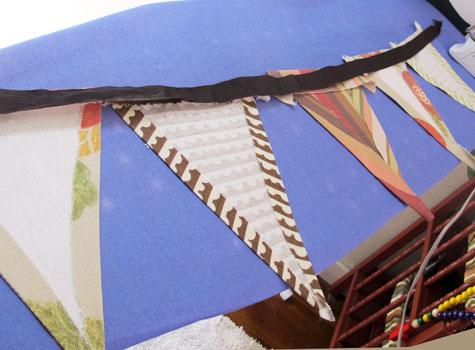
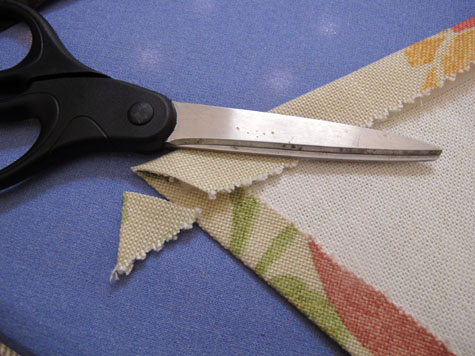
{5.} Snip extra corner pieces for a clean look.
{6.} With each pennant individually, fold the previously created top crease (step 2) over the ribbon so that the fabric crease now sandwiches the ribbon in place. Add hem tape to each side of ribbon and press with an iron. Repeat for each pennant moving slowly down the ribbon.

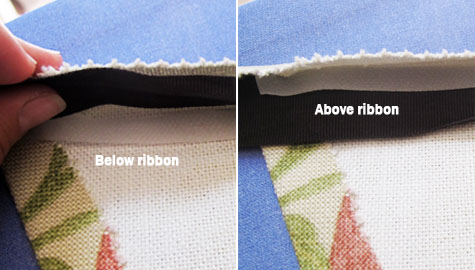
{5.} Now that each pennant is secured to the ribbon, flip over and hang!
*********************************************************************************
Really really love how it turned out! It also looks adorable tied to the front of the crib and will make a great addition to a birthday party or other event one day.

Fabric pennants are a really easy way to use up remnants of fabric that you have left over from other projects, and with hem tape it takes just an hour or so to iron together a short little line of adorable flags.
More Project Nursery posts and tutorials over here.
Now really, truly, honestly back to focusing on other rooms in the house :), big sigh of relief for those of you who are done with seeing every angle of this space!


Thanks for sharing! I love the idea and with the measurements you shared, I dare get started!
My husband and I loved the pennant idea. Any suggestions on the length and width? My first attempt came out too skinny. (I am a novice.)
Hi Mandy,
Do you mean the length and width of each pennant flag or the entire string of flags? For each flag, I found that cut outs of extra fat triangles worked out best. My approximate measurements were: 8.5″ wide by 10.5″ tall, and the final flag (after hemming 1/2″ on each of the three sides) was 7.5×10″. As far as the length of the entire set of flags, we did just enough to line Liv’s crib or dresser, my only suggestion here is to give yourself lots of extra ribbon on each end!
Good luck!
~Morgan
Isn’t hem tape wonderful? Thanks everyone for your comments! Always makes me so happy to read them.
~Morgan
I LOVE hem tape! Though I think seam rippers just ousted them as my favorite sewing (or no-sewing) tool. I just love how personal this bunting is!
pennants look great! i love that they’re no sew! you’re right, those will be great for future events too!
Beautiful job. I wouldn’t have thought to do it so easily but the no sew option is great.
Really turned out cute!