Back in the fall when we began working on the nursery, there were a few *must fix* areas of the room that we had hoped to tackle first.
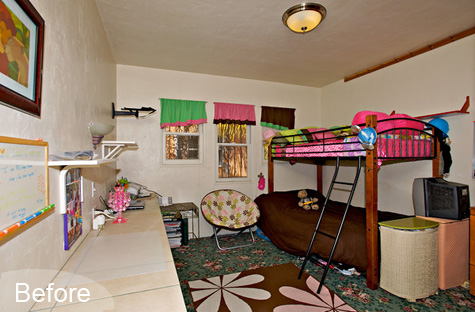
Here’s a photo of the space just before we moved in (courtesy of our realtor):
And here are all of the problem areas that we wanted to tackle prior to getting our decorating on:
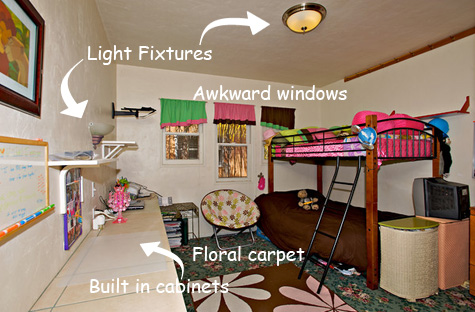
A quick status update on the fixes:
-Reveal the original wood floors (check – just before we moved in the original owners pulled up the floral carpet)
-Remove built in cabinetry (check – Kevin tore this out in the fall)
-Fix awkward windows (hopefully the new curtains will help with this)
-Replace dated light fixtures (tackling this week!)
Finding the right ceiling light for the nursery has been a bit of a challenge. We decided to stick with the central light for now (as opposed to recessed can lights that we’ve begun to install in other rooms of the house) and I wanted a fixture that was both clean and modern as well as nursery appropriate (it’s not a pendant over our dining room table, after all).
The hunt began with our budget in mind at Ikea:
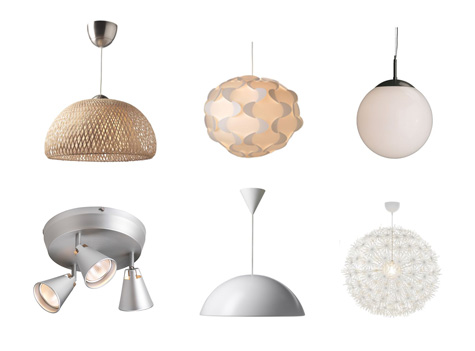
But even though the price was right (nothing really over $75), I wasn’t looking for a show stopper centerpiece (as some of those neat shapes imply) and I wanted to shy away from plastic.
On to Crate & Barrel, a store that had plenty of clean, modern barrel lampshade pendants to choose from. But the price point (nothing to be found on sale) was just out of the ‘let’s do it’ zone.
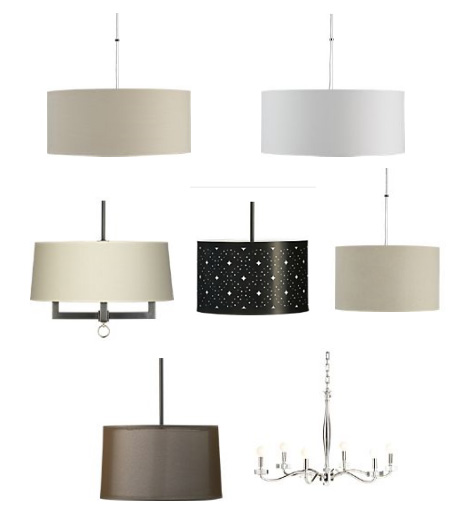
Similar searches through Pottery Barn, Overstock.com, Target, Lamps Plus, local Mom & Pop shops and so many more brought up the same issues: our ideal pendant was out of our price range and the affordable versions just didn’t fit the bill.
Could I make my own? A home improvement store basic pendant light with a simple barrel lampshade? I was once again back on the search, but oh are those basic barrel lampshades difficult to find! First it was a size issue, then a materials issue, then finding a true straight sided option rather than a tapered shade… (would love a good resource for this!)
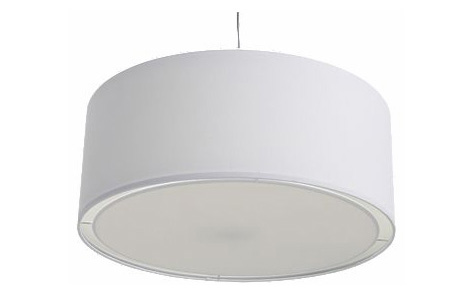
But then out of the blue I spotted the perfect pendant in the perfect size with the perfect straight-sided structure and out of a perfect white linen material. While perusing the CB2 site (why didn’t I think of that earlier?) I came across these two images with my shade hanging sweetly from above.
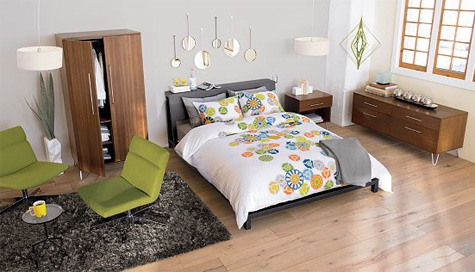
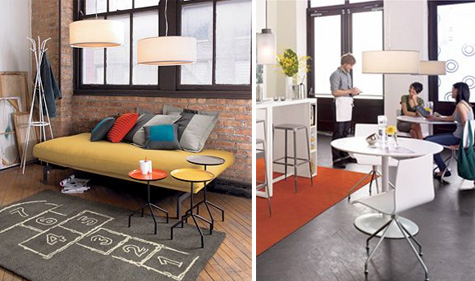
And the price of the Eden pendant? $49.95. Add on one more perfect.
I ordered the light immediately and shorty after this beauty arrived on my doorstep:
But then to burst my Wow bubble – I discovered it had one of these! Cue the ‘whomp whomp’ sound effect.

All of those pictures are so deceiving – unless someone has a plug on their ceiling the pendant comes across as a hardwire light and not as a plug-in.
I was about to throw in the towel and head back to the drawing board when I logged back onto the CB2 site and found nearly 300 reviews for the pendant, most claiming how easy it was to hardwire.
So I headed out to Lowe’s and invested in a $5 canopy for the ceiling, a dimmer for the wall (a must for a nursery) and a long chat with the poor fellow who was working in the electrical department that day. He explained where the plug would need to be cut off and how to connect the pendant to the current wiring.
Just to be on the safe side, I invited my good friend Andrew over (an engineer with electrical experience) to oversee the project. And just because I was a wee bit nervous to electrocute myself, I let him install the pendant and then show me step by step how to update the light switch for a dimmer.
It took hardly any time at all!
If you ever find yourself trying something similar, this is some serious electrical (as in you-could-electrocute-yourself) stuff, so make sure you are familiar with how to connect the various wires (if the term ‘grounding’ doesn’t ring a bell, let the electrician do it) and be sure you turn your circuit breaker OFF. You might want to go ahead and talk with your Lowe’s guy too, it couldn’t hurt.
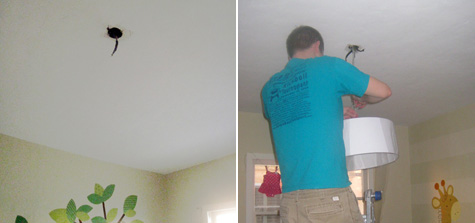
But back to the process… we started by removing the existing fixture so that the ceiling looked like the above left picture.
Our materials included the pendant and wire, lampshade and a few wire nuts to connect new wires (be sure you have the right size, shorting the circuit or electrocution happens when the wire slips out of the nut and connects with the other wire).
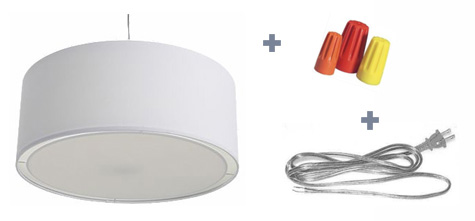
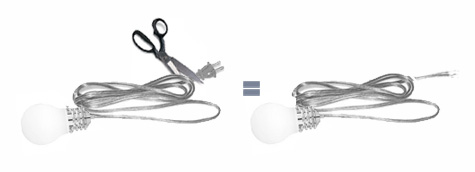
Then we cut the cord to the pendant (and off went the plug) at the length that we wanted the light to hang. The cord was then stripped back to reveal two wires within (here’s where grounding becomes an important term).
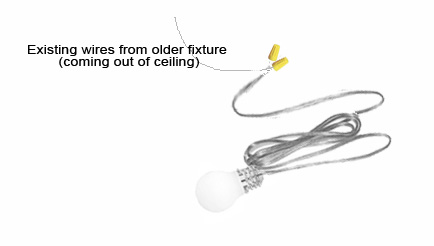
Then Andrew connected the existing wires from the previous light (in box in ceiling) to newly stripped wires with wire nuts and pushed everything back into box.
The new canopy was added to the ceiling to cover up that big hole, and the lampshade was hung with the tension rod that came with the light.
Here she is!
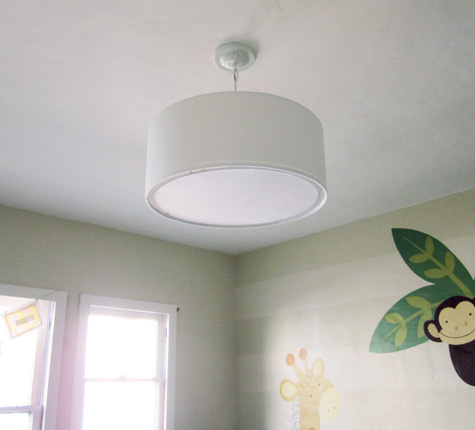
That great diffusing insert on the bottom of the shade gives the room a soft glow but still provides an ample amount of light for everyday use. When we hooked up the dimmer it added an even gentler light for the space (gotta love that the light can now be just barely turned on for night time changings and checking in on naps).
To change out the light switch, I basically followed the same steps as changing out the ceiling light. First the old switch was removed, then the wires from the new switch were attached to wires in the current wall box with wire nuts. The dimmer I chose is an energy efficient option that has a screwless plate cover (added bonus) for a very clean, modern look.
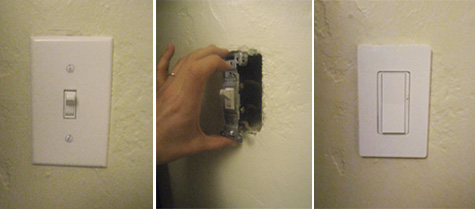
My apologies for the bad pictures, for obvious reasons the lights had to be off in the room while we were replacing the switch and it was pretty late in the day…
Yeah! One big project for the space down – next up is new curtains. Happy dance…
Just in case you missed these, here are all of the links to the previous Project Nursery posts: vintage wall art addition, changing table makeover, nursery wall striping tutorial, painted animal project, choosing nursery fabric, the initial inspiration board and the before picture posts.


Hi Morgan,
I realize this post is a couple years old but I just stumbled on it. I’m currently working on my nursery and I’ve ordered the Eden pendant and plan to do the same thing you did. My question is: do you remember the length you cut the cord to? I like how close yours is to the ceiling instead of hanging low but I have no perception of how long that actually is… Maybe like 12 inches? Any help you could give clueless me would be appreciated! :)
Hi Amanda! Going back to look at the light now, it looks like we cut the wire to 10″ above the pendant. We love the look of it!
Hello hello! I was just reading about your new nursery curtains (LOVE them, btw) and spotted this light fixture in the corner of one of your photos. I swear we had completely parallel experiences with lighting. After DAYS of searching, I too landed on the Eden pendant from CB2. Here it is in our master closet:
http://welcometoheardmont.com/2011/02/master-closet-phase-5-the-big-reveal/
And I’ve ordered one for our adjoining bath now too!
Anyway, I’m off to weigh in on the valance or no valance question! The nursery is looking great! :)
Hi Meredith, I Love your new closet and the Eden pendant lamp in it, it looks great! Such inspiration.
~Morgan
I love that you made it work. I looks very good! Awesome.
Love the fixture and love your perseverance. You’re making me feel very lazy I must say. After my babies were born I was certainly not running around to hardware stores and making plans for curtains. You rock Morgan!
Carol
I think it’s so silly that they always show that pendant hanging like a hardwire fixture. Why don’t they just sell it both ways? It looks great in there.
Hi Morgan,
Your nursery revamp is looking great.
Thanks for the link to Crate & Barrel.
They do international postage and
pricings for Australia!!!!!!
WOW I had fun looking at all the ideas.
Found some gift ideas too.
Have the best day, give Olivia a hug
from Australia,
Sue
looks great – glad it worked out for you. I still hate the lighting fixture in our master…maybe this will inspire me to get moving on getting rid of it.
Great light choice. I need to get the yucky light fixtures changed in our place but I’m still tackling the painting so first things first. Oh and always handy to have friends who can do things for you. Love the whole “invite him over” idea. ;)
Looking good! Can’t wait to see the end result!
I need some inspiration right now!