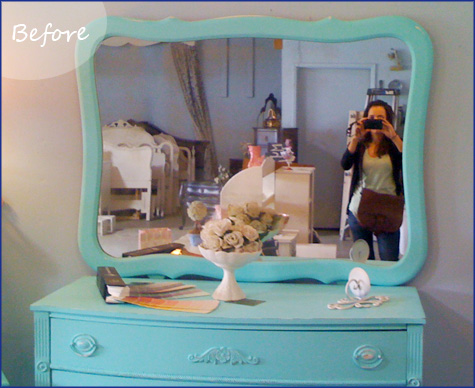
A while back I found this very cool mirror at a local refurbishing shop. The actual mirror was yellowed and discolored, but it had an ‘antique-y’ feel that I loved.
My first attempt to make it over was to create an upholstered magnet board for the future office.
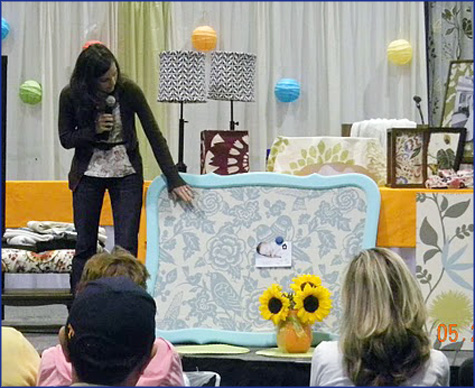
I used the Aviary print in Robin teal from Calico Corners as the face for the new board and simply flipped the mirror over and painted with three coats of magnetic primer. I didn’t love the way the magnets held (I’d imagine 3 more coats might have done the trick!) but I loved how the board turned out and was very excited to put it to good use. (The above image is from a recent San Diego design show that I did a guest presentation at.)
But then Cali experienced one of those little earth shakers that caused zero damage to the house with the exception of my new magnet board. I found the mirror shattered and the fabric ripped the next day after it had fallen on it’s side.
So project #2 came about:
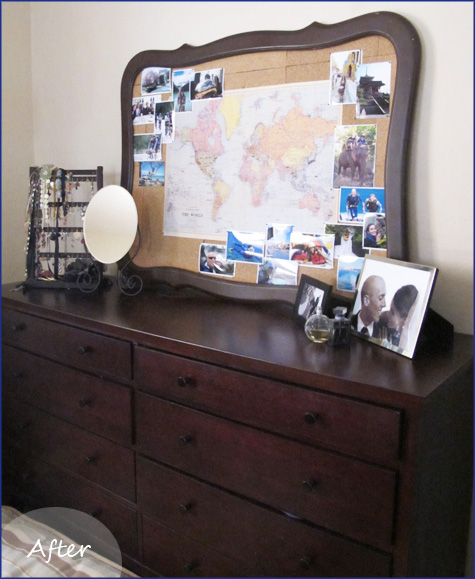
I don’t know if this map board will find it’s final spot hanging above my dresser (not propped as it currently is) in the new master bedroom or above the desk in the future office (renovation project #2 after the kitchen remodel), but I do love how it turned out!
Here’s a quick recap.
********************************************************************************************
{Before & After: Dresser Mirror to Map Board}
a
Materials: Mirror with a sturdy frame (a picture frame with a back would work well too), corkboard squares or strips (from your local craft store, mine are from Michaels), map pins (found mine at Staples), spray paint, tack nails (1/2″ or smaller, depending on frame size), hammer, glue, scissors, photos and a map (I found mine at Papyrus).
1. Remove the back of the mirror from your frame and spray paint with two coats.

2. Organize your cork squares or cork strip (much thinner than the squares and sold rolled up) so that the final look of the cork on the back of the mirror is proportional on all sides. I prefer the squares but considered rolling the cork strip over the top for fewer seams (the rolled cork on it’s own might be too thin to hold pins). In the end the raw square look won out.
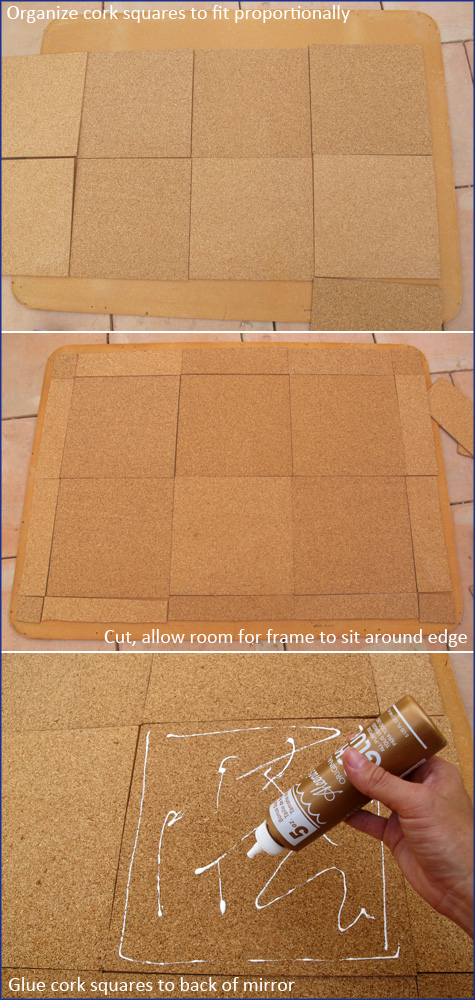
3. Cut your squares and clue to board, be sure to leave enough room for frame to sit snugly against backing. My mirror had an indent in the frame to securely hold backing on, yours might not and you could cover the entire backing in cork.
4. Flip the mirror over and tack backing back onto frame. I used small 1/2″ tack nails because both my backing and frame were thick and sturdy. You might opt for a staple gun or smaller nails if you have a thinner frame.
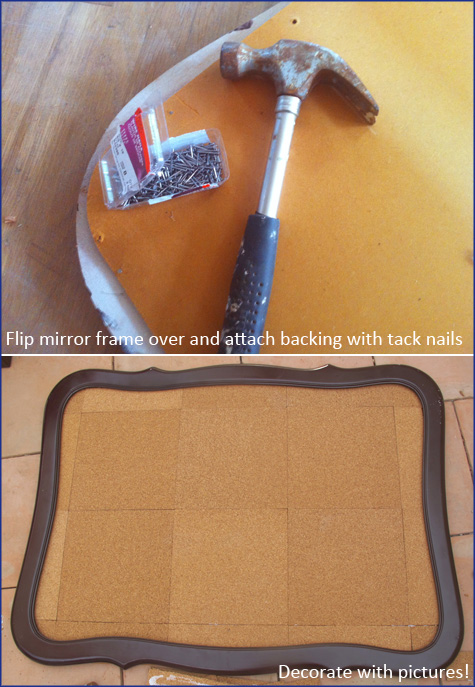
5. I attached the paper map to the very center of the board and printed photos from our travels for the edges (I love the look of the thin white line around the outer edge and had them printed that way by Costco). I then used map pins (pins with the little round balls at the end) to mark our travel destinations!
Red pins designated cities/countries Kevin and I had traveled to together, yellow were spots I had visited and blue areas that Kevin had traveled to.
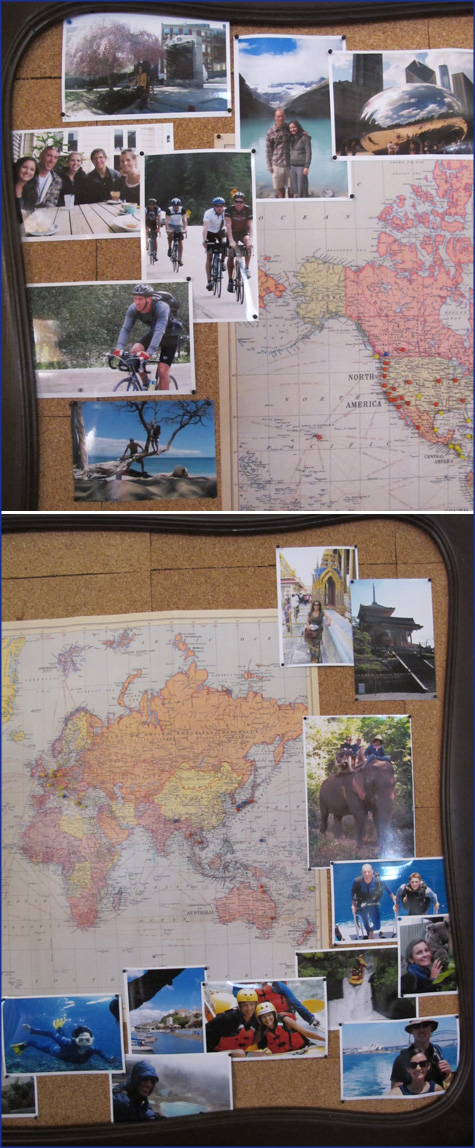
The final board is a neat tribute to our travels and allows us to keep adding as we go.
I love the shape of the frame and how easy it’s been to turn an old dresser mirror into various forms of diy art – who knows, this might receive a glossy coat of red in the next year and end up in the nursery to mark Baby S’s big events!
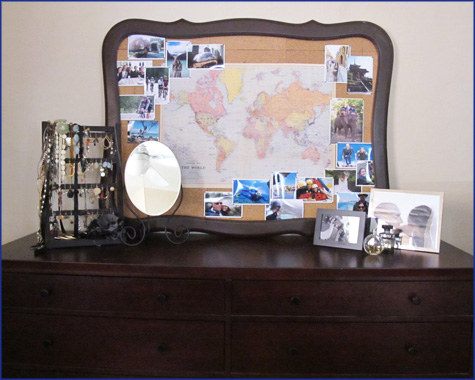


Morgan love how it turned out! I’ve been on the lookout also of an old mirror which I would like to convert into a corkboard, with a fabric on top. Yet to find one!
Love it! Going to make one for my friend who is a big traveler. She’ll love it! Thanks for the cheap x-mas gift idea!
Love it! I love the original color as well. I did a version of a map board with tin and mod podge: http://decorallure.blogspot.com/2010/03/family-travels-map.html
Great blog, btw!
Beautiful job, Erin! Love the idea of using tin as a magnet board. Thanks for sharing!
Love the shape of that frame! Great find.
The cork board is such a great idea!!! It looks awesome!
That came out so cute, I love it! Thanks so much for the how-to, I’ll be linking.
Mor, is this new in the bed room???
Love this idea! If only I had a place to put one!
love the mapboard idea…very clever
Love both ideas! the map/cork is very original! well done!!
i love the way it turned out!