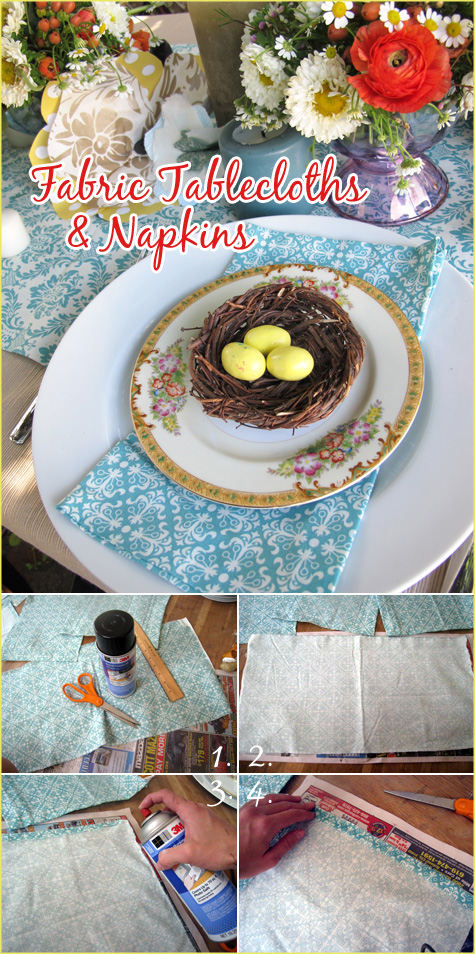
Here are two more quick projects from the Vintage Nesting shower I threw a couple of weeks ago. The first is a quick tutorial on handmade tablecloths and napkins – it’s so easy to take a basic fabric remnant and turn it into themed linens for your entire party.
I found these teal damask prints at Joanns and used a spray adhesive to quickly hem them. *In retrospect I would use iron-on hem tape as my no-sew solution because my lovely linens did not hold up so well after multiple washings.*
For the entire step-by-step directions, check out the ‘read more’ button at the bottom of this post.

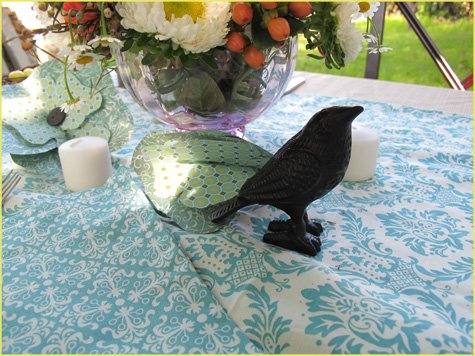
End result!

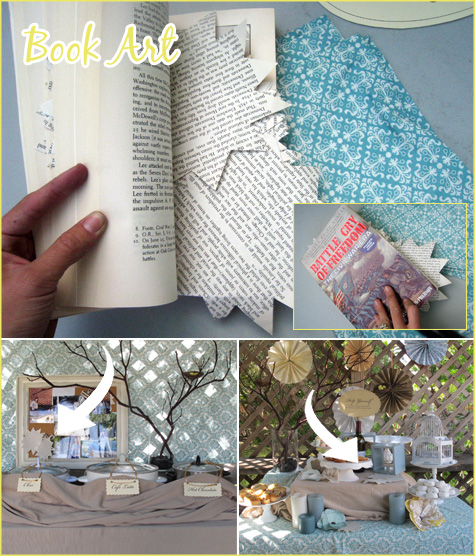
The second DIY project involved star shaped book bunting (unfortunately I didn’t get the best picture of the bunting – which was connected via tiny vintage brads – but here are a couple of shots where I used the book art on the various shower tables and pin board). It’s a vintage decoration that can be added anywhere.

Battle Cry of Freedom sacrificed itself for this project… I used the pages to make a multi-point star template that became table top decoration added amidst pictures of the mom-to-be and even connected at the points for a bunting that could be strung between doors, windows, on tables and behind a dessert buffet.
More step-by-steps for the handmade linens after the jump!

{Handmade Tablecloths & Napkins}
a
Materials: fabric by the yard, spray glue (iron on hem tape), ruler, scissors
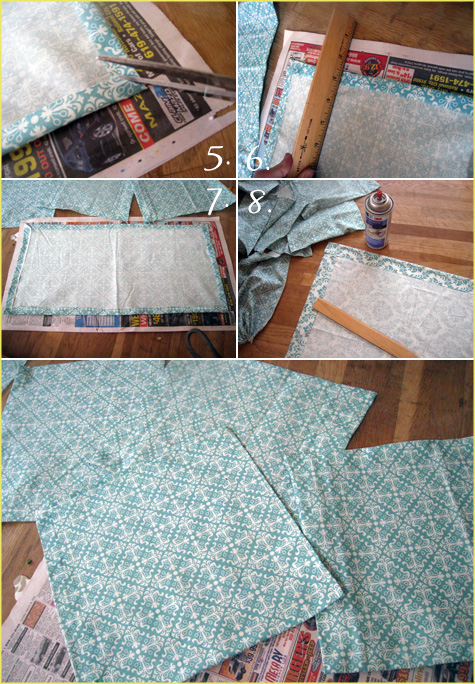
Numbers correspond with pictures above.
{1.} I began with my primary supplies of fabric, spray glue and a ruler for smoothing edges (almost any flat object will do).
{2.} Cut fabric into12x24″ rectangles (these will end up as 12×12″ napkins).
{3-6.} Spray the edges of the fabric one side at a time. Fold over fabric about a 1/2″ and smooth flat with your ruler. I cut the excess fabric from corners here at an angle for a cleaner hem line.
{7-8.} Spray one half of rectangle with glue and fold down the center to form your square.
Directions for tablecloth, runner or overlay are similar, no need to fold in half at the end! As mentioned above, I plan on using no-sew hem tape in the future (same steps) for a more durable end result. Enjoy!


I definitely agree, store selections are so limiting – but a fabric store has endless opportunities.
Love the pretty tablecloths and napkins. Thanks for sharing the tutorial. I love making things like this where I get to pick my own fabric, instead of hoping that I can find a store-bought one that I like.
thank you for these great ideas!!! love them!
This really looks great! My experiences with hem tape have not been good. Mine didn’t stand up to even one washing…maybe I just used it incorrectly. I actually though the spray adhesive was a good idea. ;-)
-FringeGirl
Good to know about the hem tape, thanks for the feedback. My spray adhesive lasted two washes before it started to unravel at one end, but it’s such a quick and easy solution compared to sewing edges on SO many napkins and tablecloths. With the spray glue, it took less than an hour to finish the entire project! I’ll have to keep looking for alternatives too. :)
Thanks everyone for your compliments and suggestions!!
~Morgan
how easy is that!?! love it! p.s. I want that bird!
Kim @ http://frostmeblog.blogspot.com
party inspiration