I love when you find inspiration in the most unexpected of places… the other day I was thinking about those little accordion paper fans I used to make as a little girl by folding up 8 1/2×11 sheets of white printer paper. They might turn into turkey tails for Thanksgiving or maybe even folded hearts for Valentine’s Day.
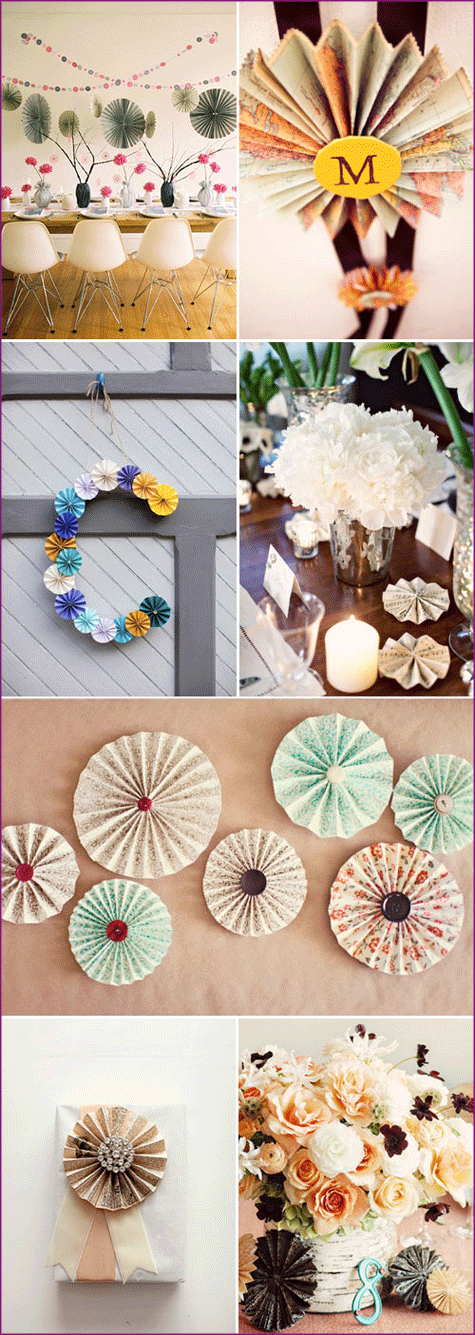
I found this lovely inspiration board (below) at Paper Crave and it brought me right back to the 2nd grade. The grown-up version of paper accordions comes in the form of folded maps, book pages or antique wallpaper.
I really love the simple way these accordion paper poms fit into every type of party decor. I can imagine them delicately hung above a wedding reception dance floor, lined neatly over a bridal shower dessert buffet or in bright & bold hues for a child’s birthday party.
The rosette ‘table confetti’ is my favorite. And how pretty are the button and brooch centerpieces? A little pearl bead would be perfect.
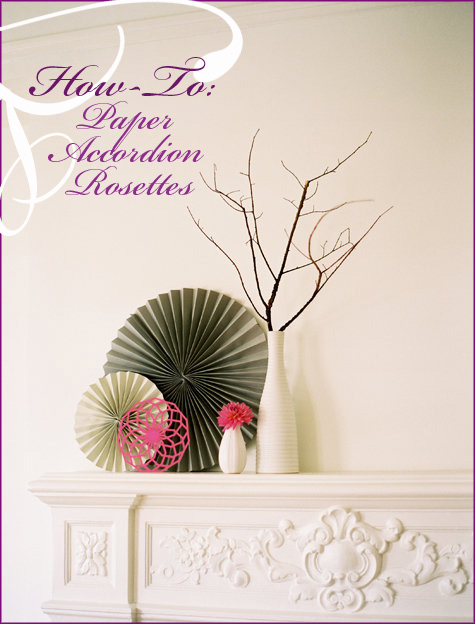
Once Wed designed an entire grey, green & pink dinner party around this theme (see top top photo), and design*sponge shares it here. To make your own paper accordion rosette, Paper Source provides a free downloadable pdf. And finally, a super easy DIY awaits after the jump!
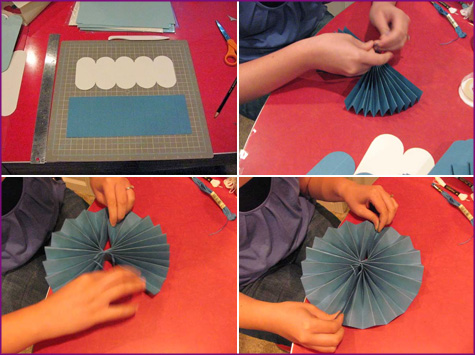
Weddingbee chronicles her blue rosette project using Martha Stewart’s tutorial:
{DIY Paper Accordion Rosette}
a
Materials: Pretty paper, matching embroidery floss, ribbon, ruler, scissors, mini stapler
1. Once you have selected your papers, choose embroidery floss that matches the color as closely as possible; you’ll use this to tie the rosettes in the center.
2. The proportions of an 8 1/2-by-11-inch or an 11-by-17-inch piece of paper are particularly good for these rosettes; as you adjust the size, try to keep this oblong shape in mind. You will need 2 pieces of paper for a single rosette (unless you are making small ones, in which case you should cut the paper to be twice as long).
3. Lay the 2 papers vertically on the work surface. Mark even intervals, top to bottom, on the edges (use 1-inch intervals for an 8 1/2-by-11-inch piece; increase to 1 1/2 inches or so for a larger piece). Score the paper between the marks with a bone folder (use a metal straight edge to guide the bone folder). Fold each piece top to bottom accordion-style at the marks to make pleats. If you want scalloped or spiky rosettes, collapse the pleats of each sheet to make a bundle, and cut each end into a U or V shape.
4. Attach the two sheets by nesting the last pleat of 1 sheet inside the first pleat of the other, securing with double-sided tape.
5. Squeeze the pleats together. Fold in half, end to end, to create a crease at the center, then unfold; tie a short length of embroidery floss snugly around the bundle at the center of the crease, using a square knot to secure.
6. Carefully cut a slit through the topmost layer along the crease, which creates a flap on each side (be sure not to cut the embroidery floss). On one side of the slit, snip off the corner at an angle (this will keep that corner from buckling when the rosette is folded together). Repeat on the bottom of the bundled pleats.
7. Fan out the pleats to form a rosette. To join the sides, slip one pleat inside the other (place the notched corner uppermost). Secure with double-sided tape on both sides of the V (leave the very tips of the pleats untaped).
8. To add the ribbon, slide the end in between the layers of an overlapped pleat, and staple through the ribbon. (A stapler that uses mini staples will give you strong yet unobtrusive results.)
Image Credits (from top): spirograph inspired wedding at Design*Sponge, DIY wedding details at Style Me Pretty, a winter holiday soiree at Snippet & Ink, Posh Paperie’s paper pinwheel tutorial at Style Me Pretty, paper rosette details in this gorgeous floral arrangement by A. Hana Design at Once Wed, lovely gift packaging from Summer of Grey Likes Weddings at Style Me Pretty, paper rosette initial decorations from Cory and Chris’ wedding at Once Wed, Paper Crave, Weddingbee


Thanks so much for your tutorial. I just came across your blog today when searching for ways to decorate a spring wreath I made. The Acordian Paper Flowers were the perfect addition:)
If you would like, you can see the finished product here: http://mainstreethouse.blogspot.com/2011/09/decorating-for-fall.html
So wonderful, Kerry! Thanks for sharing and I’m glad the collection of tutorials helped! Great job on the wreath.
~Morgan
Thank you for this tutorial as I was wanting to do these for an upcoming baby shower but like you, needed a little bit of reminding!
Thank you so much for posting this accordian flower. I am an activity director at an assisted living home and these will make great decorations for the summer. I think I can even get the residents to make these! Again, thank you!