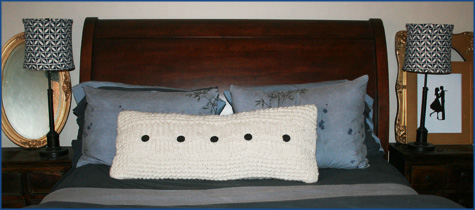
I really love the unique and customizable look of fabric lampshades and after posting several of my favorites last month, as well as a how-to by All Things Lovely, I decided to give the project a spin myself.
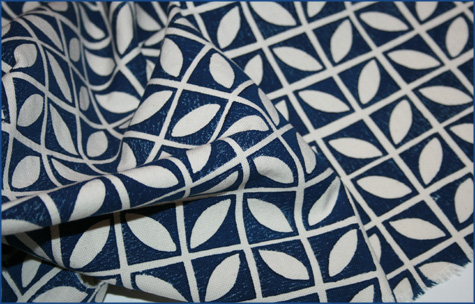
I ordered this great hand stamped block print fabric from HomeSweet on Etsy and found two replacement lampshades at a local lighting store. All I can say is easy, easy, easy! I was so impressed with how quickly I whipped both of these out, and I really love the blue with my bedroom.
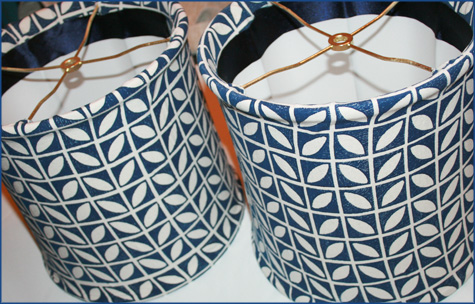
To see my custom creation journey and follow step-by-step, follow the jump!
p
{DIY Custom Fabric Lampshades}
p
Materials
*Lampshade(s)
*Fabric (aprox. 16″x30″ for a standard shade)
*Spray glue
*Matching 2″ ribbon (aprox. 1 yard for each standard shade)
*Fabric (aprox. 16″x30″ for a standard shade)
*Spray glue
*Matching 2″ ribbon (aprox. 1 yard for each standard shade)
p
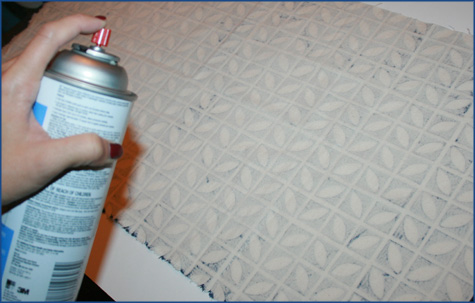
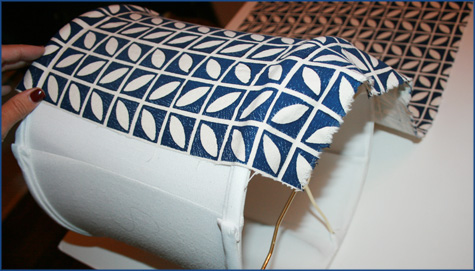
1. Lay fabric flat and spray white lampshade and back of fabric generously with spray glue. Let sit for about 15 seconds or until very tacky to the touch.
p
p
2. Roll lampshade underneath fabric, pressing and stretching fabric firmly to the shade as you slowly roll. I found it helpful to continue pressing fabric to edge of shade on each side as I rolled the lampshade — ensuring the fabric stretched and sealed itself to the shade with no air gaps. NOTE: because it’s spray glue, you can pull off and redo at any time! This step is definitely not permanent.
2. Roll lampshade underneath fabric, pressing and stretching fabric firmly to the shade as you slowly roll. I found it helpful to continue pressing fabric to edge of shade on each side as I rolled the lampshade — ensuring the fabric stretched and sealed itself to the shade with no air gaps. NOTE: because it’s spray glue, you can pull off and redo at any time! This step is definitely not permanent.
p
p
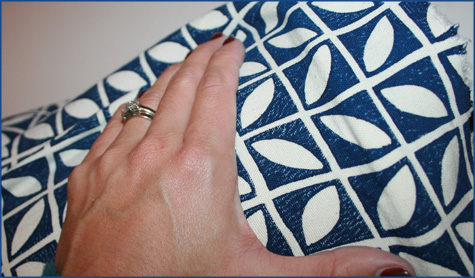
3. When you have finished coating shade in fabric, spray the meeting edge with glue and press together for a clean seam. Secure seam to back of lampshade with one more quick spray of glue.
3. When you have finished coating shade in fabric, spray the meeting edge with glue and press together for a clean seam. Secure seam to back of lampshade with one more quick spray of glue.
p
p
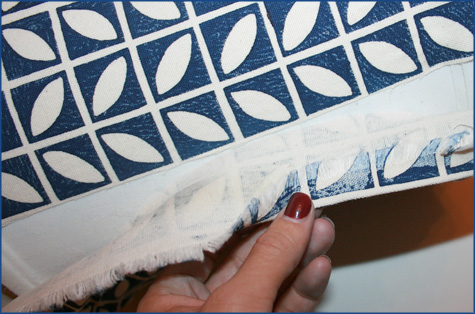
4. You should have roughly 2″ of remaining fabric on top and bottom of shade, trip any excess above 2″. Tuck in top and bottom fabric extras, gluing into place on the inside of the lampshade. Use 2″ ribbon to hide rough edges of top end of lampshade (and use spray glue to adhere — this stuff’s amazing!).
4. You should have roughly 2″ of remaining fabric on top and bottom of shade, trip any excess above 2″. Tuck in top and bottom fabric extras, gluing into place on the inside of the lampshade. Use 2″ ribbon to hide rough edges of top end of lampshade (and use spray glue to adhere — this stuff’s amazing!).
p

Ta-da! Now you have one beautiful lampshade to show off!


fantastic!! I will definitely try this! I have two very boring lampshades in our bedroom in bad need of some love and this is ideal!!
Oh I can’t wait to go to the Goodwill and buy a lamp shade! Thanks for the tip!
I’d love to see pictures of your finished product!!
These look great!