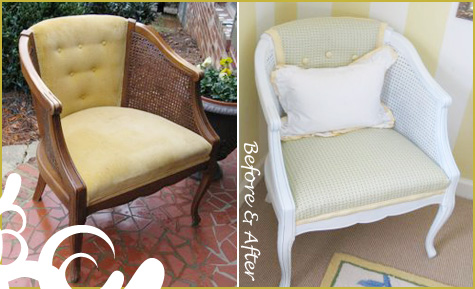
Over the past couple of weeks I’ve been searching for a great chair makeover on my local Craigslist for our guest room, only to have the perfect chair sold hours before I could nab it! Bummer. Here’s another great makeover project from the blog Matters of Style to spice up an older sitting chair for a newly appreciated place in the house. And you can’t beat the starting structure: French legs, rattan siding and an elegantly curved back.
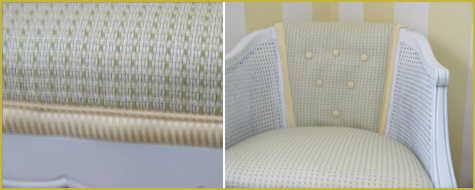
I love the fabric and trimming — so classy!
Coming up later this week… an improptu reason to throw a party (our friends got married! and since the celebration was two weeks ago and miles and miles away, they want to celebrate with local friends and family with a second, last-minute reception) and I’m on the search for a great dessert bar for the duo. Stay tuned.
Follow the jump for the How-To on this beautiful chair, and more pics!
p
{Vintage Chair Makeover}
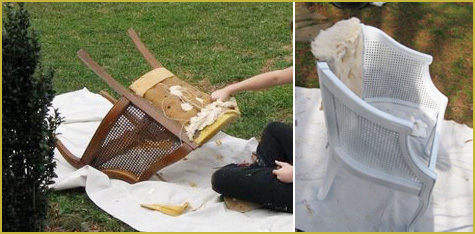
1. First step was to remove all the existing fabric. Next, I removed the worn-out foam batting in the seat and replaced it with some plain batting from Hancock Fabrics.
2. Finally, time to paint. First I sanded the chair. Then, I primed it. Third, I painted it with Krylon white gloss spray paint. It was amazing the difference a coat of paint made on this chair.
3. The next step was to find appropriate fabric. For the chair, I estimated that I needed around 2 yards. I attached the fabric to the chair with a staple gun. It was a challenge to hide all the staples and seams.
4. Next, I bought a covered button kit at Hancock’s and made them out of the yellow fabric. I then bought big “doll” needles to do the tufting.
A newly refashioned chair! This is an abridged version… check out the blog for the full article.


What a transformation! Awesome Job, thx 4 posting :-)
It turned out adorable!