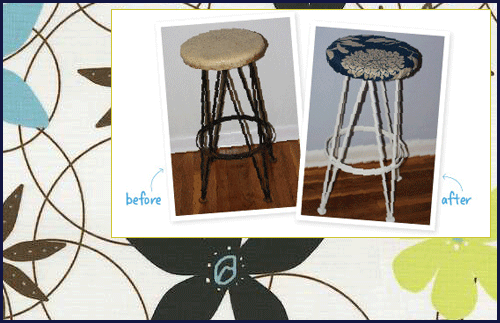
A great before-and-after example from Krissy, blogger at The Nest! Just goes to prove that anything you own, regardless of how outdated or beat up it might be, deserves a second chance to be the talked-about trendy item in the house! I have a grab-bag of fabulous DIY B&A makeovers to post each week… and look forward to sharing them all!! For instructions on redoing your bar stools, follow the jump! The great floral fabric shown can be found at Carousel Designs.
{Bar Stool Makeover}
Total cost: $29
Total time: 2 hours (minus drying!)
Tools:
•Scissors
•Paintbrush
•1 quart of Sherwin Williams Extra White paint
•Stool
•Screwdriver
•Staple Gun
•Sandpaper
•1 yard of fabric
How to :
Step 1. Remove seat with screwdriver and set aside.
Step 2. Wipe down the stool with a damp cloth. Sand the stool to smooth away bumps and rust.
Step 3. Give those legs a coat of paint. Set aside to dry.
Step 4. While paint is drying, start covering the seat with fabric. Measure, trim and secure fabric with staple gun. Set aside.
Step 5. Apply a second coat of paint and let it dry.
Step 6. Pop on the seat with that screwdriver… (note: wait a day so the stool is completely dry)
Voila, new stool!
.

