Now that the nursery is finished and Liv has a comfy room to sleep in and plenty of play space to explore, it’s time to get back to the office/guest room makeover (man oh man are kitchen barstools not a comfortable place to work on your computer all day!).
Last time we left this space, just before Christmas, we were working on projects like this:
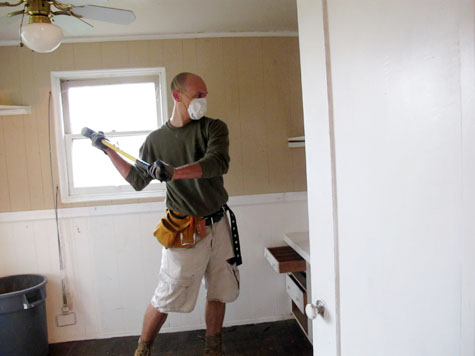
Demo time! We were hoping that we might be able to squeak out a new office/guest room before Liv joined us (not a completely furnished space – just a bare room would do) and before you knew it the entire room had been torn to shreds.
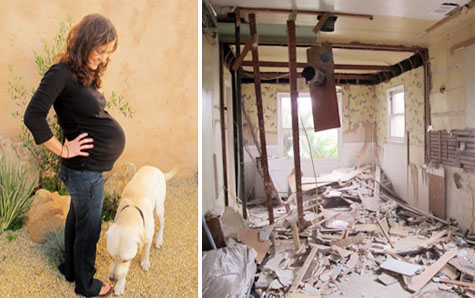
Here’s a quick recap on the tiny bedroom and old kitchen space before demo (actually, before we moved in). You can see in the top sledgehammer photo that we painted the little bedroom a neutral tan and used the paneled walls to create a chair rail look, and that’s how it lived for the first two and a half years. But for a more dramatic before and after, these are the two rooms that are now the office at the time we purchased the home:
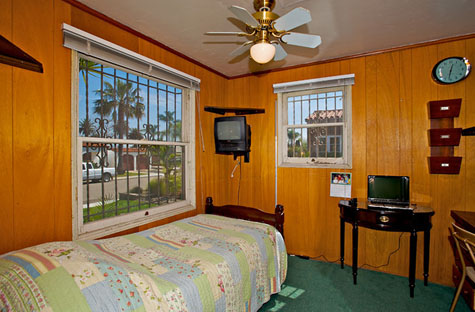
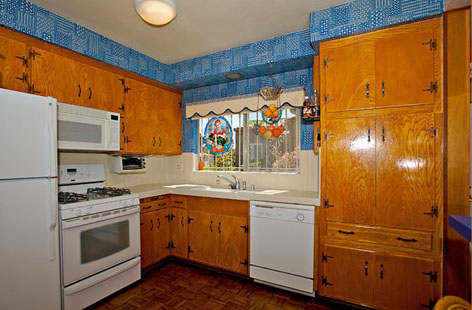
Kevin worked for about two weeks over Christmas and New Years to bring down the wall between the two rooms and to clear out the entire space.
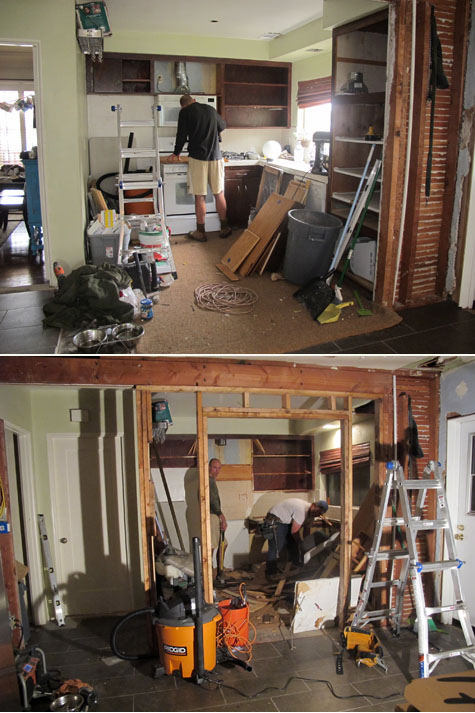
You can see from above that we had made a few changes to the old kitchen after we moved in as well, such as painting the walls a soft green and staining the older cabinets a dark espresso. We also changed out the hardware and added a jute window shade where a valence had once hung.
When family came to town for Christmas, this is what they were met with. They’re used to construction around here but boy was the inside of this room dirty! We attempted to tape it off to the outside world but there wasn’t much to be down to hide the elephant in the room.
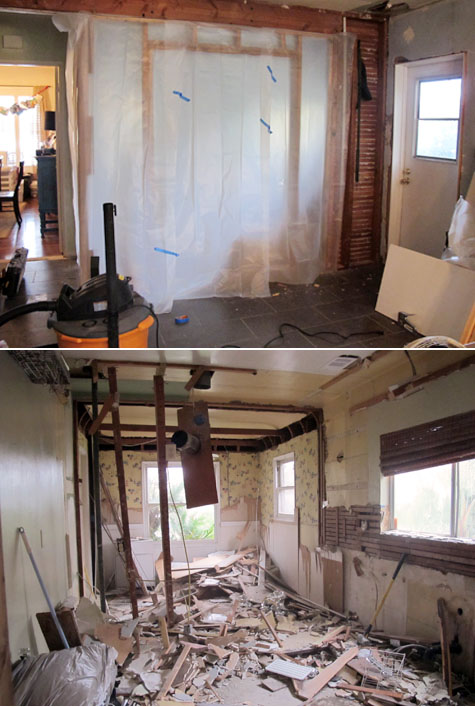
The smashed drywall and extra dust didn’t have much time to settle in, and just before Liv’s arrival on January 9 we were able to clear the extra debris out of the room so that it looked a bit more like this:
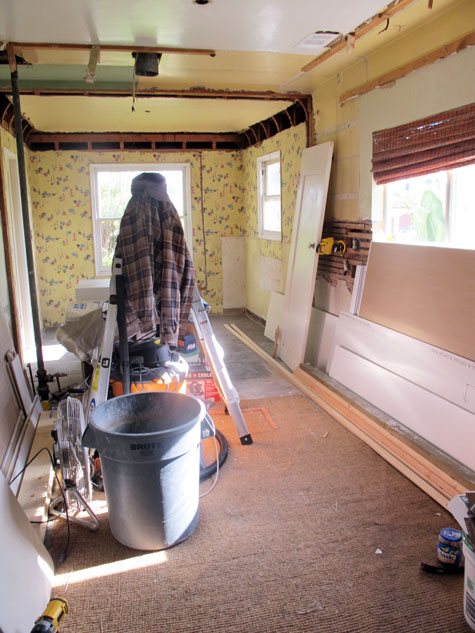
And then Liv was here! And the office makeover rested as-is for several long months… Kevin went back to school, we all got to know beautiful baby and we started working on the new guest bathroom after the-best-email-ever arrived.

But the office is back! We’re diving into it as we speak (doing double duty on the office/guest room and the new bathroom) and today the office looks a bit cleaner from the outside:
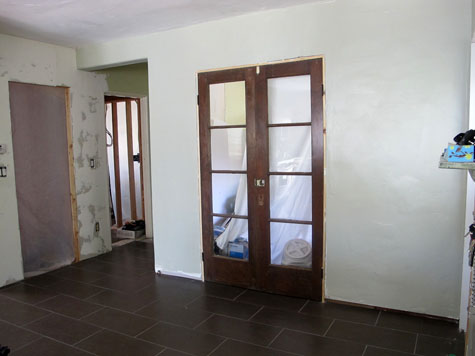
Her framed walls are now covered in hardibacker and plaster, they have the slight ‘Spanish texture’ applied and they’re painted the same Buzz Brown as the kitchen (which is just behind me in this picture.) Even the ceiling with its previously open attic access (left over from installing the new AC/heater) is all closed up with a new attic door and a coat of white paint.
Now you’re all caught up to where we’ve left off. I’m so excited for this new space! and doubly excited to move my home office from the kitchen island into an organized room.
For more Office Makeover posts, check out: desking hunting for under $300, bookcases under $300, inspirational rooms, room layout options, demo part 1 & demo part 2.


Hi Kellie! The bathroom is on a temporary pause while we finish permitting it through the city (we can’t close up any walls until we do so) but hopefully in the next week or so we’ll be working on it again.
See you over the 4th!
~Morgan
I cannot wait to see your house around the 4th! So amazing what you guys have done in the past year (including having a beautiful little girl!) I want to see pics of the bathroom! How’s it coming along?
Thanks everyone for your comments!
Janice, we agree that checking for load bearing walls is a tricky but extremely important item on the diy check list! We were privy to know that the wall we took down had been built at a later time (was not original) and was not load bearing, but Kevin checked nonetheless in the attic for the support beams and the location of all load bearing points. Original architectural plans will help with this too – don’t ever attempt to take down a wall without checking first. Framing in the new room didn’t help with additional support in this particular room but it did when we bashed 10′ holes into our kitchen walls to add sliding glass doors so that can be a good strategy for helping with tension on non-load bearing walls. Thanks for the kind comment! :)
~Morgan
Well they say the 2 most stressful things in life is moving/renovating your house and having a baby and you did both! Hats off! Can’t wait to see the finished result!
I hated living through renovations with bubba #1. Worse thing ever. So glad that’s over. Your house is turning into something amazing though!
And I got the tunic pattern from here. It’s the easiest pattern ever. :)
http://www.etsy.com/listing/61593756/little-pleated-tunic-tutorial-and
First, look at that sweet baby looking at me! Aren’t babies in black and white just the greatest art ever!?
Okay, seriously, I have a question about your demo. How did you know that wall could come down? I see more reno shows where load-bearing walls have been removed and now the house is going to eat the people alive. But you guys are the most professional DIYers ever so I’m sure you wouldn’t do something like that which brings me back to my question: how did you know it would be okay? When you put up the new framing was it designed to help reinforce other support?