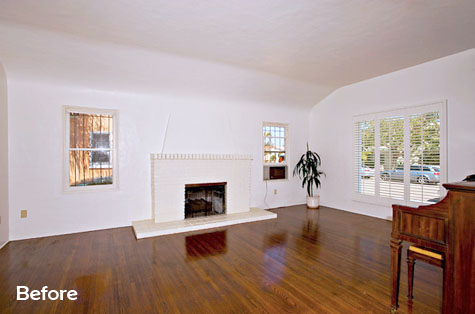
Remember when our living room fireplace looked something like this? the mantel was in need of a makeover.
One day I’d like to either knock down the brick to expose an original (fingers crossed) fireplace or fill in the brick with plaster to create a Spanish-style fireplace to match the house. Until then though, my first thought was to create a solid beam look by fitting a wooden box to the top of the current mantel. Kind of like the last image in this post.
So… I took my ideas and layout to my local hardware store that has a milling department and we created a mitered edge box that was just what I had in mind. But it came back looking like this.
And now, we’re finally back on track!

First up is staining. Since different types of wood will each have their own unique look with different types and colors of stain, I flipped the wood mantel over and tried out three different stains. The perfect shade? We chose the red mahogany in the center.

If our mantel had been cut from a softwood (uneven wood grain or blotchy patterns indicate that wood might be softwood), I would add a pre-stain wood conditioner to prevent an uneven covering (the conditioner seeps into the wood to create a consistent surface). Back when we were choosing materials originally, my carpenter friend recommended a vertical grain cut, this means that the growth rings run at 45 degrees and that the wood was quarter-sawn at the lumberyard – it increases the hardness by 20%, is a bit more expensive, but it looks beautiful.
Staining step-by-step:
1. Stir stain well.
2. With rubber gloves on, I used a brush (you can also use a sponge or old rag) to cover the bottom of the mantel. Applying stain to the bottom first means you don’t have to worry about dripping while the mantel is upside down! Or I should say the stain will still drip, but you’ll be covering it up when you stain the front – and cover it up quick, that dripping stain dries immediately. Next up is the top of the mantel and then finally the front, making sure to brush in one continuous movement in the same direction of the grain.
3. I then let the first coat of stain dry and reapplied several times.
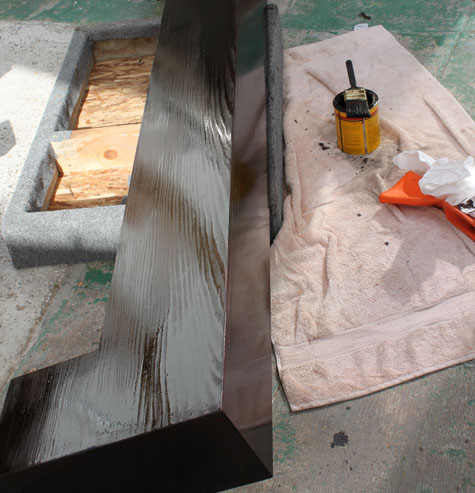
4. It’s a good idea to apply a top coat of polyurethane to seal in the mantel (and off gasses) and to protect it from water rings from future vases, wine glasses, etc.
5. The entire mantel stayed outside for 3-4 days to prevent any off gassing in the house.
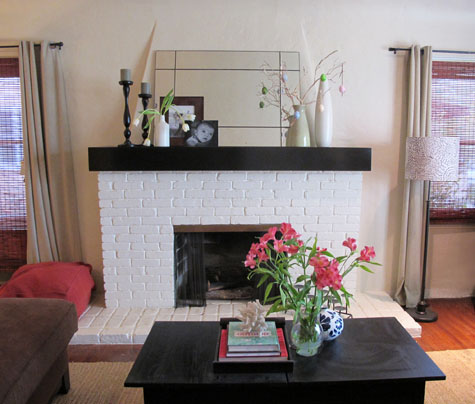
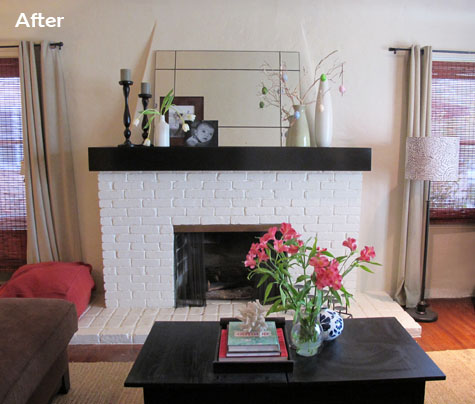
Here she is, all dressed for Easter! It makes such a difference in the room, I love it.
The extent of our Easter decorations this year is fresh flowers and beautiful hand blown eggs decorated by my Mom when she was my age.
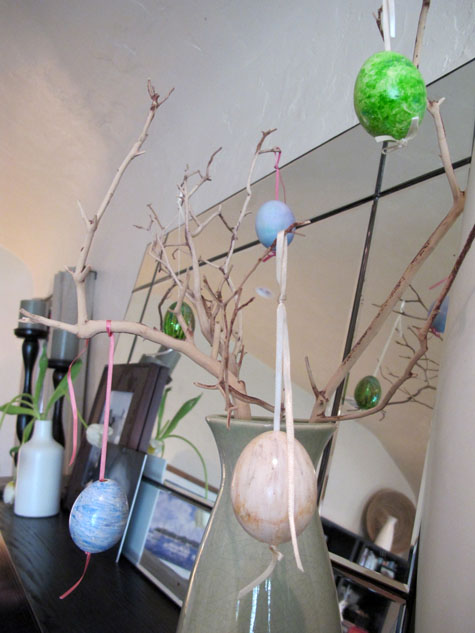
What a neat gift to pass down through the generations, right?
My dad recently sent us this picture that he took of Liv when she was just two weeks old, he had it mounted on photo board – I love her little expression and her little scrunched forehead. So alert when she was so young!
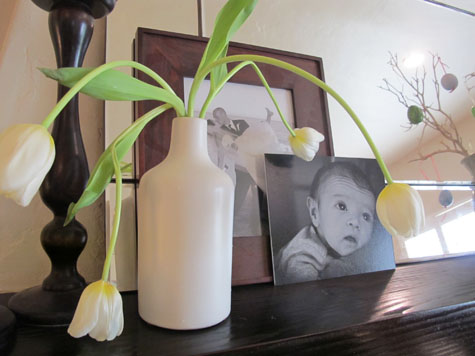
And now the living room has a brand new look!
More living room posts: mantel progress, updating a fireplace mantel part 1, bookshelf styling tips, decorating in layers: stage 1, inspiration boards, picking the perfect couch, custom lampshade, coffee table-to-ottoman, and the‘before’ photos.


hi
i love your mantel, and wanted to ask you how you came about the dimensions of the box mantel? and it the mantel 1 solid piece of wood? or is it glued together?
please let me know what which store in SD did you go to to do this at?
thanks!
anna
Hi Anna, Great questions. The mantel is actually milled together (part 1 and part 2) with glue and nails by a local lumber/hardware store. We gave them dimensions of our mantel as if a ‘box’ was going to snugly fit over all of the corners. We used Dixieline in Miramar for the milling and then I stained it myself.
One more questions,
from the picture, its piece that sits on top of the original mantel- is the inside of the mantel cut in to fit the bricks that are sticking out? i am trying to the the same thing, and guess i cant imagine how you did it.
thank you for all your help.
Hi Anna, the mantel was built out of 1/2″ boards so it is hollow on the inside. I’ll send you a picture via email :).
hi
GREAT MANTEL!!
i saw your post today and i have something similar to your fireplace (mine fireplace is huge and takes up most of my living room- and its ugly brick), where there is a brick type of mantel all the way across and i wanted to make a mantel such as your. you posted in a previous place, that it was made for $60 by a local guy in Dixieline. How did you install this? Does this sit ontop of the previous mantel and just glued or nailed in?
Anna
Also, i live in Los Angeles, can you please tell me which Dixieline you went to in San Diego. Thank you for all your help.
Hi Anna! We set the mantel on top and over the existing brick it was VERY snug so no adhering needed, though you could use liquid nails if you wanted to (or even something stronger like anchors).
I love the mantle. Do you have a post with details on how you mounted it over the brick?
Hi Liz, the mantle was so heavy and fit so snugly that we actually just rested it on top of the existing brick (fits like a sweater – super tight).
What a great use of stain, Morgan. That Minwax Red Mahogany really stands out nicely from the white brick. Fantastic job. -Bruce
Love the mantel!! Just wondering how you attached it to the fireplace!
Thanks!
Beautiful work Morgan. It amazes me to see your creative skills in real form. So many have the ideas but fail to materialize them. Mother would love it.
Thanks so much, Nora! Such a compliment coming from you :).
~Morgan
love it! It’s beautiful.
It looks great!
What cool eggs your mom made…
Hi Morgan, Love the new look wood mantel. Shame most new homes do not have mantels or fire places anymore in Australia. I miss them!
Glad the wood was correct size this time. My hubby is an excellent handy man on most things and his motto is Measure twice and cut Once!
Have a wonderful Easter family time,
Hugs to Liv,
xoSue
That looks so good! I love the warmth of the wood tones…great job!
WOW…quite impressive. It really gives the FP some presence.
It’s amazing how a simple thing can change the appearance of an entire room. It looks fantastic!
Looks great…really makes that fireplace a focal point and a great spot to display new baby photos!
Thanks, Mer!
~Morgan
it looks AMAZING!!
I love it! It really gives the fireplace a completely different look.
-FringeGirl
Thanks, Domestic Fringe! It gives a new ‘centerpiece’ to the room.
~Morgan